
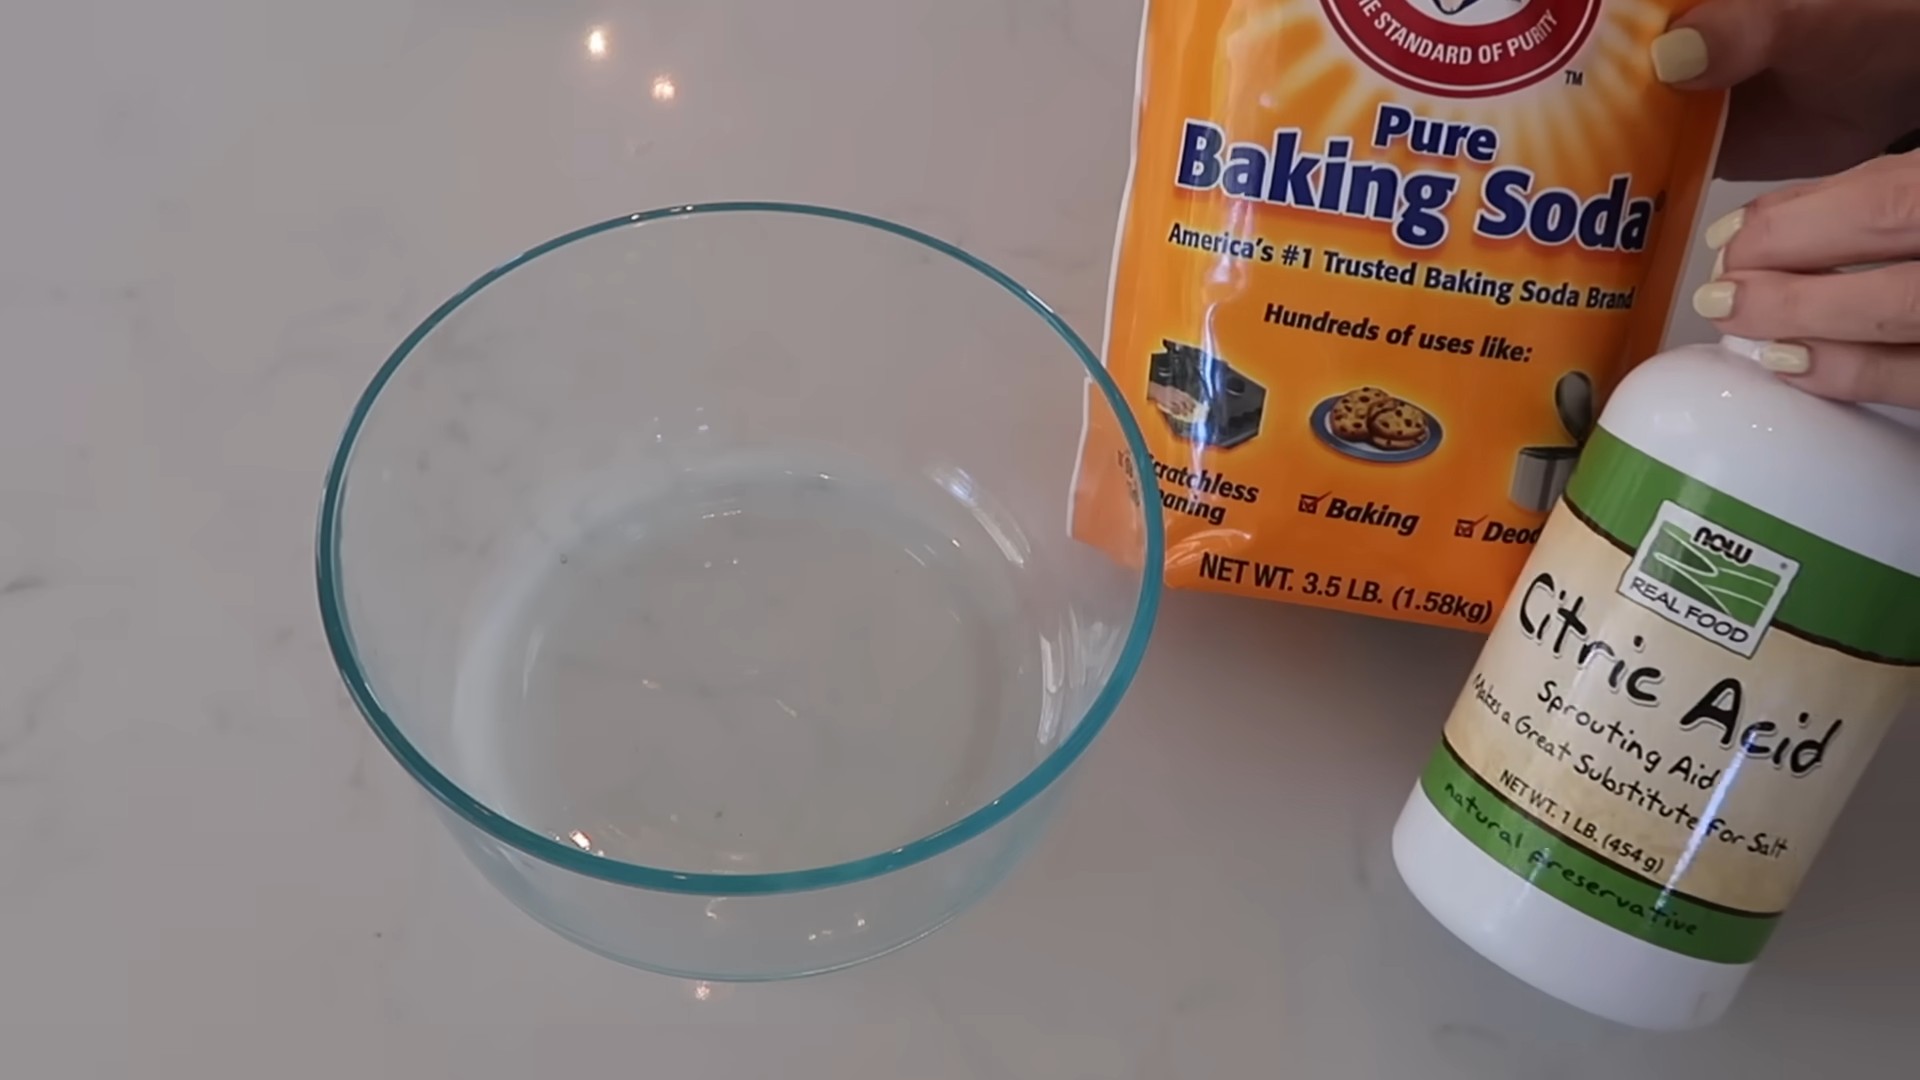
Citric Acid Cleaning Uses: Unlocking the Power of Nature’s Cleaner!
Are you tired of harsh chemicals and overpowering smells when you clean your home? I know I was! That’s why I’m so excited to share the amazing world of citric acid cleaning uses with you. For centuries, cultures around the globe have recognized the potent cleaning properties of citrus fruits. Think of your grandmother squeezing lemon juice to brighten her whites or remove stubborn stains – that’s the magic of citric acid at work!
But why should you ditch the store-bought cleaners and embrace this natural alternative? Well, for starters, it’s incredibly effective at tackling everything from hard water stains and soap scum to rust and mineral deposits. Plus, it’s biodegradable, non-toxic, and much gentler on your skin and the environment. In this article, I’m going to reveal some of my favorite DIY tricks and hacks for using citric acid to clean your entire home, from the kitchen to the bathroom and beyond. Get ready to discover a safer, more sustainable, and surprisingly powerful way to keep your home sparkling clean!
Growing Chili Peppers on Your Balcony: A Spicy DIY Adventure!
Hey there, fellow balcony gardeners! Ready to add some serious heat to your urban oasis? Growing chili peppers on your balcony is surprisingly easy and incredibly rewarding. Imagine fresh, fiery peppers just steps from your kitchen – perfect for spicing up your meals! I’m going to walk you through everything you need to know, from choosing the right varieties to harvesting your bounty. Let’s get started!
Choosing the Right Chili Pepper Varieties
Not all chili peppers are created equal, especially when it comes to balcony gardening. You’ll want to consider size, sunlight requirements, and, of course, your preferred level of spiciness. Here are some of my favorite varieties that thrive in containers:
* Thai Chili Peppers: These compact plants produce tons of small, fiery peppers. They’re perfect for adding a kick to Asian-inspired dishes.
* Jalapeño Peppers: A classic choice! Jalapeños are relatively easy to grow and offer a moderate level of heat.
* Serrano Peppers: Similar to jalapeños but with a bit more punch. These are great for salsas and hot sauces.
* Habanero Peppers: If you’re a heat seeker, habaneros are a must-try. Be warned, they’re seriously spicy!
* Bell Peppers: Okay, okay, bell peppers aren’t technically chili peppers, but they’re still a great addition to any balcony garden and provide a sweet contrast to the spicy varieties.
* Poblano Peppers: These mild peppers are perfect for stuffing or roasting. They have a rich, smoky flavor.
* Cayenne Peppers: These long, thin peppers are ideal for drying and making your own chili powder.
When choosing your varieties, think about what you like to cook and how much space you have available. Remember, some varieties grow larger than others, so plan accordingly.
Gathering Your Supplies
Before you start planting, you’ll need to gather a few essential supplies. Here’s a checklist:
* Containers: Choose pots that are at least 12 inches in diameter. Larger pots are better, as they provide more room for the roots to grow. Make sure your pots have drainage holes!
* Potting Mix: Use a high-quality potting mix that’s well-draining. Avoid using garden soil, as it can become compacted in containers.
* Chili Pepper Seeds or Seedlings: You can start your chili peppers from seed or purchase seedlings from a local nursery. Seedlings are a faster option, but starting from seed is more economical.
* Fertilizer: Chili peppers are heavy feeders, so you’ll need to fertilize them regularly. Use a balanced fertilizer or one specifically formulated for tomatoes and peppers.
* Watering Can or Hose: You’ll need a way to water your plants regularly.
* Gardening Gloves: Protect your hands from the soil and any potential irritants.
* Optional: Plant Markers: Label your plants so you know which variety is which.
* Optional: Stakes or Cages: Some chili pepper varieties may need support as they grow.
Planting Your Chili Peppers
Now for the fun part – planting! Whether you’re starting from seed or using seedlings, the process is relatively straightforward.
Starting from Seed (Optional)
1. Start Seeds Indoors (6-8 weeks before the last frost): Fill seed trays or small pots with seed-starting mix. Moisten the mix thoroughly.
2. Sow Seeds: Plant the seeds about ¼ inch deep. Gently cover them with soil.
3. Provide Warmth and Light: Place the seed trays in a warm location (around 70-80°F) and provide plenty of light. A heat mat can help speed up germination. You can use a grow light or place them near a sunny window.
4. Keep Soil Moist: Water regularly to keep the soil moist but not soggy.
5. Transplant Seedlings: Once the seedlings have developed a few sets of true leaves, they’re ready to be transplanted into larger pots.
Planting Seedlings
1. Prepare Your Pots: Fill your chosen containers with potting mix, leaving a few inches of space at the top.
2. Remove Seedlings from Their Containers: Gently squeeze the sides of the container to loosen the root ball. Carefully remove the seedling, being careful not to damage the roots.
3. Plant the Seedlings: Dig a hole in the potting mix that’s large enough to accommodate the root ball. Place the seedling in the hole and gently backfill with soil.
4. Water Thoroughly: Water the newly planted seedlings thoroughly to help them settle in.
5. Add Plant Markers: Label each plant with its variety.
Caring for Your Chili Pepper Plants
Once your chili peppers are planted, it’s important to provide them with the care they need to thrive.
* Sunlight: Chili peppers need at least 6-8 hours of sunlight per day. Choose a sunny spot on your balcony. If your balcony doesn’t get enough sunlight, you may need to supplement with grow lights.
* Watering: Water your chili pepper plants regularly, especially during hot weather. The soil should be consistently moist but not waterlogged. Check the soil moisture by sticking your finger into the soil. If the top inch feels dry, it’s time to water.
* Fertilizing: Fertilize your chili pepper plants every 2-3 weeks with a balanced fertilizer or one specifically formulated for tomatoes and peppers. Follow the instructions on the fertilizer package.
* Pruning: Pruning isn’t strictly necessary, but it can help to encourage bushier growth and more fruit production. You can pinch off the tips of the branches to encourage side growth.
* Pest Control: Keep an eye out for pests such as aphids, spider mites, and whiteflies. If you notice any pests, you can try spraying them with insecticidal soap or neem oil.
* Support: Some chili pepper varieties may need support as they grow, especially when they’re loaded with fruit. You can use stakes or cages to provide support.
Dealing with Common Problems
Even with the best care, you may encounter some problems while growing chili peppers. Here are a few common issues and how to address them:
* Blossom End Rot: This is a condition where the bottom of the fruit develops a dark, sunken spot. It’s usually caused by a calcium deficiency. To prevent blossom end rot, make sure your soil is well-draining and that you’re providing your plants with enough calcium. You can add calcium to the soil by using bone meal or eggshells.
* Leaf Curl: Leaf curl can be caused by a variety of factors, including pests, diseases, and environmental stress. Check your plants for pests and treat them accordingly. Make sure your plants are getting enough water and sunlight.
* Lack of Fruit: If your chili pepper plants are producing flowers but not fruit, it could be due to a lack of pollination. You can hand-pollinate the flowers by gently shaking the plant or using a small paintbrush to transfer pollen from one flower to another.
* Sunscald: This occurs when the fruit is exposed to too much direct sunlight, causing it to develop a white or yellow patch. To prevent sunscald, provide your plants with some shade during the hottest part of the day.
Harvesting Your Chili Peppers
The moment you’ve been waiting for! Harvesting your chili peppers is the most rewarding part of the process.
* When to Harvest: The best time to harvest chili peppers depends on the variety and your personal preference. Generally, you’ll want to harvest them when they’ve reached their mature color and size. For example, jalapeños are typically harvested when they’re dark green and about 2-3 inches long. Habaneros are harvested when they’re orange or red.
* How to Harvest: Use pruning shears or scissors to cut the peppers from the plant. Be careful not to damage the plant.
* Handling Hot Peppers: Wear gloves when handling hot peppers, especially habaneros and other super-hot varieties. The oils in the peppers can irritate your skin.
* Storing Your Harvest: You can store fresh chili peppers in the refrigerator for up to a week. You can also dry them, freeze them, or pickle them.
Enjoying Your Spicy Bounty
Now that you’ve harvested your chili peppers, it’s time to enjoy them! There are endless ways to use your homegrown peppers. Here are a few ideas:
* Add them to your favorite dishes: Chili peppers can add a kick to soups, stews, stir-fries, and more.
* Make your own hot sauce: Homemade hot sauce is a great way to use up a large harvest of chili peppers.
* Dry them and make chili powder: Dried chili peppers can be ground into chili powder
Conclusion
So, there you have it! Unlocking the power of citric acid for cleaning is a game-changer for any home. We’ve explored how this readily available, natural compound can tackle everything from stubborn hard water stains to grimy appliances, all while being gentler on the environment and your health than many harsh chemical cleaners. It’s truly a win-win!
Why is this DIY trick a must-try? Because it’s effective, affordable, and eco-conscious. You’re not just cleaning; you’re making a conscious choice to reduce your reliance on potentially harmful chemicals. The versatility of citric acid is astounding. Think about the money you’ll save by replacing multiple specialized cleaners with a single, powerful solution. Plus, the satisfaction of knowing you’re creating a cleaner, healthier home environment for yourself and your loved ones is priceless.
But don’t stop there! Experiment with different concentrations to find what works best for your specific needs. For instance, a stronger solution might be ideal for tackling heavily scaled kettles, while a milder dilution is perfect for everyday surface cleaning. Consider adding a few drops of your favorite essential oil, like lemon or lavender, to your citric acid solution for an extra boost of freshness and aromatherapy benefits. You can also create a paste by mixing citric acid with baking soda for a powerful scrubbing agent that’s perfect for grout and other tough-to-clean areas. Remember to always test your solution on an inconspicuous area first, especially when cleaning delicate surfaces.
We’ve covered a lot of ground, from descaling appliances to brightening laundry, but the possibilities are truly endless. The key is to embrace the power of experimentation and discover new and innovative ways to incorporate citric acid into your cleaning routine.
Now, it’s your turn! We wholeheartedly encourage you to give these DIY citric acid cleaning uses a try. We’re confident that you’ll be amazed by the results. Don’t be afraid to get creative and adapt these methods to suit your specific needs and preferences.
Most importantly, we want to hear about your experiences! Share your tips, tricks, and success stories in the comments below. Let us know how you’re using citric acid to create a cleaner, healthier home. Your insights could inspire others to embrace this natural cleaning alternative and join the citric acid revolution! Let’s build a community of eco-conscious cleaners, one sparkling surface at a time. We are eager to hear how you are using **citric acid cleaning uses** in your home.
Frequently Asked Questions (FAQ)
What exactly is citric acid, and is it safe to use around my family and pets?
Citric acid is a naturally occurring organic acid found in citrus fruits like lemons, limes, and oranges. It’s widely used in the food industry as a preservative and flavoring agent. When used for cleaning, it’s generally considered safe for families and pets, especially compared to harsh chemical cleaners. However, it’s still important to exercise caution. Keep citric acid solutions out of reach of children and pets, and avoid direct contact with eyes and skin. If contact occurs, rinse thoroughly with water. While citric acid is non-toxic, ingestion of concentrated solutions can cause stomach upset. Always store citric acid in a clearly labeled container to prevent accidental consumption.
Where can I purchase citric acid for cleaning purposes?
Citric acid is readily available in several places. You can find it in the baking aisle of most grocery stores, often sold as a food preservative or for canning. Health food stores and online retailers are also excellent sources. When purchasing citric acid for cleaning, make sure you’re buying a food-grade or cleaning-grade product. Avoid industrial-grade citric acid, as it may contain impurities. The price of citric acid can vary depending on the quantity and brand, but it’s generally quite affordable. Buying in bulk can often save you money in the long run.
What types of surfaces should I avoid cleaning with citric acid?
While citric acid is generally safe for most surfaces, there are a few exceptions. Avoid using it on natural stone surfaces like marble, granite, and limestone, as it can etch or damage them. It’s also best to avoid using citric acid on aluminum, as it can cause corrosion. Always test your citric acid solution on an inconspicuous area before applying it to the entire surface, especially if you’re unsure about its compatibility. If you notice any discoloration or damage, discontinue use immediately. For delicate surfaces, start with a very diluted solution and gradually increase the concentration as needed.
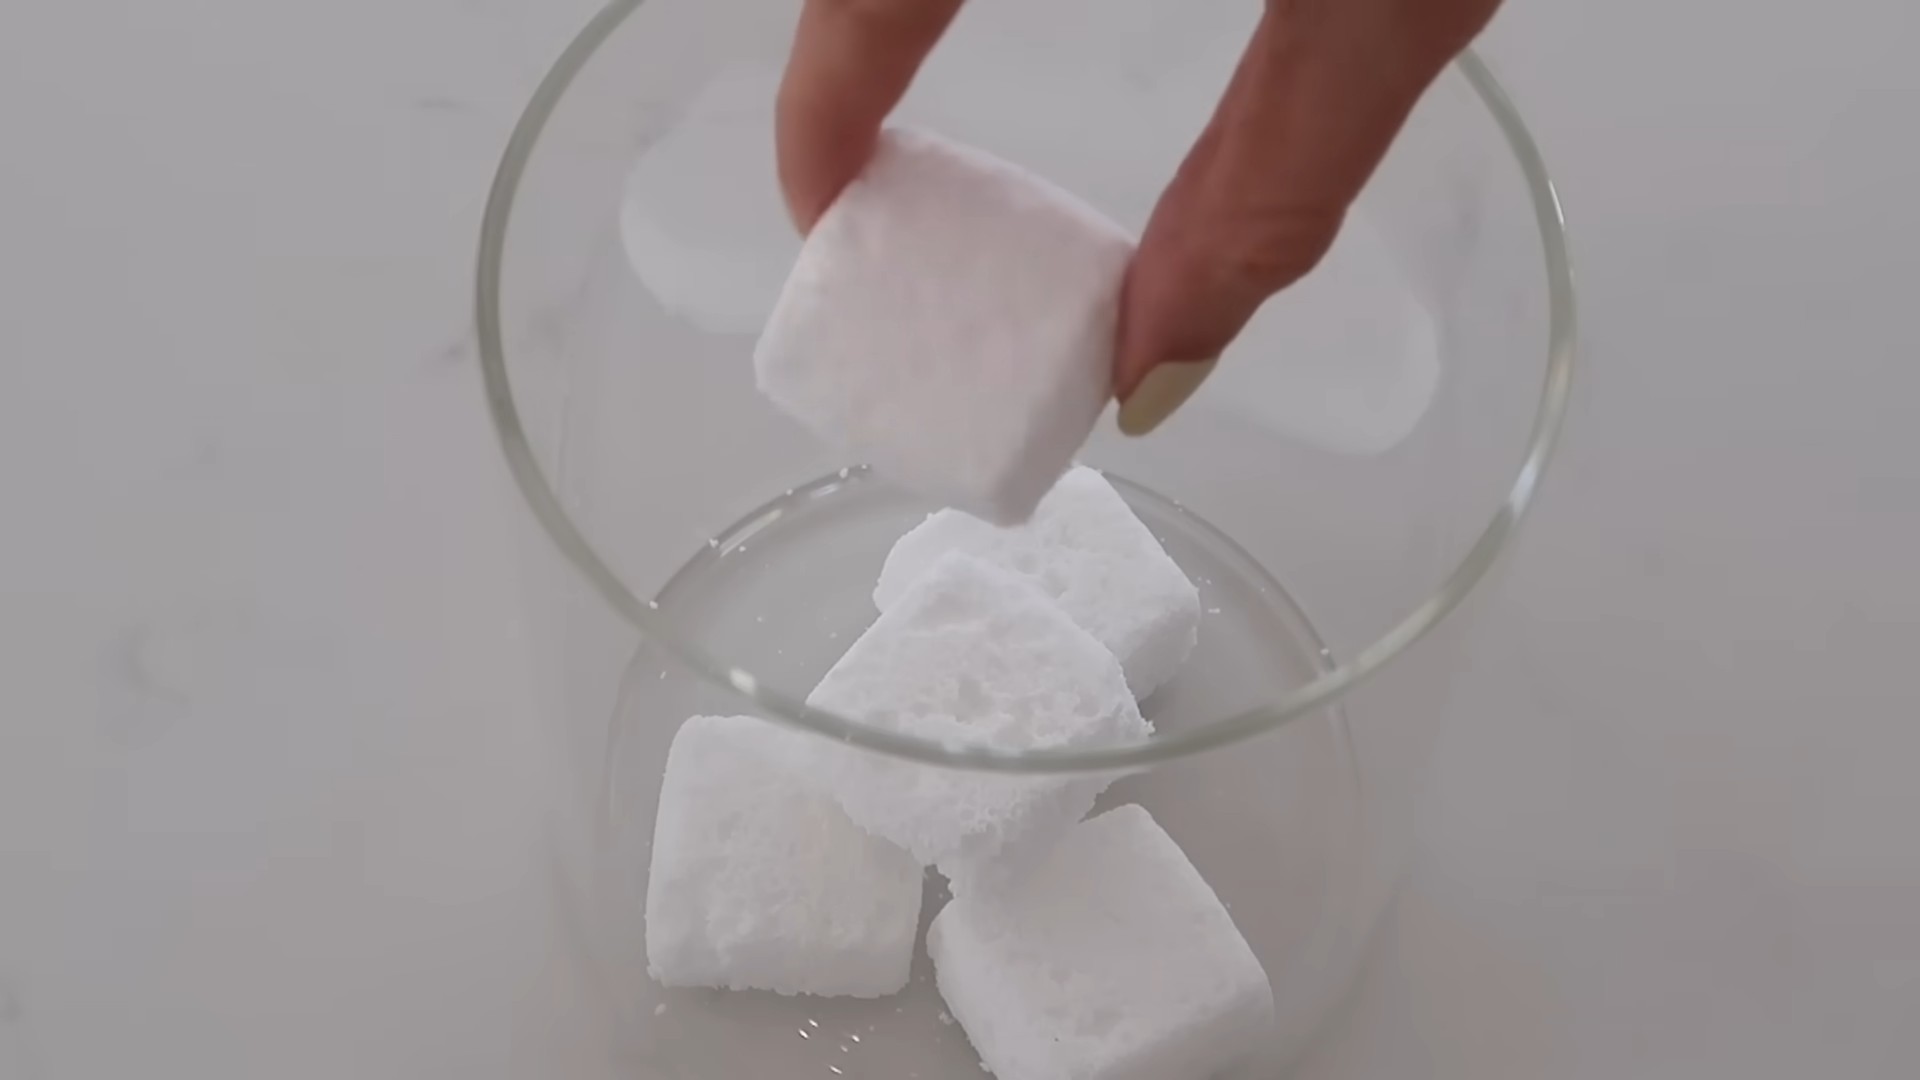
How do I make a basic citric acid cleaning solution?
Making a basic citric acid cleaning solution is incredibly simple. The most common ratio is 1-2 tablespoons of citric acid powder per cup of water. Dissolve the citric acid in warm water until it’s completely dissolved. You can then pour the solution into a spray bottle for easy application. For tougher cleaning jobs, you can increase the concentration of citric acid. For lighter cleaning, you can dilute the solution further. Remember to always label your spray bottle clearly to avoid confusion.
Can I use citric acid to clean my coffee maker or kettle?
Yes, citric acid is an excellent descaler for coffee makers and kettles. To clean your coffee maker, fill the water reservoir with a solution of 1-2 tablespoons of citric acid per cup of water. Run the coffee maker through a full brewing cycle, then run it again with plain water to rinse away any residual citric acid. For kettles, fill the kettle with the citric acid solution and bring it to a boil. Let it sit for 30 minutes, then rinse thoroughly with water. This will effectively remove mineral buildup and improve the performance of your appliances.
How can I use citric acid to remove hard water stains from my bathroom?
Citric acid is a powerful weapon against hard water stains in the bathroom. To remove hard water stains from showerheads, faucets, and tiles, spray the affected areas with a citric acid solution (1-2 tablespoons per cup of water). Let it sit for 15-30 minutes, then scrub with a non-abrasive sponge or brush. Rinse thoroughly with water. For stubborn stains, you can create a paste by mixing citric acid with a small amount of water. Apply the paste to the stain, let it sit for a few hours, then scrub and rinse.
Is citric acid effective for cleaning laundry?
Yes, citric acid can be a great addition to your laundry routine. It can help brighten whites, remove stains, and soften fabrics. Add 1/2 cup of citric acid powder to your washing machine along with your regular detergent. For stain removal, you can pre-soak stained items in a citric acid solution before washing. Citric acid is also a natural fabric softener and can help reduce static cling. It’s a great alternative to chemical-based fabric softeners.
How long does a citric acid cleaning solution last?
A citric acid cleaning solution can last for several weeks or even months if stored properly. To prolong its shelf life, store it in a cool, dark place in a tightly sealed container. Avoid exposing the solution to direct sunlight or extreme temperatures. If you notice any discoloration or cloudiness, it’s best to discard the solution and make a fresh batch.
Can I mix citric acid with other cleaning agents?
It’s generally not recommended to mix citric acid with other cleaning agents, especially those containing bleach or ammonia. Mixing these chemicals can create harmful fumes. Citric acid is effective on its own for most cleaning tasks. If you’re unsure about mixing citric acid with another cleaning agent, it’s best to err on the side of caution and avoid doing so.
What are some creative ways to use citric acid that I might not have thought of?
Beyond the typical cleaning applications, citric acid can be used for a variety of other purposes. Try using it to clean your dishwasher by running an empty cycle with a cup of citric acid powder. It can also be used to remove rust stains from metal surfaces. You can even use it to make homemade bath bombs or shower fizzies. The possibilities are endless! Don’t be afraid to experiment and discover new and innovative ways to incorporate citric acid into your daily life.
Leave a Comment