
Planting Cauliflower for Beginners can seem daunting, I know! But trust me, with a few simple tricks and a little know-how, you can be harvesting your own delicious, homegrown cauliflower in no time. Forget those bland, overpriced heads at the grocery store – imagine the satisfaction of serving up a vibrant, flavorful cauliflower you nurtured from seedling to table!
Cauliflower, a member of the Brassica family, has a rich history, dating back to ancient times. Originating in the Mediterranean, it was a prized vegetable in Roman gardens and has since spread across the globe, becoming a staple in countless cuisines. For centuries, gardeners have sought ways to optimize their cauliflower crops, passing down tips and techniques through generations.
Why do you need these DIY tricks? Well, let’s face it, cauliflower can be a bit finicky. It requires specific conditions to thrive, and without the right knowledge, you might end up with small, loose heads or even no heads at all! But don’t worry, I’m here to guide you through the process. This article is packed with easy-to-follow instructions and clever hacks that will help you master planting cauliflower for beginners and achieve a bountiful harvest. From choosing the right variety to protecting your plants from pests, we’ll cover everything you need to know to become a cauliflower-growing pro. So, grab your gardening gloves, and let’s get started!
Planting Cauliflower for Beginners: A Step-by-Step Guide
Okay, so you want to grow cauliflower? Awesome! It might seem a little intimidating at first, but trust me, with a little patience and the right know-how, you can totally rock this. I’m going to walk you through everything you need to know, from choosing the right variety to harvesting your beautiful, homegrown cauliflower. Let’s get started!
Choosing the Right Cauliflower Variety
Before you even think about digging in the dirt, you need to pick the right cauliflower variety for your climate and growing season. There are tons of options out there, and each one has its own quirks. Here’s a quick rundown:
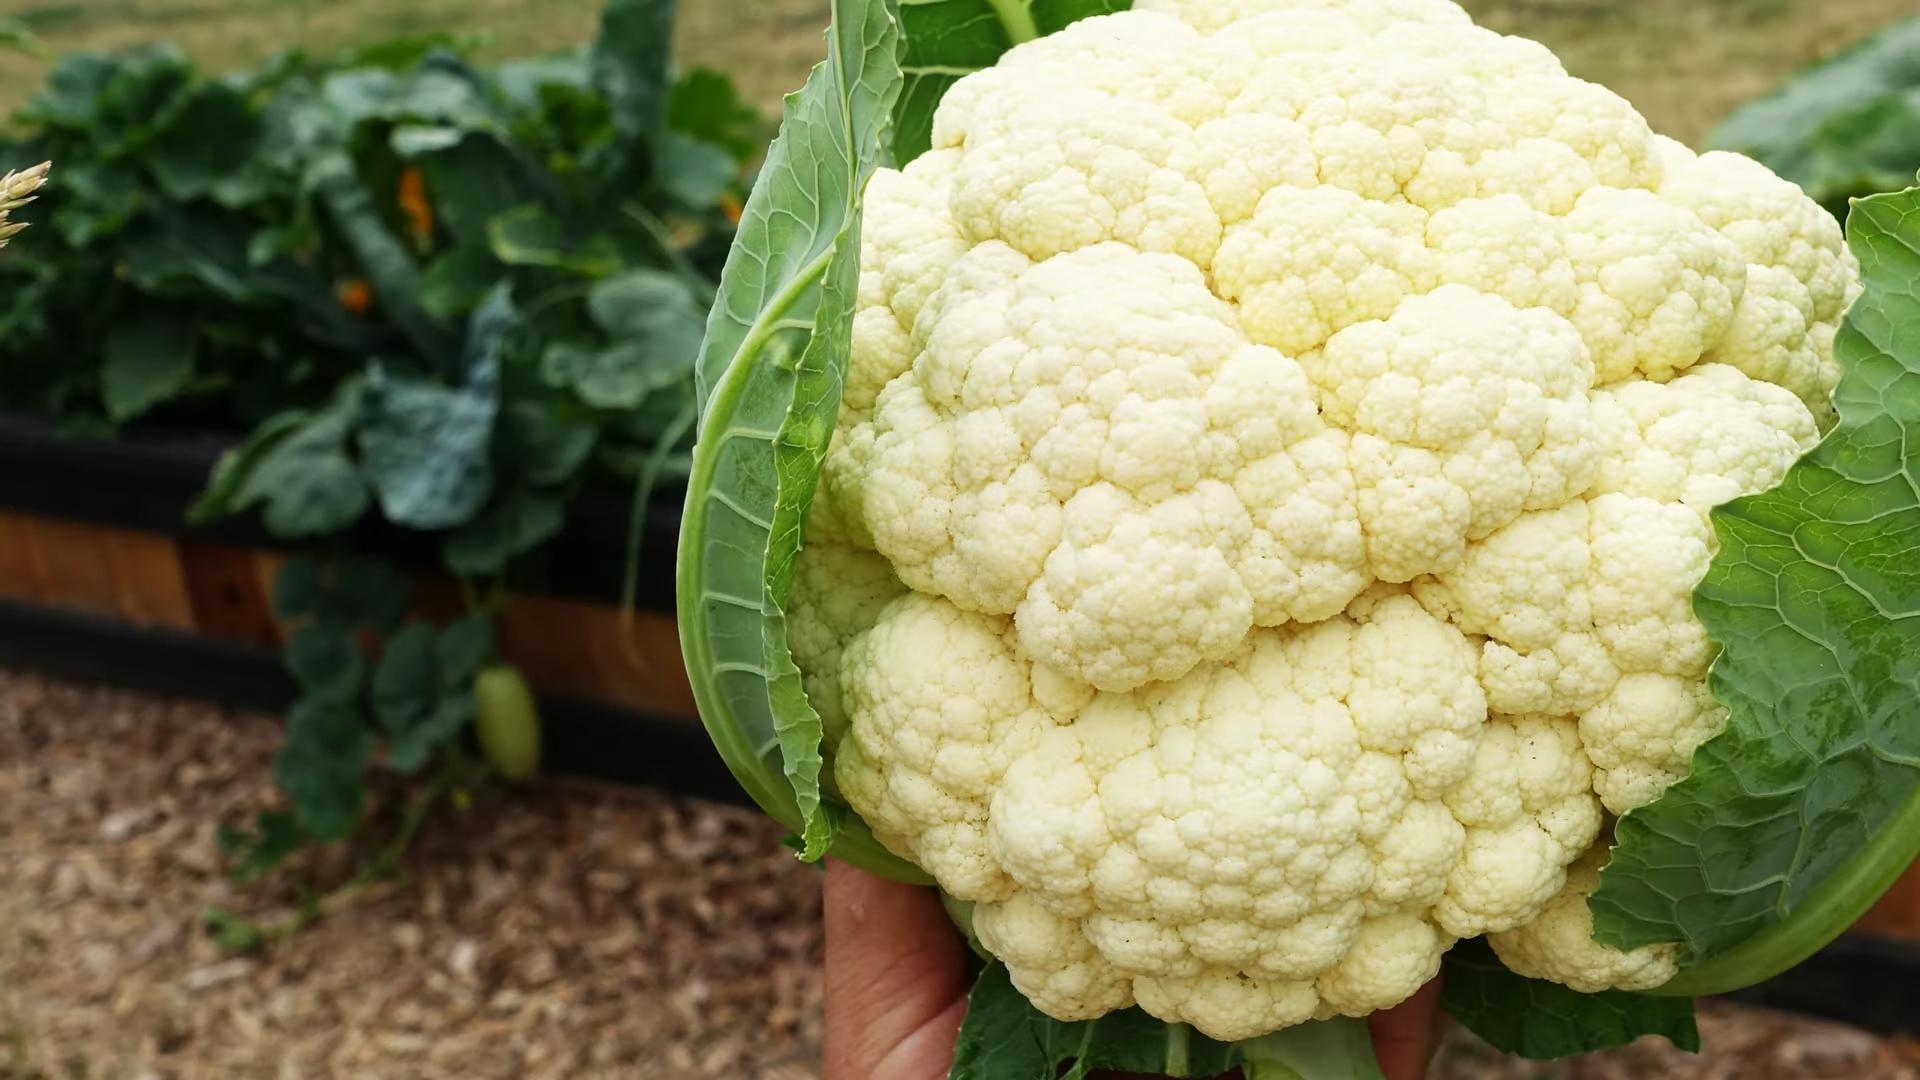
* White Cauliflower: These are the classics! Think ‘Snowball’ or ‘Early White Vienna’. They’re reliable and produce those familiar creamy white heads.
* Colored Cauliflower: Want to add some pizzazz to your garden (and your dinner plate)? Go for purple (‘Graffiti’), orange (‘Cheddar’), or green (‘Romanesco’) varieties. They’re just as tasty as white cauliflower, but way more fun!
* Early vs. Late Varieties: Pay attention to the “days to maturity” listed on the seed packet or plant label. Early varieties mature faster, making them ideal for shorter growing seasons. Late varieties take longer but often produce larger heads.
My tip: If you’re a beginner, I recommend starting with a reliable white variety like ‘Snowball’. It’s a forgiving choice and will give you a good sense of how cauliflower grows.
Preparing Your Garden Bed
Cauliflower is a bit of a diva when it comes to soil. It needs rich, well-drained soil with a pH between 6.0 and 7.0. Here’s how to get your garden bed ready:
* Sunlight: Cauliflower needs at least 6 hours of sunlight per day. Choose a spot in your garden that gets plenty of sunshine.
* Soil Testing: If you’re not sure about your soil’s pH, get a soil testing kit from your local garden center. It’s a simple way to ensure your cauliflower has the right growing conditions.
* Amendments: Amend your soil with plenty of compost or well-rotted manure. This will improve drainage, add nutrients, and create the perfect environment for your cauliflower to thrive. I usually add a generous layer, about 2-3 inches, and work it into the top 6-8 inches of soil.
* Drainage: Cauliflower hates soggy soil. If your soil is heavy clay, consider adding some sand or perlite to improve drainage. Raised beds are also a great option.
Important Note: Don’t skip the soil preparation! This is crucial for healthy cauliflower growth.
Starting Cauliflower Seeds (Optional)
You can either start cauliflower seeds indoors or buy transplants from a nursery. Starting seeds indoors gives you a head start, especially if you have a short growing season.
* When to Start: Start seeds about 4-6 weeks before the last expected frost.
* Seed Starting Mix: Use a seed starting mix, not regular potting soil. Seed starting mix is lighter and provides better drainage.
* Planting Depth: Sow seeds about ¼ inch deep in small pots or seed trays.
* Watering: Keep the soil consistently moist, but not soggy.
* Light: Provide plenty of light. A sunny windowsill might work, but a grow light is even better.
* Hardening Off: Before transplanting your seedlings outdoors, you need to “harden them off.” This means gradually exposing them to outdoor conditions over a period of about a week. Start by placing them outside for a few hours each day, gradually increasing the amount of time they spend outdoors.
Pro Tip: Use a heat mat to speed up germination. Cauliflower seeds germinate best at temperatures between 70-75°F.
Transplanting Cauliflower Seedlings
Whether you started your own seeds or bought transplants, here’s how to get them into the ground:
1. Timing: Transplant your seedlings outdoors after the last expected frost, when the soil has warmed up to at least 60°F.
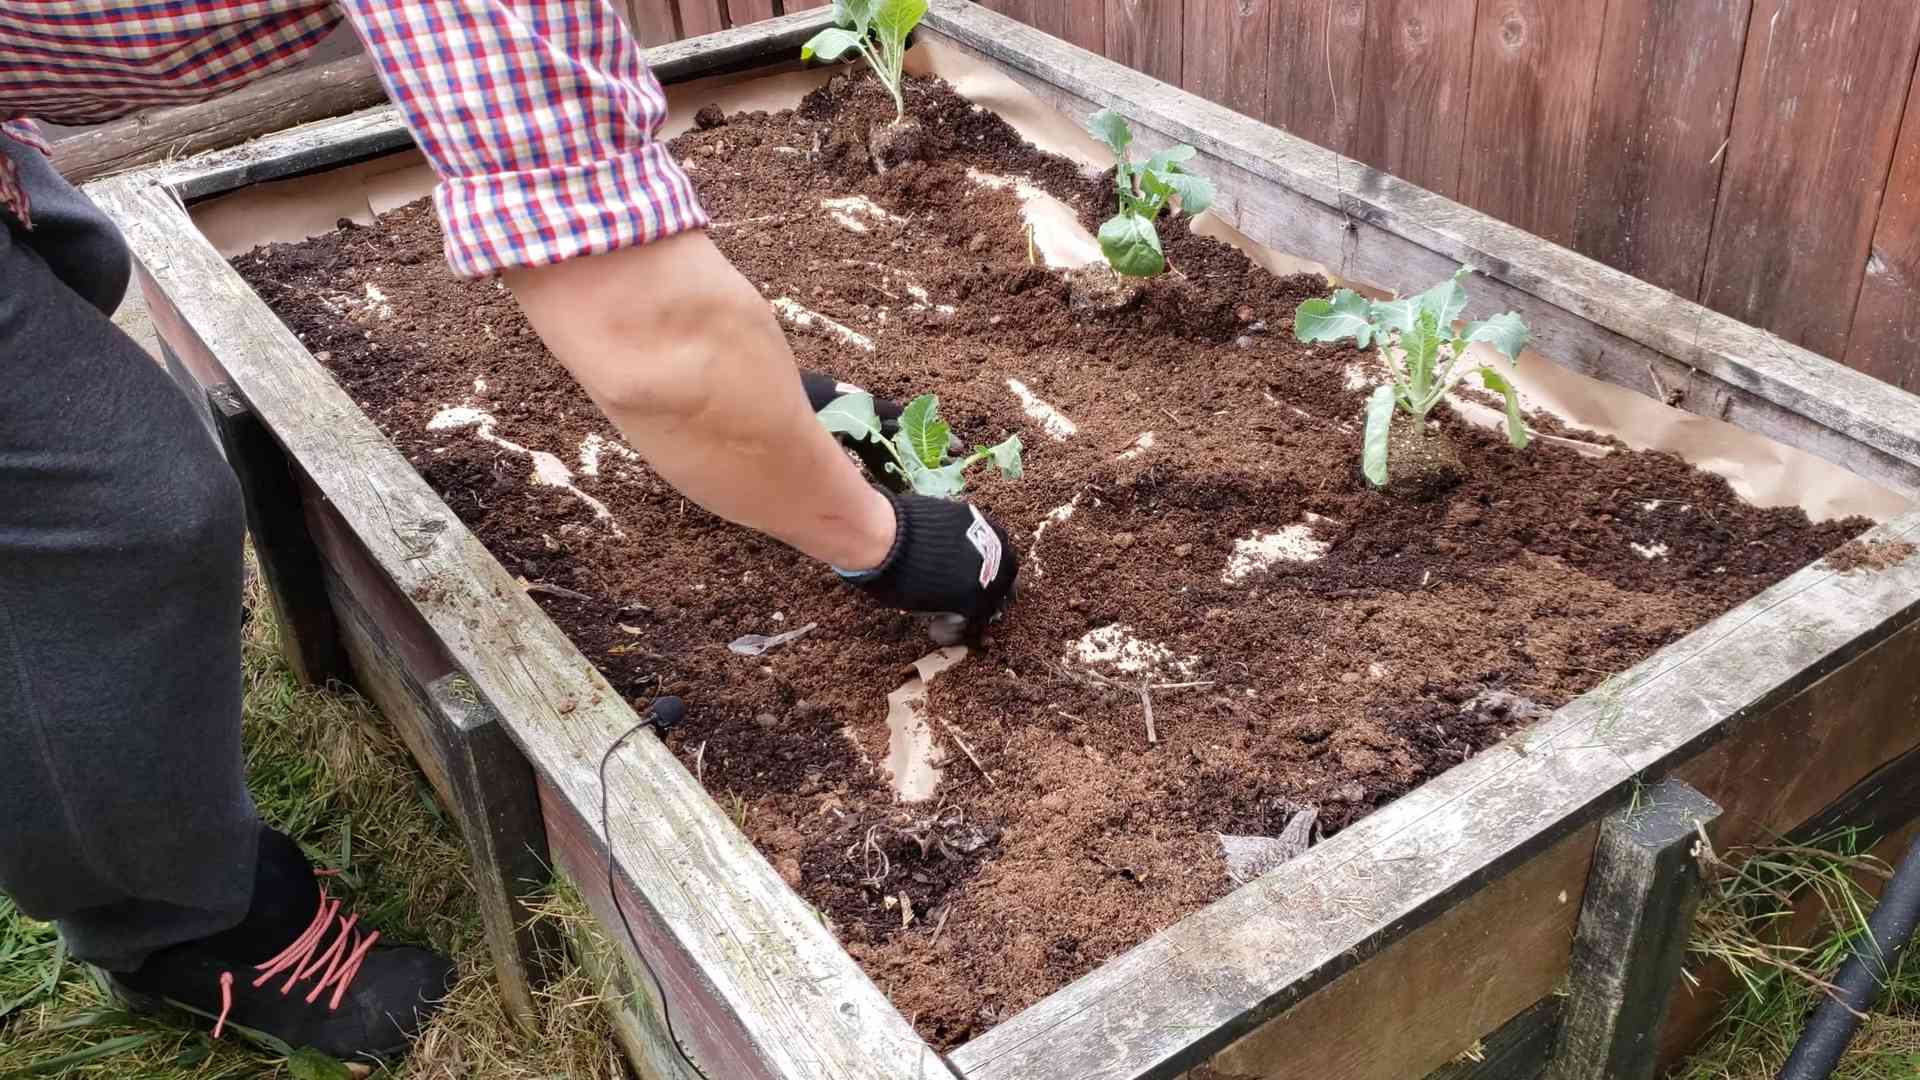
2. Spacing: Space plants 18-24 inches apart in rows that are 24-36 inches apart. This gives them enough room to grow and prevents overcrowding.
3. Planting Depth: Dig a hole that’s slightly larger than the root ball of the seedling. Gently remove the seedling from its pot and place it in the hole. Make sure the top of the root ball is level with the soil surface.
4. Watering: Water thoroughly after planting. This helps settle the soil around the roots.
5. Mulching: Apply a layer of mulch around the plants. Mulch helps retain moisture, suppress weeds, and regulate soil temperature. I like to use straw or shredded leaves.
Important: Handle the seedlings gently! Their roots are delicate.
Caring for Your Cauliflower Plants
Once your cauliflower plants are in the ground, it’s time to give them some TLC.
* Watering: Cauliflower needs consistent moisture, especially during head formation. Water deeply whenever the top inch of soil feels dry. Avoid overhead watering, as this can lead to fungal diseases.
* Fertilizing: Feed your cauliflower plants every 2-3 weeks with a balanced fertilizer. Look for a fertilizer that’s high in nitrogen, phosphorus, and potassium. Follow the instructions on the fertilizer label.
* Weeding: Keep the area around your cauliflower plants free of weeds. Weeds compete with cauliflower for nutrients and water.
* Pest Control: Cauliflower is susceptible to several pests, including cabbage worms, aphids, and flea beetles. Inspect your plants regularly for signs of pests. You can use insecticidal soap or neem oil to control these pests.
* Blanching (for White Varieties): When the cauliflower head is about 2-3 inches in diameter, you’ll need to blanch it to keep it white. This involves tying the outer leaves together over the head to protect it from sunlight. This prevents the head from turning yellow or green. Use twine or rubber bands to tie the leaves together loosely.
My Secret Weapon: I like to use companion planting to help protect my cauliflower from pests. Planting herbs like rosemary and thyme nearby can help deter cabbage moths.
Harvesting Your Cauliflower
Harvesting cauliflower at the right time is crucial for getting the best flavor and texture.
1. Timing: Harvest cauliflower when the head is firm, compact, and about 6-8 inches in diameter. The exact size will depend on the variety.
2. Cutting: Use a sharp knife to cut the head from the plant, leaving a few leaves attached to protect the head.
3. Storage: Store cauliflower in the refrigerator for up to a week.
Don’t Wait Too Long: If you wait too long to harvest, the head will start to separate and become grainy.
Troubleshooting Common Problems
Even with the best care, you might encounter some problems along the way. Here are a few common issues and how to deal with them:
* Buttoning: This is when the cauliflower head forms prematurely and stays small. It’s often caused by stress, such as lack of water or nutrients. Make sure your plants are getting enough water and fertilizer.
* Yellowing Heads: This is usually caused by too much sunlight. Blanching the heads will prevent them from turning yellow.
* Clubroot: This is a fungal disease that causes the roots to swell and become distorted. It’s more common in acidic soils. Improve drainage and raise the soil pH by adding lime.
* Pest Infestations: As mentioned earlier, cauliflower is susceptible to several pests. Inspect your plants regularly and take action as soon as you notice any problems.
Remember: Don’t be afraid to experiment! Gardening is all about learning and adapting. The more you grow, the better you’ll become.
Enjoying Your Homegrown Cauliflower
Congratulations! You’ve successfully grown your own cauliflower. Now it’s time to enjoy the fruits (or rather, vegetables) of your labor. Cauliflower is incredibly versatile and can be used in a variety of dishes.
* Roasted Cauliflower: Toss cauliflower florets with olive oil, salt, and pepper, and roast them in the oven until tender and slightly browned.
* Cauliflower Mash: Steam or boil cauliflower until tender, then mash it with butter, milk, and seasonings. It’s a healthy and delicious alternative to mashed potatoes.
* Cauliflower Rice: Pulse cauliflower florets in a food processor until they resemble rice. Use it as a low-carb substitute for rice in stir-fries, salads, or side dishes.
* Cauliflower Soup
Conclusion
So, there you have it! Planting cauliflower doesn’t have to be an intimidating endeavor. With a little planning, preparation, and the right techniques, you can cultivate your own thriving cauliflower patch right in your backyard. This DIY approach not only saves you money compared to buying cauliflower at the grocery store, but it also allows you to enjoy the unparalleled flavor and freshness of homegrown produce. Plus, there’s a certain satisfaction that comes from nurturing a plant from seedling to harvest.
This method is a must-try because it empowers you to control the entire growing process, ensuring your cauliflower is free from unwanted pesticides and herbicides. You know exactly what goes into your food, making it a healthier and more sustainable choice for you and your family. Beyond the health benefits, growing your own cauliflower is a rewarding and educational experience, connecting you with nature and the cycles of life.
Don’t be afraid to experiment with different varieties of cauliflower. Consider trying purple cauliflower for its vibrant color and slightly sweeter taste, or Romanesco cauliflower for its unique fractal pattern and nutty flavor. You can also adjust the spacing between plants based on the specific variety you choose and the size of your garden. For those with limited space, consider growing cauliflower in containers, ensuring they have adequate drainage and sunlight.
Remember to monitor your plants regularly for pests and diseases, and take action promptly to prevent any major problems. Companion planting can also be a great way to deter pests and improve the overall health of your cauliflower plants. Consider planting herbs like rosemary or thyme nearby, or flowers like marigolds, to create a beneficial ecosystem in your garden.
We wholeheartedly encourage you to give this DIY cauliflower planting method a try. It’s a fun, rewarding, and ultimately delicious way to enhance your gardening skills and enjoy the fruits (or rather, vegetables) of your labor. Once you’ve harvested your first head of homegrown cauliflower, you’ll be hooked!
Don’t forget to share your experiences with us! We’d love to hear about your successes, challenges, and any variations you’ve tried. Share your photos and stories on social media using #HomegrownCauliflower and let’s inspire others to embrace the joy of gardening. Happy planting!
Frequently Asked Questions (FAQ)
What is the best time of year to plant cauliflower?
The best time to plant cauliflower depends on your climate. In general, cauliflower thrives in cool weather, so it’s typically planted in the spring or fall. For a spring crop, start seeds indoors 6-8 weeks before the last expected frost. Transplant seedlings outdoors 2-3 weeks before the last frost. For a fall crop, start seeds indoors in mid-summer and transplant seedlings outdoors in late summer or early fall. The ideal temperature range for cauliflower growth is between 60°F and 70°F (15°C and 21°C). Avoid planting during the hottest months of summer, as high temperatures can cause the cauliflower to bolt (go to seed) prematurely.
How much sunlight does cauliflower need?
Cauliflower requires at least 6 hours of direct sunlight per day to thrive. Choose a planting location that receives ample sunlight throughout the day. If you live in a particularly hot climate, providing some afternoon shade can help prevent the cauliflower from bolting.
What type of soil is best for cauliflower?
Cauliflower prefers well-drained, fertile soil that is rich in organic matter. The ideal soil pH is between 6.0 and 7.0. Before planting, amend the soil with compost or well-rotted manure to improve its fertility and drainage. You can also add a slow-release fertilizer to provide essential nutrients throughout the growing season. Avoid planting in heavy clay soil, as it can become waterlogged and hinder root growth. If you have clay soil, amend it with plenty of organic matter to improve its drainage.
How often should I water cauliflower?
Cauliflower needs consistent moisture to grow properly. Water deeply and regularly, especially during dry periods. Aim to keep the soil consistently moist but not waterlogged. Mulching around the plants can help retain moisture and suppress weeds. Check the soil moisture regularly by sticking your finger into the soil. If the top inch of soil feels dry, it’s time to water. Avoid overhead watering, as it can increase the risk of fungal diseases. Instead, water at the base of the plants.
How do I prevent cauliflower from turning yellow?
Cauliflower heads can turn yellow if they are exposed to too much sunlight. To prevent this, blanch the heads by tying the outer leaves together over the developing head when it reaches about 2-3 inches in diameter. This will protect the head from the sun and keep it white. Use twine or rubber bands to secure the leaves. Check the heads regularly and adjust the leaves as needed.
What are some common pests and diseases that affect cauliflower?
Cauliflower is susceptible to a variety of pests and diseases, including cabbage worms, aphids, flea beetles, clubroot, and black rot. Monitor your plants regularly for signs of infestation or disease. Use organic pest control methods, such as insecticidal soap or neem oil, to control pests. Practice crop rotation to prevent soilborne diseases. Ensure good air circulation around the plants to reduce the risk of fungal diseases. Remove any infected leaves or plants promptly to prevent the spread of disease.
How do I know when cauliflower is ready to harvest?
Cauliflower is ready to harvest when the head is firm, compact, and about 6-8 inches in diameter. The head should be white or the color of the variety you are growing. Use a sharp knife to cut the head from the plant, leaving a few leaves attached to protect the head. Harvest cauliflower in the morning, when the temperatures are cooler.
Can I grow cauliflower in containers?
Yes, you can grow cauliflower in containers, but you’ll need to choose a large container that is at least 12 inches in diameter and 12 inches deep. Use a well-draining potting mix and provide regular watering and fertilization. Container-grown cauliflower may require more frequent watering than cauliflower grown in the ground. Choose a sunny location for your container and monitor the plants regularly for pests and diseases.
What are some good companion plants for cauliflower?
Good companion plants for cauliflower include herbs like rosemary, thyme, and sage, which can help deter pests. Flowers like marigolds and nasturtiums can also attract beneficial insects that prey on pests. Other beneficial companion plants include beans, peas, and onions. Avoid planting cauliflower near broccoli, cabbage, or other members of the brassica family, as they can attract the same pests and diseases.
How can I store harvested cauliflower?
Store harvested cauliflower in the refrigerator for up to a week. Wrap the head in plastic wrap or store it in a plastic bag to prevent it from drying out. You can also freeze cauliflower for longer storage. To freeze cauliflower, blanch the florets in boiling water for 3 minutes, then plunge them into ice water to stop the cooking process. Drain the florets thoroughly and freeze them in a single layer on a baking sheet. Once frozen, transfer the florets to a freezer bag or container. Frozen cauliflower can be stored for up to 12 months.

Leave a Comment