
Reliable Tomato Growing Setup: Are you dreaming of juicy, sun-ripened tomatoes bursting with flavor, straight from your own backyard? Imagine biting into a perfectly red tomato, knowing you nurtured it from a tiny seed to a delicious masterpiece. But let’s be honest, growing tomatoes can sometimes feel like a battle against pests, diseases, and unpredictable weather. Don’t worry, I’m here to help you win that battle!
For centuries, tomatoes have been a staple in gardens around the world, with roots tracing back to South America. From the vibrant sauces of Italy to the refreshing salads of the Mediterranean, tomatoes have enriched our culinary traditions. But achieving a bountiful harvest requires more than just planting a seedling and hoping for the best. That’s where a reliable tomato growing setup comes in.
This DIY guide is packed with practical tips and tricks to create the perfect environment for your tomato plants to thrive. We’ll explore everything from choosing the right location and soil to building simple, effective support systems and protecting your precious plants from common problems. Why struggle with lackluster yields when you can easily implement these proven techniques? Let’s ditch the store-bought, bland tomatoes and embark on a journey to grow the most flavorful, satisfying tomatoes you’ve ever tasted. Get ready to transform your garden into a tomato paradise!

DIY Self-Watering Tomato Planter: Never Forget to Water Again!
Hey there, fellow gardening enthusiasts! Are you tired of the constant worry about watering your tomato plants, especially during those scorching summer months? Well, I’ve got just the solution for you: a DIY self-watering tomato planter! This project is not only budget-friendly but also incredibly effective in keeping your tomato plants happy and hydrated. Trust me, once you try this, you’ll wonder how you ever gardened without it.
What Makes This Planter So Great?
* Consistent Moisture: The self-watering design ensures your tomato plants receive a steady supply of water, preventing overwatering and underwatering.
* Reduced Watering Frequency: Say goodbye to daily watering! This planter significantly reduces the need for constant attention, freeing up your time for other gardening tasks (or just relaxing!).
* Healthier Plants: Consistent moisture levels lead to healthier, more robust tomato plants with increased yields.
* Cost-Effective: Building your own self-watering planter is much cheaper than buying a pre-made one.
* Eco-Friendly: You can repurpose old containers, reducing waste and giving them a new life.
Materials You’ll Need
Before we dive into the construction, let’s gather all the necessary materials. Don’t worry, most of these are easily accessible and relatively inexpensive.
* Two Large Plastic Containers: One container should be slightly larger than the other. I recommend using two 5-gallon buckets or similar-sized containers. The larger one will act as the reservoir, and the smaller one will hold the soil and plant. Make sure they are food-grade plastic if possible.
* PVC Pipe (Approximately 12-18 inches): This will serve as the watering tube, allowing you to easily refill the reservoir. A 1-inch diameter pipe works well.
* PVC Pipe Cap: To cover the top of the PVC pipe and prevent debris from falling in.
* Drill with Various Drill Bits: You’ll need drill bits to create drainage holes and holes for the PVC pipe.
* Landscape Fabric or Burlap: This will prevent soil from falling into the water reservoir.
* Potting Mix: Choose a high-quality potting mix specifically formulated for vegetables.
* Tomato Seedling: Select your favorite tomato variety!
* Measuring Tape or Ruler: For accurate measurements.
* Utility Knife or Scissors: For cutting the landscape fabric.
* Gravel or Small Rocks: To create a drainage layer at the bottom of the planting container.
* Optional: Spray paint (if you want to customize the look of your planter).
Step-by-Step Instructions: Building Your Self-Watering Tomato Planter
Alright, let’s get our hands dirty and build this amazing self-watering planter!
Phase 1: Preparing the Containers
1. Drill Drainage Holes in the Smaller Container: Take the smaller of your two containers. Using a drill bit (around 1/4 inch), drill several drainage holes in the bottom. These holes are crucial for allowing excess water to drain and preventing root rot. I usually drill about 8-10 holes, evenly spaced.
2. Drill a Hole for the PVC Pipe in the Smaller Container: Now, we need to create a hole for the PVC pipe. Choose a spot near the center of the bottom of the smaller container. Use a drill bit that’s slightly larger than the diameter of your PVC pipe (around 1 1/8 inch). The pipe should fit snugly but not too tightly.
3. Prepare the Larger Container (Reservoir): The larger container will act as the water reservoir. We don’t need to drill any holes in the bottom of this container. However, if you want to add a drainage hole near the top (about 2-3 inches from the top) as an overflow, you can. This will prevent the reservoir from overfilling during heavy rain.
4. (Optional) Paint the Containers: If you want to personalize your planter, now’s the time to paint the containers. Use a spray paint designed for plastic and apply several thin coats, allowing each coat to dry completely before applying the next.
Phase 2: Assembling the Planter
1. Insert the PVC Pipe: Insert the PVC pipe through the hole you drilled in the bottom of the smaller container. The pipe should extend a few inches above the top of the container. This will allow you to easily add water to the reservoir.
2. Add Gravel to the Smaller Container: Pour a layer of gravel or small rocks into the bottom of the smaller container, around 2-3 inches deep. This layer will improve drainage and prevent the soil from clogging the drainage holes.
3. Line with Landscape Fabric: Cut a piece of landscape fabric or burlap that’s large enough to line the inside of the smaller container. This fabric will act as a barrier, preventing the potting mix from falling into the water reservoir. Make sure the fabric covers the gravel layer completely and extends up the sides of the container.
4. Place the Smaller Container Inside the Larger Container: Carefully place the smaller container inside the larger container. The bottom of the smaller container should be elevated above the bottom of the larger container, creating a water reservoir. The PVC pipe should extend above the top of the smaller container, allowing you to easily add water.
Phase 3: Planting Your Tomato Seedling
1. Fill with Potting Mix: Fill the smaller container with high-quality potting mix, leaving a few inches of space at the top. Gently press down on the soil to remove any air pockets.
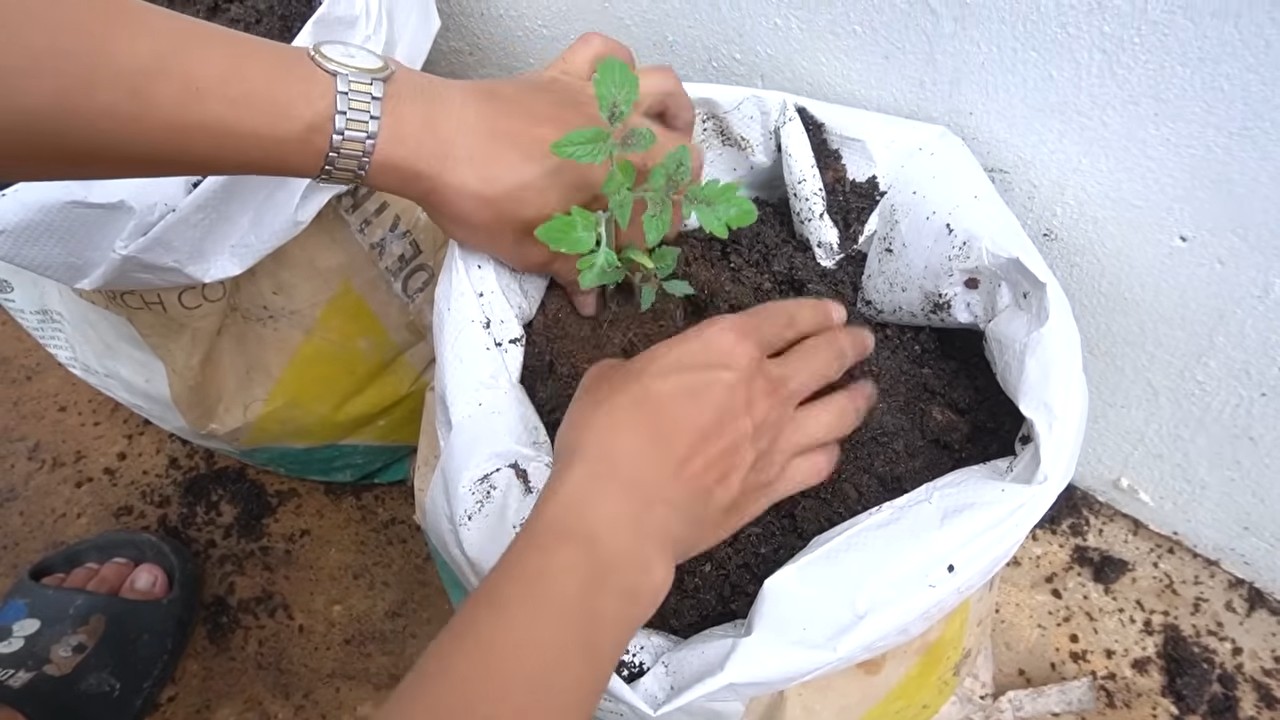
2. Plant Your Tomato Seedling: Dig a hole in the center of the potting mix large enough to accommodate the root ball of your tomato seedling. Carefully remove the seedling from its container and place it in the hole. Backfill with potting mix and gently press down around the base of the plant.
3. Water Thoroughly: Water the potting mix thoroughly from the top to help settle the soil and encourage root growth.
4. Add Water to the Reservoir: Pour water into the PVC pipe until the reservoir is full. You’ll know it’s full when water starts to come out of the overflow hole (if you added one).
5. Cap the PVC Pipe: Place the PVC pipe cap on top of the pipe to prevent debris from falling in.
Tips for Success
* Choose the Right Tomato Variety: Determinate tomato varieties (bush tomatoes) are generally better suited for container gardening than indeterminate varieties (vining tomatoes), as they tend to be more compact. However, you can grow indeterminate varieties in containers as well, just make sure to provide them with adequate support, such as a tomato cage or trellis.
* Use High-Quality Potting Mix: Don’t skimp on the potting mix! A good quality potting mix will provide your tomato plants with the nutrients they need to thrive.
* Fertilize Regularly: Tomato plants are heavy feeders, so it’s important to fertilize them regularly. Use a fertilizer specifically formulated for tomatoes and follow the instructions on the label.
* Provide Adequate Sunlight: Tomato plants need at least 6-8 hours of sunlight per day to produce fruit. Place your self-watering planter in a sunny location.
* Monitor Water Levels: Check the water level in the reservoir regularly, especially during hot weather. Refill as needed.
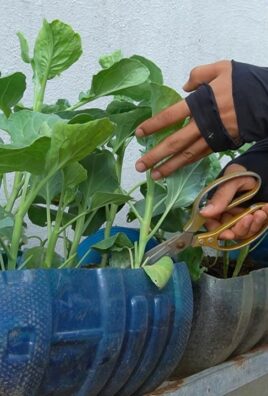
* Prune Your Tomato Plants: Pruning your tomato plants can help improve air circulation and prevent disease. Remove any suckers (small shoots that grow between the main stem and the branches) to encourage fruit production.
* Protect from Pests and Diseases: Keep an eye out for common tomato pests and diseases, such as aphids, whiteflies, and blight. Take action promptly to prevent infestations and diseases from spreading.
* Consider Adding Mulch: Adding a layer of mulch to the top of the potting mix can help retain moisture and suppress weeds.
Troubleshooting
* Plant Wilting: If your tomato plant is wilting, it could be a sign of underwatering or overwatering. Check the water level in the reservoir and adjust accordingly. Also, make sure the drainage holes are not clogged.
* Yellowing Leaves: Yellowing leaves can be a sign of nutrient deficiency. Fertilize your tomato plant with a balanced fertilizer.
* Slow Growth: Slow growth can be caused by a variety of factors, including lack of sunlight, poor soil, or nutrient deficiency. Make sure your tomato plant is getting enough sunlight and fertilize regularly.
* No Fruit Production: Lack of fruit production can be caused by a variety of factors, including lack of pollination, high temperatures, or nutrient deficiency. Make sure your tomato plant is getting enough sunlight and fertilize regularly. You can also try hand-pollinating the flowers.
And there you have it! Your very own DIY self-watering tomato planter. I hope you found this guide helpful and that you enjoy growing delicious, juicy tomatoes with minimal effort. Happy gardening!
Conclusion
So, there you have it! Creating your own reliable tomato growing setup isn’t just about saving money; it’s about taking control of your garden and ensuring your plants thrive. We’ve explored how to build a system that provides consistent watering, essential nutrients, and sturdy support, all crucial elements for a bountiful harvest.
Why is this DIY trick a must-try? Because it empowers you to tailor your tomato growing environment to your specific needs and climate. Store-bought solutions are often generic, failing to address the unique challenges of your garden. With this setup, you can adjust watering schedules, nutrient concentrations, and support structures to optimize growth and maximize yield. Imagine plump, juicy tomatoes bursting with flavor, all thanks to your ingenuity and effort.
Beyond the basic setup, there’s plenty of room for customization. Consider adding a rain barrel to collect rainwater for an even more sustainable watering system. Experiment with different types of mulch to retain moisture and suppress weeds. You could even integrate a small solar panel to power a timer for automated watering, taking your tomato growing to the next level. For those in cooler climates, think about incorporating a mini greenhouse or cold frame around your setup to extend the growing season.
Don’t be afraid to get creative! Perhaps you want to use recycled materials like old tires or plastic containers to build your raised beds. Or maybe you’d like to add companion plants like basil or marigolds to deter pests and attract beneficial insects. The possibilities are endless, and the only limit is your imagination.
This reliable tomato growing setup is more than just a project; it’s an investment in your garden and your health. By providing your tomato plants with the optimal conditions, you’ll be rewarded with a delicious and nutritious harvest that you can enjoy all season long.
We wholeheartedly encourage you to give this DIY trick a try. It’s a rewarding experience that will not only improve your tomato growing but also deepen your connection to nature. And most importantly, we want to hear about your experiences! Share your photos, tips, and variations in the comments below. Let’s build a community of tomato enthusiasts who are passionate about growing their own food. What worked for you? What challenges did you face? What innovative solutions did you come up with? Your insights could inspire others and help them achieve their tomato growing dreams. So, grab your tools, gather your materials, and get ready to create a reliable tomato growing setup that will transform your garden into a tomato paradise!
Frequently Asked Questions (FAQ)
What are the benefits of a DIY tomato growing setup compared to buying a pre-made one?
DIY tomato growing setups offer several advantages over pre-made options. Firstly, they are often more cost-effective. You can source materials locally and repurpose items you already have, saving money compared to purchasing a complete system. Secondly, DIY setups are highly customizable. You can tailor the size, shape, and features of your setup to perfectly match your garden space and the specific needs of your tomato plants. This level of customization is rarely available with pre-made systems. Thirdly, building your own setup is a rewarding and educational experience. You’ll gain a deeper understanding of how tomato plants grow and what they need to thrive. Finally, DIY setups are often more sustainable. You can use recycled materials and implement water-saving techniques, reducing your environmental impact.
What type of soil is best for a reliable tomato growing setup?
Tomatoes thrive in well-draining, nutrient-rich soil with a slightly acidic pH (around 6.0 to 6.8). A good starting point is a mix of equal parts garden soil, compost, and peat moss or coco coir. Compost provides essential nutrients and improves soil structure, while peat moss or coco coir helps retain moisture. You can also add perlite or vermiculite to improve drainage. Before planting, it’s a good idea to test your soil’s pH and nutrient levels. You can purchase a soil testing kit at most garden centers or send a sample to a local agricultural extension office for professional analysis. Based on the results, you can amend your soil with lime to raise the pH or sulfur to lower it. You can also add fertilizers to provide essential nutrients like nitrogen, phosphorus, and potassium.
How often should I water my tomato plants in a DIY setup?
Watering frequency depends on several factors, including the weather, soil type, and the size of your plants. As a general rule, tomato plants need about 1-2 inches of water per week. Check the soil moisture regularly by sticking your finger about an inch into the soil. If it feels dry, it’s time to water. Water deeply and thoroughly, ensuring the water reaches the roots. Avoid watering the foliage, as this can promote fungal diseases. In hot, dry weather, you may need to water more frequently. A drip irrigation system or soaker hose is an excellent way to deliver water directly to the roots, minimizing water waste and reducing the risk of disease. Mulching around your tomato plants can also help retain moisture and reduce the need for frequent watering.
What type of support structure is best for my tomato plants?
The best type of support structure depends on the variety of tomato you’re growing. Determinate tomatoes, which grow to a certain size and then stop, can often be supported with sturdy stakes or cages. Indeterminate tomatoes, which continue to grow and produce fruit throughout the season, require more robust support. Tall stakes, trellises, or large cages are good options for indeterminate varieties. When using stakes, tie the tomato stems to the stake with soft twine or plant ties, being careful not to damage the stems. Cages should be large enough to accommodate the mature size of the plant. Trellises provide excellent support and allow for good air circulation, which can help prevent disease.
How do I protect my tomato plants from pests and diseases in my DIY setup?
Prevention is key when it comes to pests and diseases. Start by choosing disease-resistant tomato varieties. Ensure good air circulation around your plants by spacing them properly and pruning away suckers (the small shoots that grow between the main stem and the branches). Regularly inspect your plants for signs of pests or diseases. Common tomato pests include aphids, tomato hornworms, and whiteflies. You can control these pests with insecticidal soap, neem oil, or by handpicking them off the plants. Common tomato diseases include early blight, late blight, and blossom end rot. To prevent these diseases, avoid overhead watering, provide good air circulation, and mulch around your plants. If you notice signs of disease, remove the affected leaves or plants immediately. You can also use fungicides to control fungal diseases. Blossom end rot is caused by a calcium deficiency, so make sure your soil has adequate calcium and water your plants consistently.
Can I grow tomatoes in containers using this DIY setup?
Yes, absolutely! This DIY setup can be easily adapted for container gardening. Choose large containers (at least 10 gallons) with good drainage holes. Use a high-quality potting mix that is specifically formulated for containers. Provide adequate support for your tomato plants, such as stakes or cages. Water your container tomatoes more frequently than those grown in the ground, as containers tend to dry out more quickly. Fertilize your container tomatoes regularly with a balanced fertilizer. Place your containers in a sunny location that receives at least 6-8 hours of sunlight per day.
How can I extend the growing season for my tomatoes using this DIY setup?
There are several ways to extend the growing season for your tomatoes. Start your seeds indoors 6-8 weeks before the last expected frost. Harden off your seedlings gradually before transplanting them outdoors. Use row covers or cloches to protect your plants from frost in the spring and fall. Consider building a mini greenhouse or cold frame around your setup to provide extra warmth and protection. Choose early-maturing tomato varieties that will produce fruit before the first frost. You can also try growing tomatoes in containers, which can be easily moved indoors if frost is threatened.

Leave a Comment