
Rooftop kale gardening: sounds like a dream, right? Imagine stepping out onto your own private green oasis, plucking fresh, vibrant kale leaves for your morning smoothie or a delicious salad. Forget those sad, wilted bunches at the grocery store! This isn’t just a pipe dream; it’s an achievable reality, even if you’re short on space.
For centuries, urban dwellers have sought ways to bring nature closer, from window boxes overflowing with herbs to elaborate courtyard gardens. The modern rooftop garden, however, takes this concept to a whole new level. It’s a testament to our enduring connection to the earth and our desire to cultivate our own food, no matter where we live. And let’s be honest, who wouldn’t want to impress their friends with their own homegrown kale?
But why rooftop kale gardening specifically? Well, kale is a nutritional powerhouse, packed with vitamins and antioxidants. Plus, it’s surprisingly easy to grow, even for beginners. This DIY guide will provide you with simple, effective tricks and hacks to transform your rooftop into a thriving kale haven. We’ll cover everything from choosing the right containers and soil to protecting your precious plants from pests and the elements. So, get ready to unleash your inner gardener and enjoy the satisfaction of harvesting your own delicious, healthy kale, right from your rooftop!
Dein eigener Dachgarten: Kale Anbau leicht gemacht!
Hallo liebe Gartenfreunde! Habt ihr auch Lust, eure eigenen, frischen und gesunden Lebensmittel anzubauen, aber keinen Garten? Kein Problem! Ich zeige euch, wie ihr ganz einfach einen Dachgarten mit leckerem Grünkohl (Kale) anlegen könnt. Es ist einfacher als ihr denkt und macht super viel Spaß!
Was du für deinen Dachgarten brauchst:
* Geeignete Behälter: Das können große Töpfe, Pflanzkästen oder sogar recycelte Behälter sein. Achte darauf, dass sie Abzugslöcher haben, damit das Wasser ablaufen kann.
* Hochwertige Pflanzerde: Grünkohl braucht nährstoffreiche Erde. Am besten ist eine Mischung aus Gartenerde, Kompost und etwas Sand.
* Grünkohl-Samen oder Jungpflanzen: Samen sind günstiger, aber Jungpflanzen sind einfacher zu handhaben und bringen schneller Ernte.
* Gießkanne oder Gartenschlauch: Zum regelmäßigen Gießen.
* Schaufel oder kleine Kelle: Zum Umtopfen und Einpflanzen.
* Organischer Dünger (optional): Für extra Nährstoffe.
* Schneckenkorn (optional): Wenn ihr in einer Gegend mit vielen Schnecken wohnt.
* Handschuhe: Zum Schutz eurer Hände.
* Sonnenbrille und Sonnencreme: Denkt an euren Sonnenschutz!
Vorbereitung ist alles: Der richtige Standort und die passenden Behälter
Bevor wir loslegen, ist es wichtig, den richtigen Standort für unseren Dachgarten zu finden. Grünkohl liebt die Sonne! Sucht euch also einen Platz auf eurem Dach, der mindestens 6 Stunden Sonne am Tag bekommt. Achtet auch darauf, dass der Standort windgeschützt ist, da starker Wind die Pflanzen beschädigen kann.
Die Wahl der richtigen Behälter ist ebenfalls entscheidend. Sie sollten groß genug sein, damit die Grünkohlpflanzen ausreichend Platz zum Wachsen haben. Ich empfehle Behälter mit einem Volumen von mindestens 20 Litern pro Pflanze. Außerdem ist es wichtig, dass die Behälter Abzugslöcher haben, damit überschüssiges Wasser ablaufen kann und die Wurzeln nicht faulen.
Tipp: Wenn ihr recycelte Behälter verwendet, achtet darauf, dass sie sauber und frei von Schadstoffen sind. Alte Plastikeimer oder Regentonnen eignen sich hervorragend, solange ihr Löcher in den Boden bohrt.
Schritt-für-Schritt Anleitung: Grünkohl anpflanzen
Jetzt geht’s ans Eingemachte! Hier ist eine detaillierte Anleitung, wie ihr euren Grünkohl erfolgreich anpflanzt:
1. Behälter vorbereiten: Füllt die Behälter mit der vorbereiteten Pflanzerde. Lasst etwa 5 cm Platz bis zum Rand.
2. Samen aussäen (optional): Wenn ihr Samen verwendet, sät sie etwa 1 cm tief in die Erde. Haltet die Erde feucht, aber nicht nass. Die Keimung dauert in der Regel 5-10 Tage.
3. Jungpflanzen einpflanzen: Wenn ihr Jungpflanzen verwendet, grabt ein Loch in die Erde, das groß genug ist, um den Wurzelballen aufzunehmen. Setzt die Pflanze vorsichtig ein und füllt das Loch mit Erde auf. Drückt die Erde leicht an.
4. Gießen: Gießt die Pflanzen gründlich an. Achtet darauf, dass die Erde gleichmäßig feucht ist.
5. Düngen (optional): Wenn ihr möchtet, könnt ihr die Pflanzen mit einem organischen Dünger düngen. Befolgt dabei die Anweisungen auf der Verpackung.
6. Schneckenkorn ausstreuen (optional): Wenn ihr in einer Gegend mit vielen Schnecken wohnt, könnt ihr Schneckenkorn um die Pflanzen streuen, um sie vor Fraß zu schützen.
Pflege deines Grünkohls: Gießen, Düngen und Schädlinge bekämpfen
Damit euer Grünkohl prächtig gedeiht, ist regelmäßige Pflege wichtig. Hier sind ein paar Tipps:
* Gießen: Grünkohl braucht regelmäßig Wasser, besonders an heißen Tagen. Gießt die Pflanzen am besten morgens oder abends, wenn die Sonne nicht so stark scheint. Achtet darauf, dass die Erde immer leicht feucht ist, aber nicht nass.
* Düngen: Grünkohl ist ein Starkzehrer und benötigt viele Nährstoffe. Düngt die Pflanzen alle 2-3 Wochen mit einem organischen Dünger.
* Schädlinge bekämpfen: Grünkohl kann von verschiedenen Schädlingen befallen werden, wie z.B. Blattläusen, Kohlweißlingen oder Schnecken. Kontrolliert die Pflanzen regelmäßig und entfernt Schädlinge gegebenenfalls von Hand. Bei starkem Befall könnt ihr auch biologische Schädlingsbekämpfungsmittel einsetzen.
* Unkraut entfernen: Entfernt regelmäßig Unkraut aus den Behältern, damit der Grünkohl nicht von Unkraut überwuchert wird.
* Verwelkte Blätter entfernen: Entfernt regelmäßig verwelkte oder gelbe Blätter, um die Gesundheit der Pflanze zu fördern.
Erntezeit: Wann und wie du deinen Grünkohl ernten kannst
Nach etwa 60-80 Tagen könnt ihr euren Grünkohl das erste Mal ernten. Die Erntezeit hängt von der Sorte und den Wetterbedingungen ab.
So erntet ihr euren Grünkohl richtig:
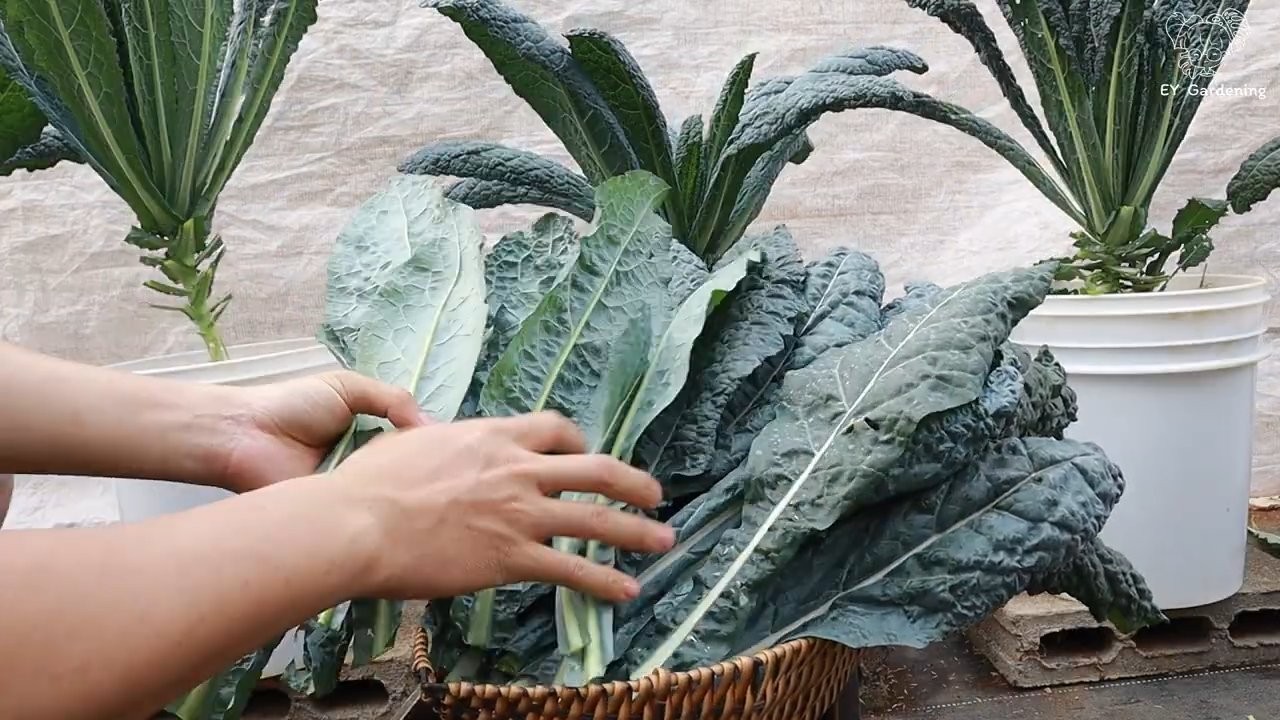
1. Äußere Blätter ernten: Erntet immer die äußeren Blätter der Pflanze. Die inneren Blätter sollten noch wachsen können.
2. Blätter abschneiden: Schneidet die Blätter mit einem scharfen Messer oder einer Schere ab.
3. Regelmäßig ernten: Erntet den Grünkohl regelmäßig, um die Produktion neuer Blätter anzuregen.
Tipp: Grünkohl schmeckt am besten, wenn er nach dem ersten Frost geerntet wird. Durch den Frost wird der Zuckergehalt in den Blättern erhöht und der Grünkohl schmeckt süßer.
Grünkohl richtig lagern: So bleibt er frisch
Geernteter Grünkohl hält sich im Kühlschrank etwa 3-5 Tage. Am besten wickelt ihr ihn in ein feuchtes Tuch oder legt ihn in einen Plastikbeutel.
Grünkohl einfrieren:
Wenn ihr mehr Grünkohl geerntet habt, als ihr verbrauchen könnt, könnt ihr ihn auch einfrieren.
1. Grünkohl waschen und putzen: Wascht den Grünkohl gründlich und entfernt die harten Stiele.
2. Grünkohl blanchieren: Blanchiert den Grünkohl für 2-3 Minuten in kochendem Wasser.
3. Grünkohl abschrecken: Schreckt den Grünkohl in Eiswasser ab, um den Garprozess zu stoppen.
4. Grünkohl abtropfen lassen: Lasst den Grünkohl gut abtropfen.
5. Grünkohl einfrieren: Füllt den Grünkohl in Gefrierbeutel oder -dosen und friert ihn ein.
Eingefrorener Grünkohl hält sich etwa 8-12 Monate.
Leckere Rezeptideen mit Grünkohl: Von Smoothies bis Chips
Grünkohl ist super vielseitig und kann in vielen verschiedenen Gerichten verwendet werden. Hier sind ein paar meiner Lieblingsrezepte:
* Grünkohl-Smoothie: Mixe Grünkohl mit Obst, Joghurt und etwas Wasser zu einem gesunden Smoothie.
* Grünkohl-Chips: Vermische Grünkohl mit Olivenöl, Salz und Gewürzen und backe ihn im Ofen zu knusprigen Chips.
* Grünkohl-Salat: Massiere Grünkohl mit Olivenöl und Zitronensaft und füge Nüsse, Trockenfrüchte und Käse hinzu.
* Grünkohl-Suppe: Koche Grünkohl mit Gemüsebrühe, Kartoffeln und Wurst zu einer herzhaften Suppe.
* Grünkohl-Pfanne: Brate Grünkohl mit Knoblauch, Zwiebeln und Speck in der Pfanne an.
Lasst eurer Kreativität freien Lauf und probiert neue Rezepte mit Grünkohl aus!
Häufige Fehler vermeiden: Tipps für einen erfolgreichen Dachgarten
Auch wenn der Anbau von Grünkohl auf dem Dach relativ einfach ist, gibt es ein paar Fehler, die ihr vermeiden solltet:
*

Conclusion
So, there you have it! Transforming your rooftop into a thriving kale garden is not just a whimsical dream; it’s an achievable reality that brings a wealth of benefits right to your doorstep. We’ve explored the ins and outs of creating your own rooftop kale oasis, from selecting the right containers and soil to mastering the art of watering and pest control. But why is this DIY project a must-try?
Firstly, consider the unparalleled freshness and flavor. Store-bought kale simply can’t compare to the vibrant, crisp taste of kale harvested moments before it graces your plate. Imagine adding freshly picked kale to your morning smoothie, tossing it into a hearty salad, or sautéing it as a delicious side dish – all sourced directly from your own urban farm.
Secondly, think about the environmental impact. By growing your own kale, you’re reducing your carbon footprint by minimizing transportation and packaging. You’re also contributing to a greener urban environment, providing a habitat for beneficial insects and improving air quality. Plus, you’re reducing your reliance on commercially grown produce, which often relies on pesticides and herbicides.
Thirdly, rooftop gardening is incredibly rewarding. There’s something deeply satisfying about nurturing a plant from seed to harvest, witnessing its growth, and enjoying the fruits (or in this case, the leaves) of your labor. It’s a therapeutic activity that connects you with nature and provides a sense of accomplishment.
But the benefits don’t stop there. A rooftop kale garden can also be a beautiful and aesthetically pleasing addition to your home. Imagine a lush green space adorning your rooftop, transforming it into a tranquil retreat where you can relax and unwind.
Now, let’s talk about variations. While we’ve focused on kale, you can easily adapt this DIY approach to other leafy greens like spinach, lettuce, and chard. You can also experiment with different varieties of kale, from the classic curly kale to the more delicate Tuscan kale (also known as Lacinato or dinosaur kale). Consider adding companion plants like marigolds or basil to deter pests and attract pollinators. You can even incorporate vertical gardening techniques to maximize space and create a visually stunning display.
For those with limited rooftop space, consider using smaller containers or hanging baskets. You can also explore hydroponic or aquaponic systems for a more efficient and sustainable approach to rooftop gardening.
We understand that embarking on a new DIY project can be daunting, but we assure you that rooftop kale gardening is a relatively simple and straightforward endeavor. With a little planning, preparation, and dedication, you can create a thriving kale garden that will provide you with fresh, healthy produce for months to come.
So, what are you waiting for? Grab your gardening gloves, gather your supplies, and get ready to transform your rooftop into a kale paradise! We encourage you to try this DIY trick and share your experience with us. We’d love to see photos of your rooftop gardens and hear about your successes and challenges. Share your tips and tricks with fellow gardeners and inspire others to embrace the joys of urban farming. Let’s create a community of rooftop kale enthusiasts and spread the word about the benefits of growing your own food. Remember, even a small rooftop garden can make a big difference! Embrace the power of DIY rooftop kale gardening and reap the rewards of fresh, healthy, and sustainable produce.
FAQ
What kind of kale grows best on a rooftop?
The best type of kale for your rooftop garden depends on your climate and personal preferences. However, some varieties tend to thrive in container gardens and are well-suited for rooftop conditions. Curly kale is a classic choice, known for its hardiness and resilience. Tuscan kale (Lacinato or dinosaur kale) is another excellent option, offering a more delicate flavor and texture. Red Russian kale is a visually appealing variety with a slightly sweeter taste. Consider your local climate and the amount of sunlight your rooftop receives when making your selection. Experimenting with different varieties is also a great way to discover your favorites.
How much sunlight does my rooftop kale garden need?
Kale thrives in full sun, requiring at least 6 hours of direct sunlight per day. However, it can tolerate partial shade, especially in hotter climates. If your rooftop receives less than 6 hours of sunlight, consider using grow lights to supplement the natural light. Observe your kale plants closely and adjust their position as needed to ensure they receive adequate sunlight. If the leaves appear pale or leggy, it may indicate insufficient sunlight.
What kind of soil should I use for my rooftop kale garden?
The ideal soil for your rooftop kale garden is a well-draining potting mix that is rich in organic matter. Avoid using garden soil, as it can be too heavy and compact for container gardening. Look for a potting mix that contains ingredients like peat moss, perlite, and vermiculite. You can also amend your potting mix with compost or other organic matter to improve its fertility and drainage. Ensure the containers have drainage holes to prevent waterlogging, which can lead to root rot.
How often should I water my rooftop kale garden?
The frequency of watering depends on several factors, including the weather, the size of your containers, and the type of soil you’re using. Generally, you should water your kale plants when the top inch of soil feels dry to the touch. Avoid overwatering, as this can lead to root rot. During hot, dry weather, you may need to water your plants daily. In cooler, wetter weather, you may only need to water them every few days. Use a watering can or a hose with a gentle spray nozzle to avoid damaging the leaves.
How do I protect my rooftop kale garden from pests?
Pests can be a challenge for any gardener, but there are several steps you can take to protect your rooftop kale garden. Regularly inspect your plants for signs of pests, such as aphids, cabbage worms, and flea beetles. Handpick any pests you find and dispose of them properly. You can also use organic pest control methods, such as insecticidal soap or neem oil. Companion planting with herbs like basil or marigolds can also help deter pests. Consider using row covers to protect your plants from pests, especially during the early stages of growth.
How do I fertilize my rooftop kale garden?
Kale is a heavy feeder, so it’s important to fertilize your plants regularly. Use a balanced fertilizer that is specifically formulated for leafy greens. You can also use organic fertilizers, such as compost tea or fish emulsion. Follow the instructions on the fertilizer label carefully to avoid over-fertilizing, which can damage your plants. Fertilize your kale plants every few weeks during the growing season.
When is the best time to harvest kale from my rooftop garden?
You can start harvesting kale leaves when they are about 4-6 inches long. Harvest the outer leaves first, leaving the inner leaves to continue growing. Avoid harvesting more than one-third of the plant at a time. Kale can be harvested throughout the growing season, even after a light frost. In fact, some gardeners believe that frost improves the flavor of kale.
Can I grow kale on my rooftop during the winter?
Yes, kale is a cold-hardy vegetable that can be grown on your rooftop during the winter in many climates. However, you may need to provide some protection from extreme cold. Consider using row covers or a cold frame to insulate your plants. You can also move your containers to a more sheltered location, such as a garage or shed, during periods of extreme cold.
What are some creative ways to use kale from my rooftop garden?
Kale is a versatile vegetable that can be used in a variety of dishes. Add it to smoothies, salads, soups, stews, and stir-fries. You can also sauté it with garlic and olive oil, bake it into kale chips, or use it as a filling for omelets and frittatas. Get creative and experiment with different recipes to discover your favorite ways to enjoy your homegrown kale.
How do I prevent my rooftop kale garden from becoming too heavy for my roof?
Weight is a crucial consideration for rooftop gardens. Choose lightweight containers made from materials like plastic or fiberglass. Use a lightweight potting mix and avoid overwatering. Distribute the weight evenly across your rooftop by placing containers near load-bearing walls or beams. Consult with a structural engineer or building professional to assess the weight-bearing capacity of your roof and ensure that your rooftop garden is safe.


Leave a Comment