
Salt uses around the house extend far beyond the kitchen table! Are you ready to unlock the surprising potential of this everyday ingredient? For centuries, salt has been more than just a seasoning; it’s been a preservative, a cleanser, and even a symbol of good luck in various cultures. From ancient Roman soldiers being paid in salt (hence the word “salary”) to its use in traditional cleaning rituals, salt’s versatility is undeniable.
But in today’s world, many of us only think of salt when we’re reaching for the shaker. That’s where this DIY guide comes in! I’m going to show you some amazing, budget-friendly tricks using salt uses around the house that will simplify your life and save you money.
Why do you need these hacks? Because who doesn’t love a good DIY solution that’s both effective and eco-friendly? From tackling stubborn stains to keeping your home smelling fresh, these simple salt-based solutions will become your new go-to for a cleaner, happier home. Get ready to be amazed by the power of this humble mineral!
Growing Cape Gooseberries: A DIY Guide to Golden Berry Goodness!
Hey there, fellow gardening enthusiasts! I’m so excited to share my experience with growing Cape Gooseberries, also known as Golden Berries, Physalis peruviana, or simply, those delightful little orange fruits wrapped in papery husks. They’re surprisingly easy to grow, and the reward of harvesting your own sweet-tart berries is absolutely worth it. This guide will walk you through everything you need to know, from starting seeds to enjoying your bountiful harvest.
Choosing Your Variety and Starting Seeds
Before we dive into the nitty-gritty, let’s talk about choosing the right variety and getting those seeds started. While most Cape Gooseberries are pretty similar, some varieties might be better suited to your climate or have slightly different flavor profiles.
* Variety Selection: Look for varieties that are known to thrive in your region. If you live in a cooler climate, opt for early-maturing varieties. If you have a longer growing season, you have more options!
* Seed Starting Time: I usually start my seeds indoors about 6-8 weeks before the last expected frost. This gives them a good head start.
* Seed Starting Mix: Use a well-draining seed starting mix. Avoid using garden soil, as it can be too heavy and may contain diseases.
* Containers: Small seed trays or individual pots work great. Make sure they have drainage holes!
Now, let’s get those seeds going!
1. Prepare Your Seed Starting Mix: Moisten the seed starting mix thoroughly. It should be damp but not soggy.
2. Sow the Seeds: Sprinkle the seeds thinly over the surface of the mix. Cape Gooseberry seeds are tiny, so don’t bury them too deep. A light dusting of vermiculite or more seed starting mix is sufficient.
3. Water Gently: Use a spray bottle to gently mist the surface of the soil. Avoid overwatering, which can cause the seeds to rot.
4. Provide Warmth and Light: Cover the seed tray with a clear plastic dome or plastic wrap to create a humid environment. Place the tray in a warm location, ideally around 70-75°F (21-24°C). A heat mat can be helpful if your home is cooler. Once the seeds germinate, remove the cover and provide plenty of bright, indirect light. A grow light is ideal, but a sunny windowsill can also work.
5. Keep the Soil Moist: Check the soil moisture regularly and mist with water as needed to keep it consistently moist but not waterlogged.
6. Thin Seedlings (If Necessary): Once the seedlings have their first true leaves (the second set of leaves), thin them out if they are too crowded. Snip off the weaker seedlings at the soil line, leaving the strongest ones to grow.
Transplanting Your Seedlings
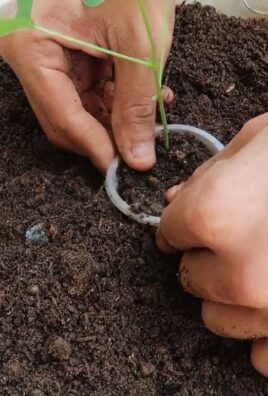
Once your seedlings have grown a few inches tall and the danger of frost has passed, it’s time to transplant them outdoors. This is a crucial step, so let’s make sure we do it right!
* Hardening Off: Before transplanting, you need to “harden off” your seedlings. This process gradually acclimates them to outdoor conditions. Start by placing the seedlings outdoors in a sheltered location for a few hours each day, gradually increasing the amount of time they spend outside over the course of a week or two.
* Choosing a Location: Cape Gooseberries thrive in full sun (at least 6-8 hours of direct sunlight per day) and well-drained soil.
* Soil Preparation: Amend your garden soil with compost or other organic matter to improve drainage and fertility. Cape Gooseberries prefer slightly acidic soil (pH 6.0-6.8).
* Spacing: Space the plants about 2-3 feet apart. They can get quite bushy!
Here’s the transplanting process:
1. Dig the Holes: Dig holes that are slightly larger than the root balls of your seedlings.
2. Carefully Remove Seedlings: Gently remove the seedlings from their containers, being careful not to damage the roots.
3. Plant the Seedlings: Place the seedlings in the holes and backfill with soil. Gently firm the soil around the base of the plants.
4. Water Thoroughly: Water the newly transplanted seedlings thoroughly.
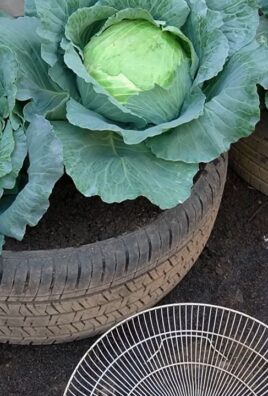
5. Mulch: Apply a layer of mulch around the plants to help retain moisture, suppress weeds, and regulate soil temperature. Straw, wood chips, or shredded leaves work well.
Caring for Your Cape Gooseberry Plants
Now that your plants are in the ground, it’s time to provide them with the care they need to thrive.
* Watering: Water regularly, especially during dry periods. Cape Gooseberries need consistent moisture, but avoid overwatering, which can lead to root rot. Aim for about 1 inch of water per week.
* Fertilizing: Fertilize every few weeks with a balanced organic fertilizer. Avoid over-fertilizing, as this can lead to excessive foliage growth at the expense of fruit production.
* Pruning: Cape Gooseberries don’t require a lot of pruning, but you can pinch back the tips of the stems to encourage bushier growth. Remove any dead or diseased branches.
* Support: As the plants grow, they may need some support to prevent them from sprawling. You can use stakes, cages, or trellises.
* Pest and Disease Control: Cape Gooseberries are generally resistant to pests and diseases, but keep an eye out for common garden pests like aphids, flea beetles, and whiteflies. Treat any infestations promptly with insecticidal soap or neem oil. Good air circulation can help prevent fungal diseases.
Let’s break down some of these care aspects further:
Watering Strategies
Consistent watering is key, especially during fruit development. I like to check the soil moisture regularly by sticking my finger into the soil. If the top inch feels dry, it’s time to water. Deep watering is better than frequent shallow watering, as it encourages the roots to grow deeper.
Fertilizing for Optimal Growth
I prefer using organic fertilizers, such as compost tea or fish emulsion. These provide a slow-release source of nutrients and are less likely to burn the plants. Avoid fertilizers that are high in nitrogen, as this can promote excessive foliage growth and reduce fruit production.
Pest and Disease Prevention
Prevention is always better than cure! I like to inspect my plants regularly for any signs of pests or diseases. If I spot any problems, I address them immediately. Insecticidal soap and neem oil are effective treatments for many common garden pests. For fungal diseases, good air circulation is essential. You can also use a copper fungicide if necessary.
Harvesting and Storing Your Cape Gooseberries
The moment you’ve been waiting for! Harvesting your own Cape Gooseberries is incredibly satisfying.
* Harvest Time: Cape Gooseberries are ready to harvest when the papery husks turn brown and dry and the berries inside turn a golden-orange color. The husks will often drop to the ground when the berries are ripe.
* Harvesting Technique: Gently pluck the berries from the plants. If they don’t come off easily, they’re probably not quite ripe yet.
* Storage: Cape Gooseberries can be stored in their husks at room temperature for several weeks. For longer storage, you can refrigerate them in their husks for up to a few months. You can also freeze them.
Here’s a closer look at harvesting and storage:
Knowing When to Harvest
The color of the husk is your best indicator of ripeness. When the husk is completely brown and papery, the berry inside is usually ripe. You can also gently squeeze the husk to feel the berry inside. If it feels plump and slightly soft, it’s ready to harvest.
Storing Your Harvest
Storing Cape Gooseberries in their husks is the best way to preserve their freshness. The husks protect the berries from drying out and help to prevent spoilage. If you’re planning to use the berries within a few weeks, you can store them at room temperature in a cool, dry place. For longer storage, refrigerate them in their husks. You can also freeze them. To freeze, spread the berries out on a baking sheet and freeze until solid. Then, transfer them to a freezer bag or container. Frozen Cape Gooseberries can be stored for up to a year.
Enjoying Your Cape Gooseberries
Now for the best part – enjoying the fruits of your labor! Cape Gooseberries are delicious eaten fresh, but they can also be used in a variety of recipes.
* Eating Fresh: Simply peel back the husk and pop the berry into your mouth. The sweet-tart flavor is incredibly refreshing.
* Jams and Preserves: Cape Gooseberries make delicious jams and preserves.
* Desserts: Add them to pies, tarts, and other desserts.
* Salads: They add a unique flavor and texture to salads.
* Sauces: Use them
Conclusion
So, there you have it! Unlocking the surprising power of salt around your home is not just a cost-effective alternative to expensive cleaning products; it’s a revelation. From banishing stubborn stains to revitalizing your garden, the versatility of this humble ingredient is truly astounding. We’ve explored a range of applications, demonstrating how simple it is to incorporate this natural resource into your daily routine.
Why is this DIY trick a must-try? Because it’s effective, eco-friendly, and readily available. You’re likely already stocked up on salt, meaning you can start reaping the benefits immediately without a trip to the store or breaking the bank. It’s a win-win for your wallet and the environment. Plus, many commercial cleaners contain harsh chemicals that can be harmful to your health and the planet. By opting for salt, you’re choosing a safer, more sustainable option.
But the possibilities don’t end here! Feel free to experiment and adapt these techniques to suit your specific needs. For instance, if you’re dealing with particularly stubborn mildew in your bathroom, try creating a paste of salt and baking soda for extra scrubbing power. Or, if you’re looking to boost the health of your houseplants, consider adding a pinch of Epsom salt (magnesium sulfate) to the soil, as it provides essential nutrients. You can even infuse your cleaning solutions with essential oils like lemon or lavender for a pleasant aroma.
Remember, the key is to start small and observe the results. Every household is different, and what works perfectly for one person may require a slight adjustment for another. Don’t be afraid to get creative and tailor these methods to your unique circumstances.
We’re confident that once you experience the transformative power of salt uses around the house, you’ll never look at this common condiment the same way again. It’s more than just a seasoning; it’s a natural cleaner, a garden booster, and a household essential.
Now, it’s your turn! We encourage you to try out these DIY tricks and share your experiences with us. Let us know which methods worked best for you, any variations you discovered, and any other creative uses you’ve found for salt around your home. Your insights could help other readers unlock even more potential from this amazing ingredient. Share your stories in the comments below, and let’s build a community of salt-savvy homeowners!
Frequently Asked Questions (FAQs)
Is all salt the same for these DIY tricks?
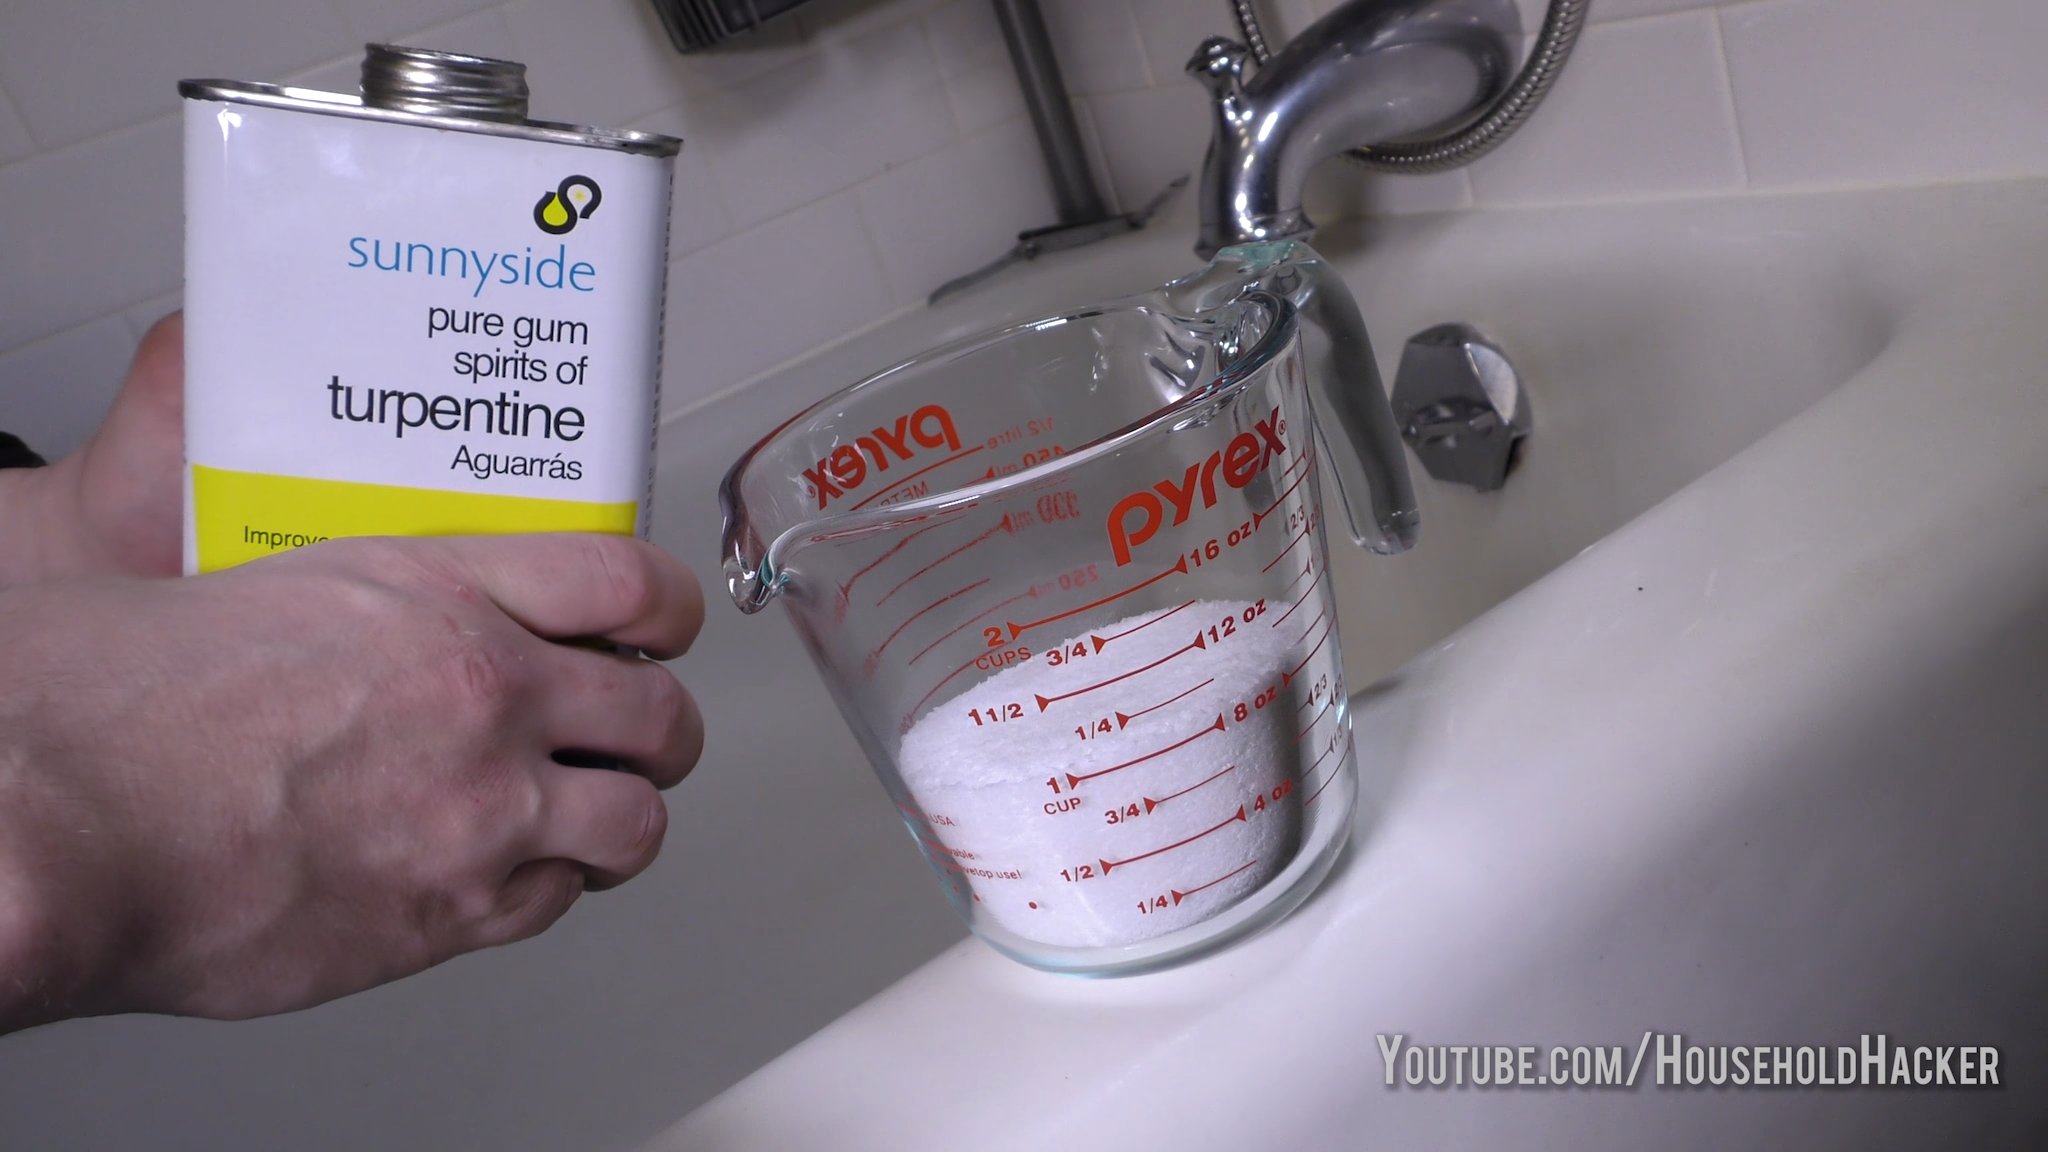
Not necessarily. While table salt is generally suitable for most cleaning and household purposes, some applications may benefit from using coarser salts like sea salt or kosher salt. For example, when scrubbing surfaces, a coarser salt can provide more abrasive power. Epsom salt (magnesium sulfate) is specifically recommended for gardening purposes due to its magnesium content, which is beneficial for plant growth. Avoid using iodized salt on plants, as the iodine can be harmful.
Can I use salt on all surfaces?
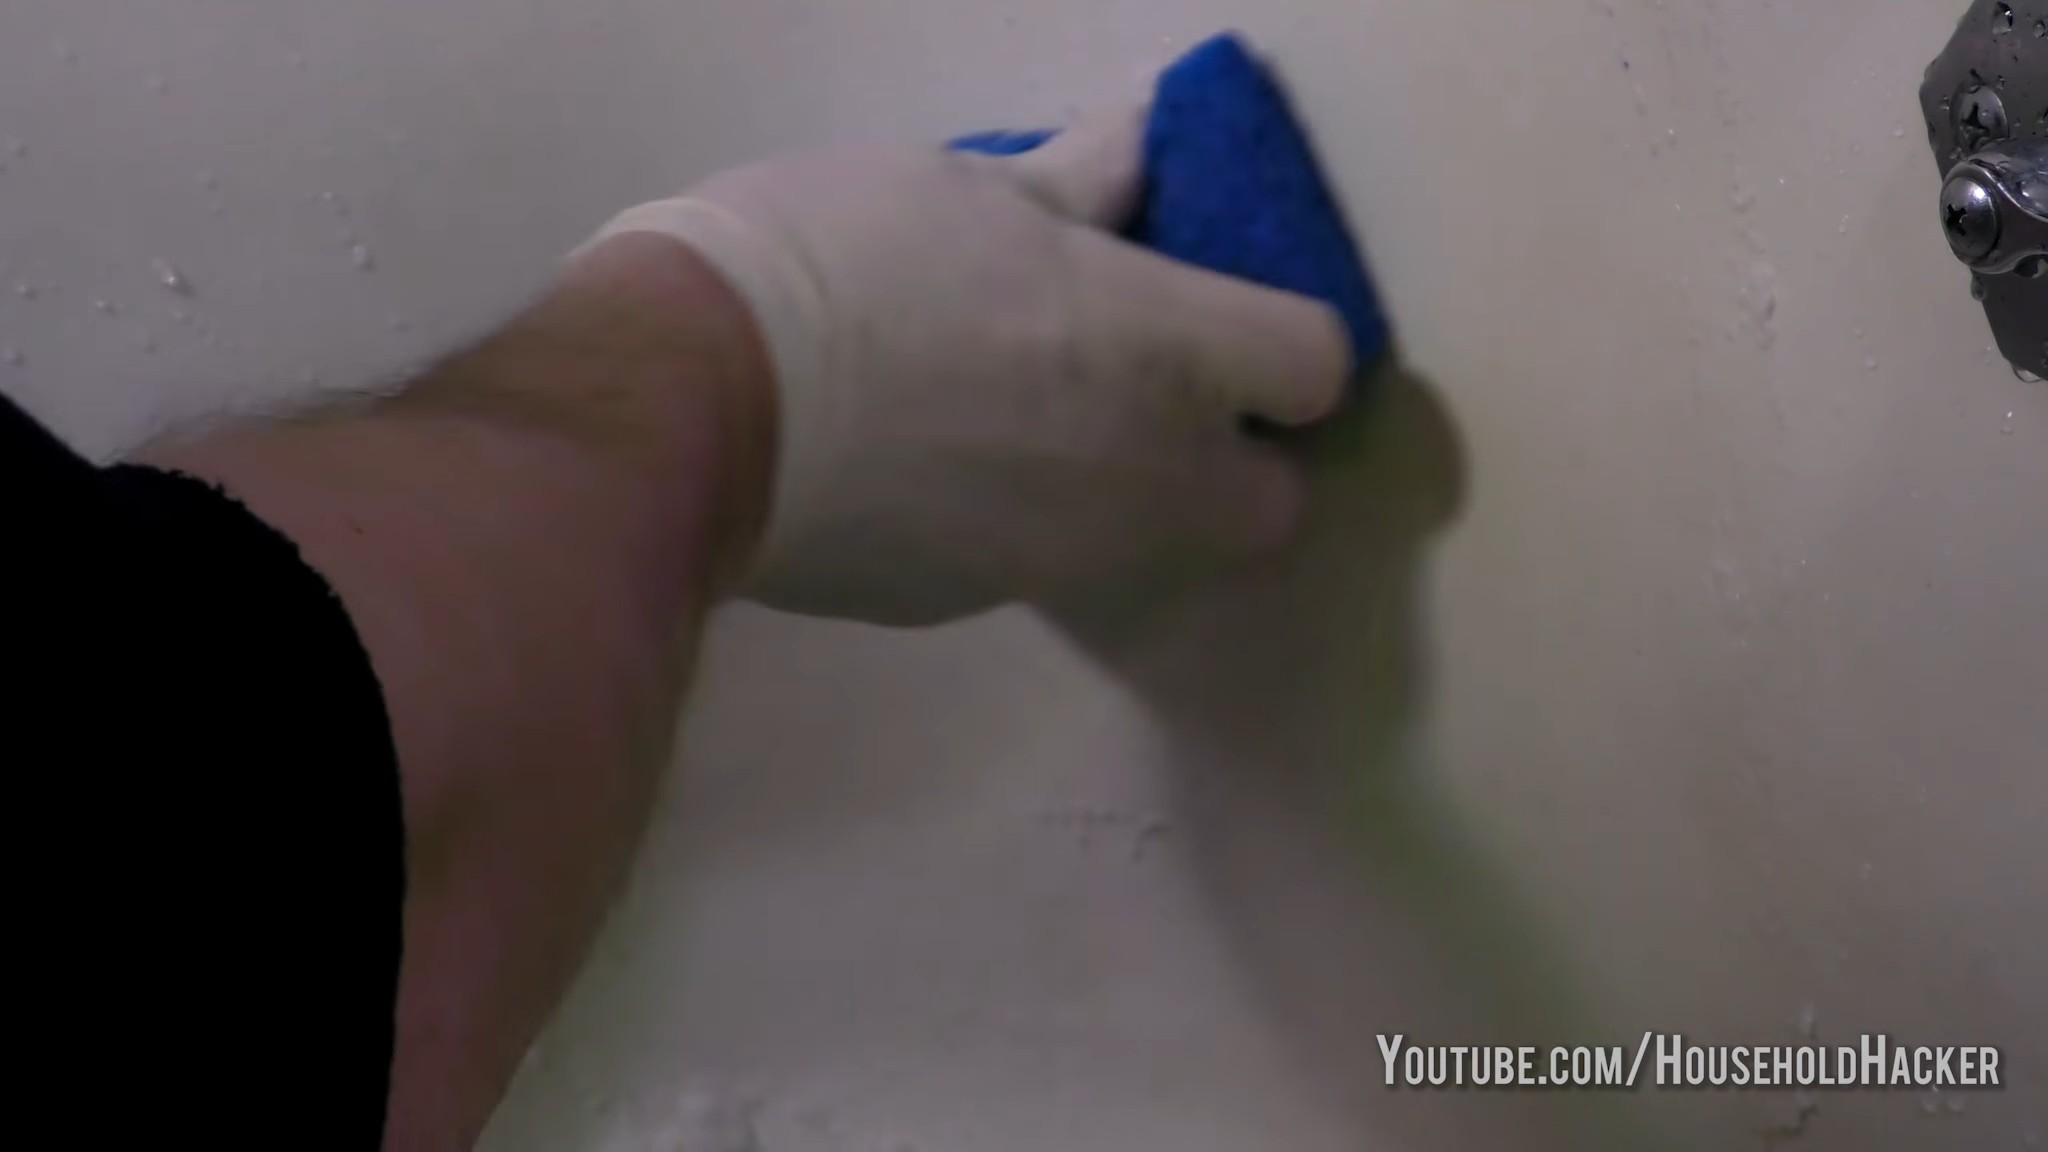
No, it’s important to exercise caution when using salt on certain surfaces. Avoid using salt on delicate or easily scratched materials like polished wood, marble, or certain types of plastic. Always test a small, inconspicuous area first to ensure that the salt doesn’t cause any damage or discoloration. For sensitive surfaces, consider diluting the salt solution or using a gentler cleaning method.
How often should I use salt to clean my home?
The frequency of using salt for cleaning depends on the specific application and the level of dirt or grime. For general cleaning, such as wiping down countertops or cleaning sinks, you can use salt solutions as needed. For more stubborn stains or mildew, you may need to repeat the treatment several times. However, avoid overusing salt, as excessive amounts can potentially damage surfaces or leave behind a residue.
Is salt safe for my pets and children?
While salt is generally considered safe, it’s important to keep it out of reach of pets and children, especially in concentrated forms. Ingesting large amounts of salt can be harmful. When using salt solutions for cleaning, ensure that the area is well-ventilated and that pets and children are kept away until the surface is dry. If you’re concerned about potential risks, consider using alternative cleaning methods or consulting with a veterinarian or pediatrician.
What are some other creative uses for salt around the house?
Beyond cleaning and gardening, salt has a wide range of other applications. It can be used to:
* Deodorize shoes: Sprinkle salt inside shoes to absorb moisture and eliminate odors.
* Clean cast iron skillets: Use salt as a gentle abrasive to scrub away food residue.
* Prevent drains from clogging: Pour a mixture of salt and hot water down drains to dissolve grease and prevent clogs.
* Keep cut flowers fresh: Add a pinch of salt to the water in a vase to prolong the life of cut flowers.
* Remove rust: Create a paste of salt, lemon juice, and cream of tartar to remove rust from metal surfaces.
* Extinguish grease fires: Pour salt onto a grease fire to smother the flames. Never use water on a grease fire.
Can I mix salt with other cleaning agents?
In many cases, yes, you can mix salt with other cleaning agents to enhance its effectiveness. For example, combining salt with vinegar creates a powerful cleaning solution for removing hard water stains and mildew. Mixing salt with baking soda can create a more abrasive scrub for tackling stubborn grime. However, it’s important to exercise caution when mixing cleaning agents, as some combinations can produce harmful fumes or react negatively. Always research the potential interactions before mixing any chemicals. Avoid mixing salt with bleach, as this can create toxic chlorine gas.
How do I store salt properly?
Salt should be stored in a cool, dry place in an airtight container. This will prevent it from absorbing moisture and clumping together. If your salt does become clumpy, you can try adding a few grains of rice to the container to absorb excess moisture. Avoid storing salt near strong odors, as it can absorb them.
What if the salt solution leaves a residue on the surface?
If a salt solution leaves a residue on the surface, simply wipe it away with a damp cloth. You can also try diluting the salt solution further to prevent residue from forming. In some cases, a slight residue may be unavoidable, but it should be easily removable with a little extra effort.
Is using salt for cleaning environmentally friendly?
Yes, using salt for cleaning is generally considered environmentally friendly. Salt is a natural and readily available resource that is biodegradable and non-toxic. Unlike many commercial cleaning products, salt doesn’t contain harsh chemicals that can pollute waterways or harm the environment. By opting for salt as a cleaning agent, you’re reducing your reliance on synthetic chemicals and contributing to a more sustainable lifestyle.
Where can I find more information about salt uses around the house?
You can find more information about salt uses around the house by searching online for articles, blog posts, and videos. You can also consult with experts in cleaning, gardening, or home improvement for personalized advice. Don’t be afraid to experiment and discover new and creative ways to use salt around your home!

Leave a Comment