
Soil bag carrots: who knew growing these crunchy delights could be so incredibly easy and space-saving? Forget sprawling garden beds and back-breaking digging! I’m about to let you in on a little secret that will revolutionize your carrot-growing game, especially if you’re short on space or just starting out with home gardening.
Carrots have been cultivated for centuries, with their origins tracing back to Afghanistan. Initially, they weren’t even orange! Purple, yellow, and white varieties were common before the vibrant orange carrot we know and love today was popularized in the Netherlands in the 17th century. Now, you can easily grow your own at home.
Let’s face it, traditional gardening can be intimidating. The thought of preparing the soil, dealing with weeds, and battling pests can deter even the most enthusiastic beginner. But what if I told you there’s a simpler way? This DIY soil bag carrot growing method eliminates many of those challenges, making it perfect for apartment dwellers, balcony gardeners, or anyone who wants a hassle-free way to enjoy fresh, homegrown carrots. Plus, it’s a fantastic project for kids, teaching them about where their food comes from. So, ditch the complicated gardening guides and get ready to harvest your own delicious soil bag carrots with this easy-to-follow guide!
DIY Soil Bag Carrot Garden: Grow Your Own Deliciousness!
Hey there, fellow gardening enthusiasts! Ever dreamed of harvesting your own crunchy, sweet carrots but thought you didn’t have the space? Well, I’m here to tell you that you absolutely can, even if you only have a balcony or a small patio! This DIY soil bag carrot garden is a super easy and rewarding project, perfect for beginners and seasoned gardeners alike. Let’s get growing!
What You’ll Need:
Before we dive in, let’s gather our supplies. This is a pretty low-cost project, which is always a win in my book!
* A Large Bag of Potting Soil: I recommend a bag that’s at least 40 quarts. Make sure it’s potting soil, not garden soil, as potting soil is lighter and better draining, which is crucial for carrots.
* Carrot Seeds: Choose your favorite variety! Nantes are a classic choice, but Danvers or Chantenay are also great options. Consider the length of the carrot when choosing, as shorter varieties will be easier to grow in a bag.
* A Sharp Knife or Scissors: For making drainage holes and opening the soil bag.
* Watering Can or Hose: For keeping your carrots happy and hydrated.
* Optional: Slow-Release Fertilizer: This isn’t essential, but it can give your carrots a boost.
* Optional: Garden Gloves: To keep your hands clean.
Step-by-Step Instructions:
Alright, let’s get our hands dirty! Here’s how to create your very own soil bag carrot garden:
1. Prepare the Soil Bag:
* First, find a sunny spot for your carrot garden. Carrots need at least 6 hours of sunlight per day.
* Lay the bag of potting soil flat on the ground in your chosen location.
* Using your sharp knife or scissors, carefully cut several slits in the bottom of the bag for drainage. These slits should be about 2-3 inches long and spaced about 6-8 inches apart. This is super important to prevent waterlogging, which can rot your carrots.
* Now, flip the bag over so the top is facing up.
* Carefully cut a large rectangle out of the top of the bag, leaving a border of about 4-6 inches around the edges. This will create an opening for planting your seeds. Don’t throw away the cut-out piece of plastic! You can use it later to cover the bag on cool nights to protect your seedlings.
2. Amend the Soil (Optional):
* If you’re using slow-release fertilizer, now’s the time to mix it into the potting soil. Follow the instructions on the fertilizer package for the correct amount to use. I usually sprinkle it evenly over the surface and then gently mix it in with my hands.
* You can also add some compost to the soil at this stage to improve drainage and fertility. A ratio of about 1 part compost to 3 parts potting soil is a good starting point.
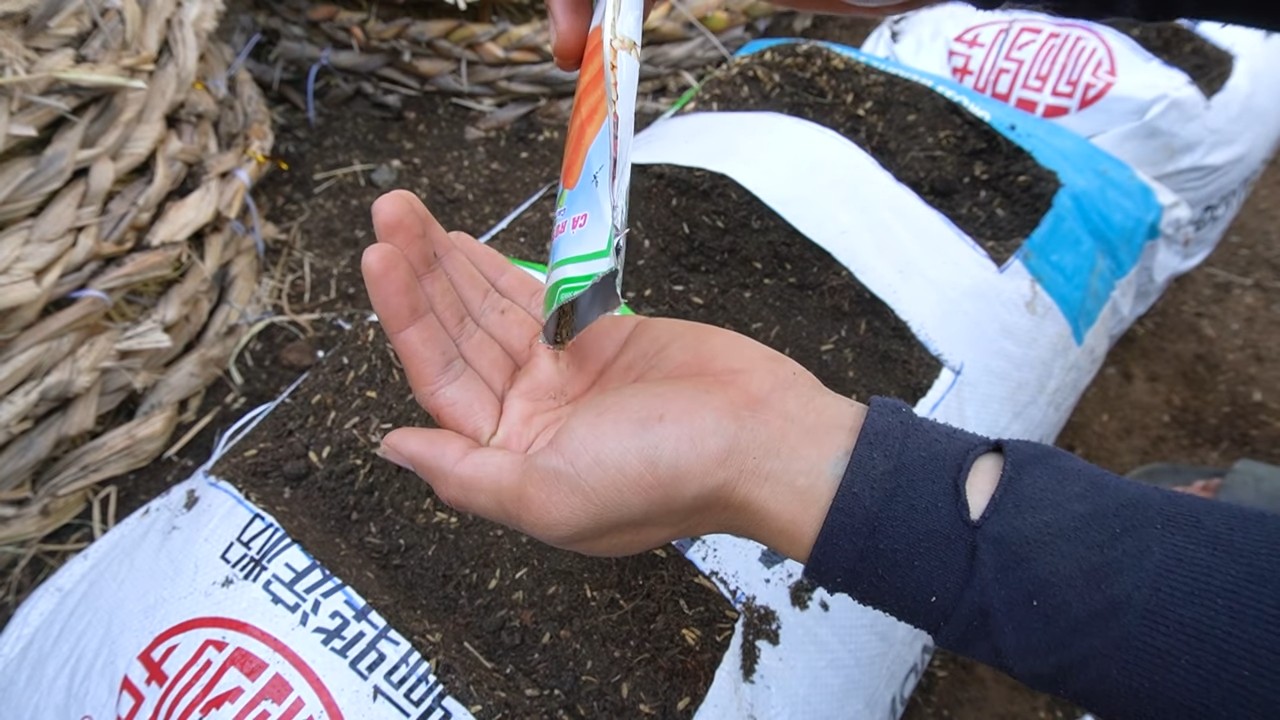
3. Sow the Carrot Seeds:
* This is the fun part! Carrot seeds are tiny, so be careful not to sow them too thickly.
* Gently sprinkle the seeds evenly over the surface of the soil. Aim for about 1/2 inch to 1 inch spacing between seeds.
* Once you’ve sown the seeds, lightly cover them with a thin layer of potting soil (about 1/4 inch).
* Gently pat down the soil to ensure good contact between the seeds and the soil.
4. Water Thoroughly:
* After sowing, water the soil bag gently but thoroughly. You want to moisten the soil without washing away the seeds.
* I like to use a watering can with a rose head to distribute the water evenly.
* Keep the soil consistently moist, but not soggy, throughout the germination period.
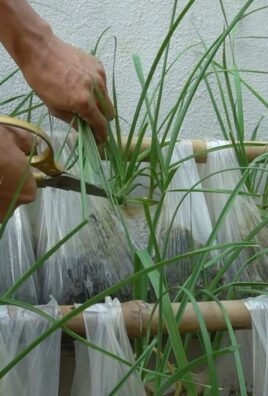
5. Thin the Seedlings:
* Once the seedlings emerge (usually in about 1-3 weeks), you’ll need to thin them out. This is crucial for giving the carrots enough space to develop properly.
* When the seedlings are about 2 inches tall, thin them to about 1-2 inches apart.
* When they’re about 4 inches tall, thin them again to about 3-4 inches apart.
* To thin, gently pull out the unwanted seedlings. Be careful not to disturb the roots of the remaining plants.
* Don’t throw away the thinned seedlings! You can eat them as microgreens in salads or sandwiches.
6. Water Regularly:
* Carrots need consistent moisture to grow well. Water your soil bag regularly, especially during dry spells.
* Check the soil moisture by sticking your finger into the soil. If the top inch feels dry, it’s time to water.
* Avoid overwatering, as this can lead to root rot.
7. Weed Carefully:
* Keep your soil bag free of weeds, as they can compete with your carrots for nutrients and water.
* Gently pull out any weeds that you see, being careful not to disturb the carrot roots.
8. Fertilize (Optional):
* If you didn’t add slow-release fertilizer at planting time, you can fertilize your carrots with a liquid fertilizer every few weeks.
* Choose a fertilizer that’s high in phosphorus and potassium, as these nutrients are important for root development.
* Follow the instructions on the fertilizer package for the correct amount to use.
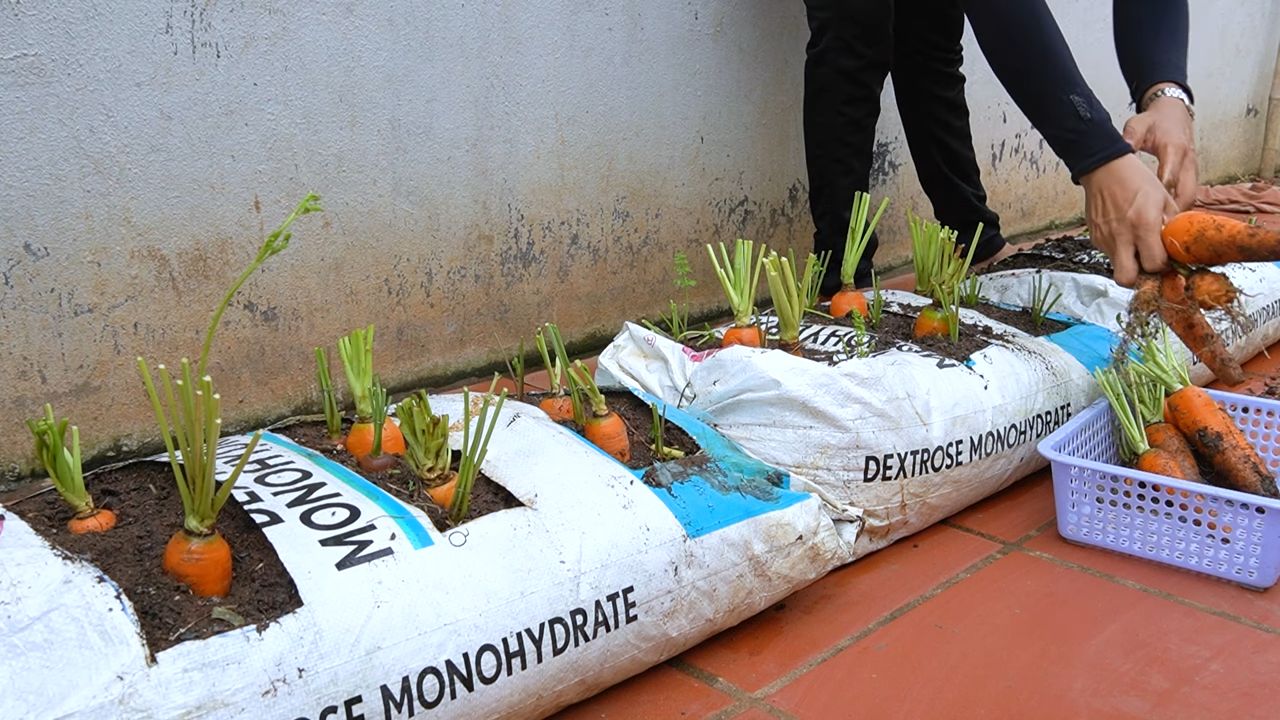
9. Harvest Your Carrots:
* The time to harvest your carrots will depend on the variety you planted, but generally, they’re ready to harvest in about 60-80 days.
* You can tell when your carrots are ready to harvest by checking the size of the tops. The tops should be about 1/2 to 1 inch in diameter.
* To harvest, gently loosen the soil around the carrot and then pull it out of the ground.
* If the soil is dry, you may need to water it before harvesting to make it easier to pull the carrots out.
* Brush off any excess soil and enjoy your homegrown carrots!
Troubleshooting Tips:
Even with the best planning, sometimes things don’t go exactly as expected. Here are a few common issues you might encounter and how to deal with them:
* Poor Germination: If your seeds don’t germinate well, it could be due to several factors, such as old seeds, dry soil, or soil that’s too cold. Make sure to use fresh seeds and keep the soil consistently moist. You can also try starting the seeds indoors in a seed tray and then transplanting the seedlings to the soil bag.
* Forked or Twisted Carrots: This is often caused by rocks or other obstacles in the soil. Make sure your potting soil is free of debris. Also, avoid using garden soil, as it tends to be too heavy and compacted.
* Root Rot: This is caused by overwatering. Make sure your soil bag has good drainage and avoid watering too frequently.
* Pests: Carrots can be susceptible to pests such as carrot rust flies and aphids. Inspect your plants regularly and take action if you see any signs of infestation. You can use organic pest control methods such as insecticidal soap or neem oil.
Choosing the Right Carrot Variety:
Not all carrots are created equal! When choosing your carrot seeds, consider the following:
* Length: Shorter varieties like Chantenay or Parisian are better suited for growing in containers or soil bags, as they don’t need as much depth.
* Days to Maturity: This is the number of days it takes for the carrots to reach maturity. Choose a variety that fits your growing season.
* Taste: Some varieties are sweeter than others. Experiment with different varieties to find your favorite.
Here are a few popular carrot varieties to consider:
* Nantes: A classic choice with a sweet, mild flavor.
* Danvers: A versatile variety that’s good for both fresh eating and storage.
* Chantenay: A short, stubby variety that’s ideal for growing in containers.
* Parisian: A round, bite-sized variety that’s perfect for snacking.
* Rainbow Blend: A mix of different colored carrots that adds visual appeal to your garden.
Extra Tips for a Bountiful Harvest:
Here are a few extra tips to help you get the most out of your soil bag carrot garden:
* Rotate Your Crops: If you’re growing carrots in the same soil bag year after year, it’s a good idea to rotate your crops. This means planting different types of vegetables in the bag each year to prevent soil depletion and pest buildup.
* Companion Planting: Plant carrots alongside other
Conclusion
So, there you have it! Transforming a simple soil bag into a thriving carrot garden is not only surprisingly easy but also incredibly rewarding. Forget those trips to the grocery store for bland, pre-packaged carrots. With this DIY trick, you’ll be harvesting sweet, crisp, and vibrant carrots right from your own backyard (or balcony!).
Why is this a must-try? Firstly, it’s incredibly space-efficient. Perfect for apartment dwellers or anyone with limited garden space, this method allows you to grow a substantial amount of carrots in a single soil bag. Secondly, it’s cost-effective. Reusing a soil bag minimizes waste and reduces the need for expensive containers. Thirdly, it’s a fantastic way to control the growing environment. You have complete control over the soil composition, watering, and sunlight exposure, leading to healthier and more flavorful carrots.
But the benefits don’t stop there. Growing your own carrots is a deeply satisfying experience. From sowing the tiny seeds to watching the vibrant green shoots emerge, you’ll gain a newfound appreciation for the natural world. And the taste of freshly harvested, homegrown carrots? It’s simply unmatched.
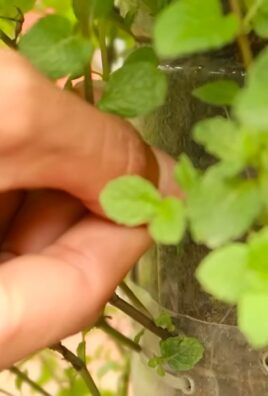
Looking for variations? Consider adding companion plants like radishes or onions to your soil bag. These plants can help deter pests and improve the overall health of your carrot crop. You can also experiment with different carrot varieties, from the classic Nantes to the colorful Rainbow mix. For a continuous harvest, try succession planting, sowing new seeds every few weeks.
Don’t be afraid to get your hands dirty and experiment! This DIY carrot growing method is incredibly forgiving, and even if you make a few mistakes along the way, you’re sure to learn something new. The key is to have fun and enjoy the process.
We’re confident that once you try this method, you’ll be hooked. Imagine the satisfaction of pulling up your own homegrown carrots, knowing that you nurtured them from seed to table. It’s a truly rewarding experience that will transform the way you think about gardening.
So, grab a soil bag, some carrot seeds, and get ready to embark on your own carrot-growing adventure! We can’t wait to hear about your experiences. Share your photos, tips, and tricks in the comments below. Let’s create a community of thriving carrot gardeners! This simple DIY trick is a game-changer for anyone who loves fresh produce and sustainable living. Happy gardening!
Frequently Asked Questions (FAQ)
What kind of soil bag should I use?
Ideally, you should use a soil bag that has already been emptied of its contents. This is a great way to recycle and reduce waste. Look for bags that are made of a durable material, such as woven polypropylene, as these will hold up better to the weight of the soil and the elements. Avoid using bags that have been heavily damaged or torn, as they may leak or break apart. If you don’t have an empty soil bag, you can purchase a similar-sized bag from a garden supply store. Make sure the bag is clean and free of any debris before using it.
What type of soil is best for growing carrots in a soil bag?
Carrots thrive in loose, well-draining soil that is rich in organic matter. A good mix would be equal parts of compost, potting soil, and sand or perlite. The compost provides essential nutrients, the potting soil retains moisture, and the sand or perlite improves drainage. Avoid using heavy clay soil, as it can compact and hinder root development. You can also add a slow-release fertilizer to the soil mix to provide a steady supply of nutrients throughout the growing season. Before planting, make sure to remove any rocks or clumps from the soil to ensure that the carrots can grow straight and unimpeded.
How often should I water my carrots in a soil bag?
Watering frequency will depend on the weather conditions and the type of soil you are using. Generally, you should water your carrots when the top inch of soil feels dry to the touch. Water deeply and evenly, ensuring that the entire soil bag is moistened. Avoid overwatering, as this can lead to root rot. During hot, dry weather, you may need to water more frequently. Check the moisture level of the soil regularly and adjust your watering schedule accordingly. A good rule of thumb is to water in the morning to allow the foliage to dry before nightfall, which can help prevent fungal diseases.
How much sunlight do carrots need in a soil bag?
Carrots need at least six hours of sunlight per day to thrive. Choose a location for your soil bag that receives plenty of direct sunlight. If you live in a hot climate, you may need to provide some afternoon shade to prevent the soil from overheating. You can also use a shade cloth to protect the carrots from intense sunlight. If you are growing carrots indoors, you will need to supplement with artificial light. Use grow lights that provide a full spectrum of light to ensure that the carrots receive the necessary energy for growth.
How long does it take for carrots to grow in a soil bag?
The time it takes for carrots to mature will depend on the variety you are growing and the growing conditions. Generally, carrots take between 60 and 80 days to reach maturity. Check the seed packet for specific information on the variety you are growing. You can start harvesting carrots when they reach the desired size. To harvest, gently loosen the soil around the carrot and pull it straight up. If the soil is dry, water it before harvesting to make it easier to pull the carrots.
What are some common pests and diseases that affect carrots in a soil bag?
Some common pests that affect carrots include carrot rust flies, aphids, and nematodes. To prevent pest infestations, practice good garden hygiene, such as removing weeds and debris from around the soil bag. You can also use insecticidal soap or neem oil to control pests. Common diseases that affect carrots include leaf blight and root rot. To prevent diseases, ensure that the soil is well-draining and avoid overwatering. You can also use a fungicide to control fungal diseases.
Can I grow other vegetables in a soil bag besides carrots?
Yes, you can grow other vegetables in a soil bag, but it’s important to choose plants that have similar growing requirements. Good companion plants for carrots include radishes, onions, lettuce, and spinach. Avoid planting carrots near fennel or dill, as these plants can inhibit their growth. When planting multiple vegetables in a soil bag, make sure to provide enough space for each plant to grow. You may also need to adjust the watering and fertilization schedule to meet the needs of all the plants.
How do I store carrots after harvesting them from the soil bag?
To store carrots after harvesting, remove any excess soil and trim the tops, leaving about an inch of green. Store the carrots in a cool, dark, and humid place, such as a refrigerator or root cellar. You can also store carrots in a plastic bag or container to prevent them from drying out. Carrots can be stored for several weeks or even months if stored properly. Avoid storing carrots near apples or pears, as these fruits release ethylene gas, which can cause the carrots to become bitter.
Can I reuse the soil from the soil bag for future plantings?
Yes, you can reuse the soil from the soil bag, but it’s important to replenish the nutrients that have been depleted by the previous crop. You can amend the soil with compost, manure, or other organic matter. You may also need to add fertilizer to provide a boost of nutrients. Before reusing the soil, make sure to remove any roots, weeds, or debris. You can also sterilize the soil by baking it in the oven or microwaving it to kill any pests or diseases.
What if my carrots are forked or misshapen?
Forked or misshapen carrots are often caused by compacted soil or rocks in the soil. The roots struggle to grow through the dense soil and split or bend around obstacles. To prevent this, ensure that your soil is loose, well-draining, and free of rocks or clumps. You can also add sand or perlite to improve drainage and aeration. Another possible cause is overcrowding. Make sure to thin your carrot seedlings to provide enough space for each plant to grow.
Leave a Comment