
Soil bags for corn growing – ever thought about ditching the traditional garden plot and embracing a super simple, space-saving way to grow your own delicious corn? I’m here to tell you, it’s totally possible, and honestly, kind of revolutionary! For centuries, corn has been a staple crop, deeply woven into the cultures of the Americas, providing sustenance and playing a vital role in traditions. But let’s face it, not everyone has acres of land to dedicate to a sprawling cornfield. That’s where this DIY trick comes in!
Imagine sinking your teeth into sweet, juicy corn on the cob that you grew yourself, even if you only have a small balcony or patio. Using soil bags for corn growing is a game-changer for urban gardeners, apartment dwellers, or anyone looking for an easy and efficient way to cultivate this amazing grain. This method not only saves space but also allows for better control over soil quality and drainage, leading to healthier, more productive plants. Plus, it’s a fantastic way to recycle those old soil bags! So, ditch the dirt-filled mess and get ready to learn how to create your own mini cornfield with this simple, step-by-step guide. You’ll be amazed at how easy it is to grow your own corn using soil bags!
DIY Maissack-Garten: Dein eigener Maisanbau im Sack!
Hey Leute! Habt ihr auch keinen Garten, aber trotzdem Lust auf frischen, selbst angebauten Mais? Kein Problem! Ich zeige euch, wie ihr mit einfachen Mitteln und ein paar alten Säcken euren eigenen Maissack-Garten anlegen könnt. Das ist nicht nur super platzsparend, sondern auch ein echter Hingucker! Lasst uns loslegen!
Was du brauchst:
* Säcke: Stabile, gewebte Säcke aus Jute, Polypropylen oder ähnlichem Material. Alte Futtersäcke, Kartoffelsäcke oder sogar Reissäcke eignen sich perfekt. Achte darauf, dass sie sauber und unbeschädigt sind. Die Größe sollte mindestens 50 Liter Fassungsvermögen haben, besser noch 70-100 Liter.
* Erde: Hochwertige Pflanzerde ist das A und O. Du kannst entweder fertige Blumenerde kaufen oder dir eine Mischung aus Gartenerde, Kompost und Sand selbst zusammenstellen.
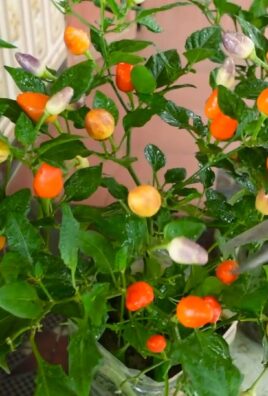
* Maiskörner: Wähle eine Maissorte, die für den Anbau im Topf geeignet ist. Zwergmaissorten oder spezielle Topfmaissorten sind ideal. Du bekommst sie im Gartenfachhandel oder online.
* Dünger: Langzeitdünger oder organischer Dünger wie Hornspäne oder Kompost sorgen für eine optimale Nährstoffversorgung.
* Wasser: Klares Wasser zum Gießen, am besten Regenwasser.
* Werkzeug: Schaufel, Gartenschere, eventuell ein Messer oder eine Schere zum Zuschneiden der Säcke.
* Drainagematerial: Kies, Blähton oder Tonscherben für eine gute Drainage am Boden der Säcke.
* Optional: Pflanzstäbe oder Bambusstäbe zur Stabilisierung der Maispflanzen, besonders bei höheren Sorten.
Schritt-für-Schritt-Anleitung:
1. Vorbereitung der Säcke:
1. Reinigung: Falls du gebrauchte Säcke verwendest, reinige sie gründlich mit Wasser und eventuell etwas Seife. Achte darauf, dass keine Rückstände von vorherigen Inhalten vorhanden sind.
2. Drainagelöcher: Schneide oder stich mehrere kleine Löcher (ca. 1 cm Durchmesser) in den Boden der Säcke. Diese Löcher sind wichtig, damit überschüssiges Wasser ablaufen kann und Staunässe vermieden wird. Staunässe kann zu Wurzelfäule führen und deine Maispflanzen schädigen.
3. Umschlagen (optional): Wenn die Säcke sehr hoch sind, kannst du den oberen Rand einmal oder zweimal umschlagen. Das stabilisiert die Säcke und erleichtert das Befüllen.
2. Befüllen der Säcke:
1. Drainageschicht: Fülle den Boden der Säcke mit einer Schicht Drainagematerial (Kies, Blähton oder Tonscherben). Diese Schicht sollte etwa 5-10 cm hoch sein. Die Drainageschicht sorgt dafür, dass das Wasser gut abfließen kann und die Wurzeln nicht im Wasser stehen.
2. Erde einfüllen: Fülle die Säcke nun mit der vorbereiteten Erde. Lass oben einen Rand von etwa 10-15 cm frei. Die Erde sollte locker und luftig sein, damit die Wurzeln gut wachsen können.
3. Dünger hinzufügen: Mische den Langzeitdünger oder den organischen Dünger (Hornspäne, Kompost) unter die oberste Erdschicht. Achte auf die Dosierungsanleitung des Herstellers. Der Dünger versorgt die Maispflanzen mit den notwendigen Nährstoffen für ein gesundes Wachstum.
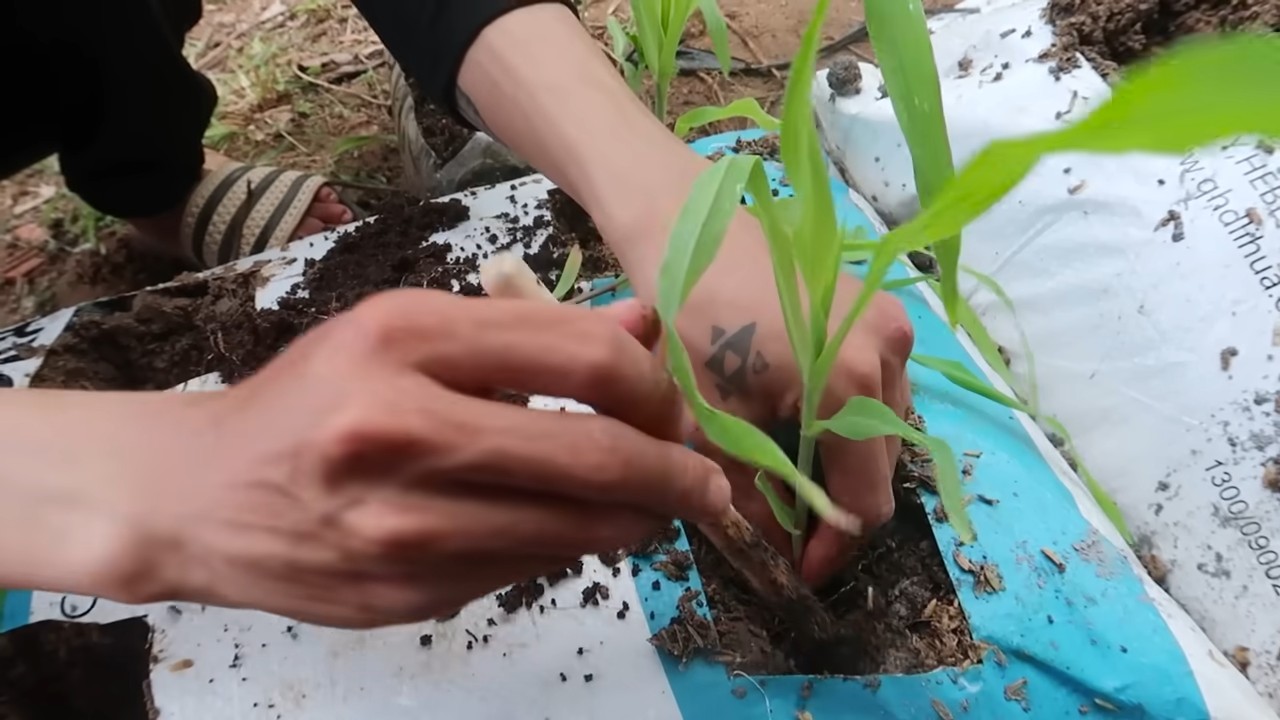
3. Aussaat der Maiskörner:
1. Aussaatzeitpunkt: Der beste Zeitpunkt für die Aussaat ist nach den Eisheiligen (Mitte Mai), wenn keine Frostgefahr mehr besteht. Mais ist sehr frostempfindlich.
2. Aussaattiefe: Drücke mit dem Finger kleine Mulden in die Erde (ca. 2-3 cm tief). Lege in jede Mulde 2-3 Maiskörner. Das erhöht die Wahrscheinlichkeit, dass mindestens ein Korn keimt.
3. Abdecken: Bedecke die Maiskörner mit Erde und drücke sie leicht an.
4. Gießen: Gieße die Erde vorsichtig an, sodass sie gut durchfeuchtet ist. Achte darauf, dass die Körner nicht weggespült werden.
4. Pflege der Maissack-Garten:
1. Standort: Stelle die Säcke an einen sonnigen und warmen Standort. Mais braucht viel Sonne, um gut zu wachsen. Ein windgeschützter Platz ist ideal, um die Pflanzen vor dem Umknicken zu schützen.
2. Gießen: Gieße die Maispflanzen regelmäßig, besonders während der Wachstumsphase und bei heißem Wetter. Die Erde sollte immer leicht feucht sein, aber nicht nass. Vermeide Staunässe.
3. Düngen: Dünge die Maispflanzen regelmäßig nach, etwa alle 2-3 Wochen. Verwende dafür einen Flüssigdünger oder streue etwas Langzeitdünger um die Pflanzen.
4. Ausdünnen: Sobald die Maispflanzen etwa 10-15 cm hoch sind, dünne sie aus. Entferne die schwächsten Pflanzen, sodass nur die stärkste Pflanze pro Stelle übrig bleibt.
5. Stabilisieren: Bei höheren Maissorten kann es notwendig sein, die Pflanzen mit Pflanzstäben oder Bambusstäben zu stabilisieren. Stecke die Stäbe in die Erde und binde die Pflanzen vorsichtig daran fest.
6. Schutz vor Schädlingen: Achte auf Schädlinge wie Schnecken oder Blattläuse. Bei Bedarf kannst du biologische Schädlingsbekämpfungsmittel einsetzen.
5. Ernte:
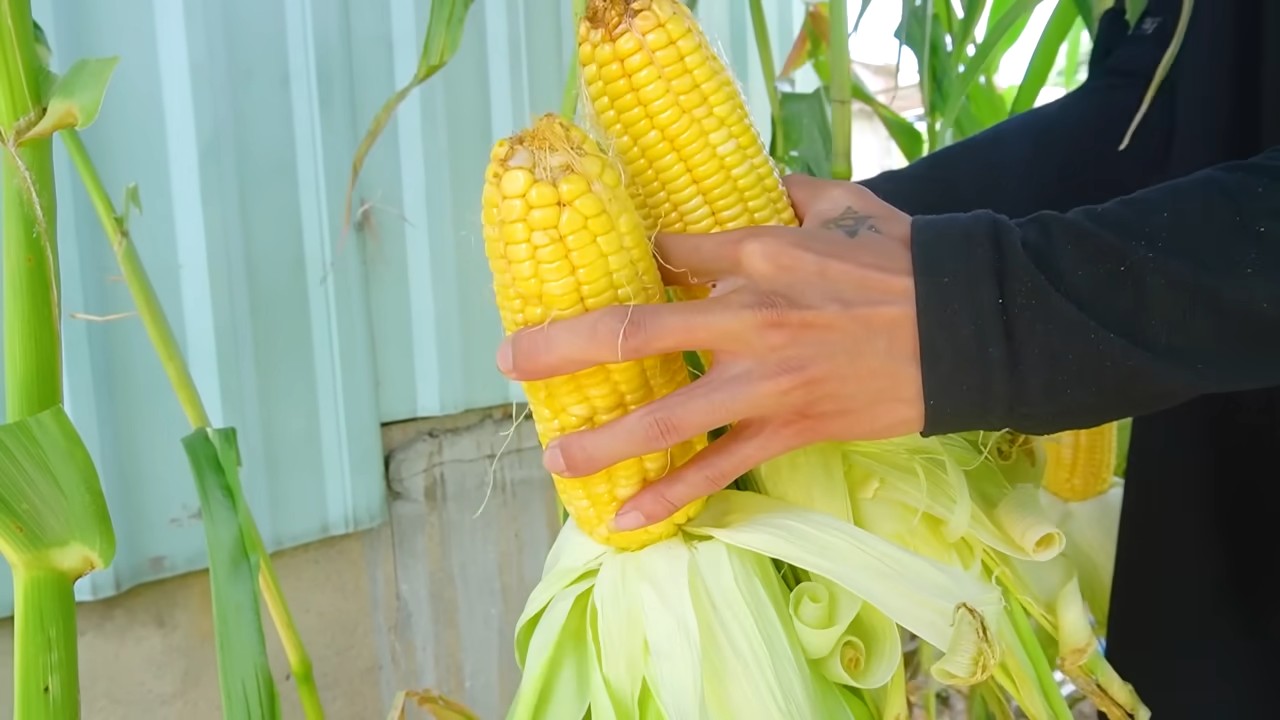
1. Erntezeitpunkt: Die Maiskolben sind reif, wenn die Fäden am Ende der Kolben braun und trocken sind. Drücke leicht auf die Kolben. Wenn sie sich prall anfühlen und Milchsaft austritt, sind sie reif.
2. Ernten: Breche die Maiskolben vorsichtig von den Pflanzen ab.
3. Verarbeitung: Du kannst die Maiskolben sofort frisch essen, grillen, kochen oder einfrieren.
Zusätzliche Tipps und Tricks:
* Sortenwahl: Informiere dich vor dem Kauf über die verschiedenen Maissorten und wähle eine Sorte, die für den Anbau im Topf geeignet ist. Zwergmaissorten sind besonders empfehlenswert.
* Mischkultur: Du kannst die Säcke auch mit anderen Pflanzen bepflanzen, die gut zu Mais passen. Ringelblumen oder Tagetes halten Schädlinge fern und verbessern die Bodenqualität.
* Bewässerungssystem: Wenn du wenig Zeit hast, kannst du ein automatisches Bewässerungssystem installieren. Das spart Zeit und sorgt für eine gleichmäßige Bewässerung.
* Winterfest machen: Die Säcke sind in der Regel nicht winterfest. Entleere die Säcke im Herbst und lagere sie trocken. Die Erde kannst du im Garten verteilen oder kompostieren.
* Upcycling: Verwende alte Säcke, um Ressourcen zu schonen und Müll zu vermeiden. Das ist gut für die Umwelt und spart Geld.
* Dekoration: Gestalte deine Maissack-Garten individuell. Bemalte die Säcke mit bunten Farben oder beklebe sie mit Motiven. Das macht deinen Garten zu einem echten Hingucker.
* Mehrere Säcke: Pflanze mehrere Säcke mit Mais, um eine größere Ernte zu erzielen. Du kannst die Säcke in Gruppen aufstellen oder eine kleine Maisreihe anlegen.
* Beobachtung: Beobachte deine Maispflanzen regelmäßig, um Probleme frühzeitig zu erkennen und zu beheben. Achte auf Schädlinge, Krankheiten oder Nährstoffmangel.
Häufige Probleme und Lösungen:
* Gelbe Blätter: Gelbe Blätter können auf Nährstoffmangel hindeuten. Dünge die Pflanzen mit einem stickstoffhaltigen Dünger.
* Schädlinge: Bekämpfe Schädlinge wie Schnecken oder Blattläuse mit biologischen Schädlingsbekämpfungsmitteln.
* Umknicken: Stabilisiere die Pflanzen mit Pflanzstäben oder Bambusstäben.
* Keine Kolbenbildung: Stelle sicher, dass die Pflanzen genügend Sonne und Nährstoffe bekommen.
* Staunässe: Achte auf eine gute Drainage und
Conclusion
So, there you have it! Creating your own soil bags for corn growing isn’t just a cost-effective alternative to store-bought options; it’s a pathway to a more personalized and ultimately, more successful harvest. We’ve walked through the simple steps, highlighted the benefits, and hopefully, inspired you to ditch the pre-packaged and embrace the DIY spirit.
Why is this a must-try? Because it puts you in complete control. You dictate the soil composition, ensuring your corn receives the precise nutrients it craves. You choose the bag size, perfectly tailoring it to your available space and the specific variety of corn you’re planting. And, let’s be honest, there’s a certain satisfaction that comes from nurturing life from the ground up, literally.
But the beauty of this DIY approach lies in its adaptability. Feel free to experiment!
* For a richer soil mix: Incorporate composted manure or worm castings for an extra boost of organic matter.
* For improved drainage: Add more perlite or coarse sand, especially if you live in an area with heavy rainfall.
* For a sustainable twist: Use burlap sacks or repurposed feed bags instead of plastic, contributing to a more eco-friendly garden.
* For vertical gardening: Create taller, narrower bags and arrange them against a wall or fence for a stunning and space-saving corn display.
Don’t be afraid to get your hands dirty and tailor this method to your unique needs and preferences. The possibilities are endless!
We genuinely believe that making your own soil bags for corn growing is a game-changer for any gardener, whether you’re a seasoned pro or just starting out. It’s empowering, economical, and environmentally conscious.
Now, it’s your turn! We urge you to give this DIY trick a try. Plant those corn seeds, nurture those seedlings, and watch your garden flourish. And most importantly, share your experience with us! We’d love to hear about your successes, your challenges, and any variations you’ve discovered along the way. Post pictures of your thriving corn plants, share your soil mix recipes, and let’s build a community of DIY corn-growing enthusiasts. Your insights could inspire others to take the plunge and experience the joy of growing their own food. Let’s cultivate a greener, more sustainable future, one soil bag at a time!
Frequently Asked Questions (FAQ)
What type of soil is best for growing corn in soil bags?
The ideal soil mix for corn in soil bags is a well-draining, nutrient-rich blend. A good starting point is a combination of equal parts topsoil, compost, and either peat moss or coco coir. Topsoil provides structure, compost adds essential nutrients and improves water retention, and peat moss or coco coir helps with aeration and drainage. You can also incorporate perlite or vermiculite to further enhance drainage, especially if you live in an area with heavy clay soil. Remember that corn is a heavy feeder, so ensuring your soil is rich in nitrogen, phosphorus, and potassium is crucial for healthy growth and a bountiful harvest. Consider adding a slow-release fertilizer or amending the soil with bone meal and blood meal to provide these essential nutrients.
How big should my soil bags be for growing corn?
The size of your soil bags depends on the variety of corn you’re growing. Generally, a bag that is at least 12 inches in diameter and 18 inches deep is recommended for most standard corn varieties. This provides ample space for the roots to develop and access the necessary nutrients and water. For larger varieties, you may want to increase the size of the bag accordingly. Remember that the larger the bag, the more soil it will require, so factor that into your planning. Also, consider the weight of the filled bags and ensure you have a sturdy surface to place them on.
How often should I water corn grown in soil bags?
Watering frequency depends on several factors, including the weather, the size of the bag, and the type of soil mix you’re using. Generally, corn grown in soil bags needs to be watered more frequently than corn grown directly in the ground, as the soil in bags tends to dry out faster. Check the soil moisture regularly by sticking your finger a few inches into the soil. If the soil feels dry to the touch, it’s time to water. Water deeply until water drains out of the bottom of the bag. Avoid overwatering, as this can lead to root rot. During hot, dry weather, you may need to water daily, while during cooler, wetter periods, you may only need to water every few days.
Can I reuse soil bags for growing corn?
Yes, you can reuse soil bags, but it’s important to take certain precautions. First, thoroughly clean the bags to remove any debris or leftover plant material. This will help prevent the spread of diseases or pests. Second, amend the soil with fresh compost and fertilizer to replenish the nutrients that were depleted during the previous growing season. Over time, the soil structure can also degrade, so you may need to add some fresh topsoil or peat moss to improve drainage and aeration. If the bags are made of plastic, inspect them for any tears or damage and repair them as needed. Burlap bags may decompose over time, so you may need to replace them more frequently.
What are the best fertilizers to use for corn grown in soil bags?
Corn is a heavy feeder and requires a balanced supply of nitrogen, phosphorus, and potassium. A slow-release fertilizer with an NPK ratio of 10-10-10 or 14-14-14 is a good option for providing a steady supply of nutrients throughout the growing season. You can also supplement with organic fertilizers such as composted manure, bone meal, and blood meal. Bone meal is rich in phosphorus, which promotes strong root development, while blood meal is a good source of nitrogen, which is essential for leafy growth. Composted manure provides a wide range of nutrients and improves soil structure. Avoid using excessive amounts of nitrogen fertilizer, as this can lead to excessive vegetative growth at the expense of ear development.
How do I prevent pests and diseases in corn grown in soil bags?
Prevention is key when it comes to pests and diseases. Start by using healthy, disease-free seeds. Choose corn varieties that are resistant to common diseases in your area. Ensure good air circulation around the plants by spacing the bags appropriately. Regularly inspect the plants for any signs of pests or diseases. Common pests that affect corn include corn earworms, aphids, and spider mites. Diseases include corn smut, leaf blight, and rust. If you detect any pests or diseases, take action promptly. You can use organic pesticides such as neem oil or insecticidal soap to control pests. For diseases, remove and destroy any infected leaves or plants. Ensure proper drainage to prevent fungal diseases. Crop rotation can also help prevent the buildup of soilborne diseases.
Can I grow different varieties of corn in soil bags?
Yes, you can grow different varieties of corn in soil bags. However, it’s important to consider the pollination requirements of each variety. If you’re growing different varieties of sweet corn, they may cross-pollinate, resulting in kernels that are not as sweet. To prevent cross-pollination, you can either grow the varieties far apart from each other or plant them at different times so that they don’t flower at the same time. You can also hand-pollinate the corn to ensure that you get the desired results. When growing different varieties, make sure to label the bags clearly so you can keep track of which variety is growing in each bag.
What are the advantages of using soil bags for growing corn compared to traditional gardening?
Using soil bags offers several advantages over traditional gardening. Soil bags allow you to grow corn in areas where the soil is poor or non-existent, such as on patios, balconies, or decks. They also provide better drainage and aeration than heavy clay soil, which can improve root growth and prevent root rot. Soil bags are portable, so you can move them around to take advantage of sunlight or protect them from frost. They also make it easier to control weeds and pests. Additionally, soil bags can warm up faster in the spring than the ground, allowing you to start your corn earlier in the season.
Leave a Comment