
Sponge Cleaning Hacks: Are you tired of your kitchen sponge smelling funky and looking like it’s been through a war zone? I know I am! We all rely on these little absorbent wonders to keep our homes clean, but let’s be honest, they can quickly become breeding grounds for bacteria and grime. But fear not, my fellow cleaning enthusiasts! This isn’t just another article about tossing your sponge in the microwave (although, we’ll touch on that!). I’m here to share some seriously effective and surprisingly simple DIY sponge cleaning hacks that will not only extend the life of your sponges but also keep your home sparkling.
Sponges have been around in various forms for centuries, from natural sea sponges used by the ancient Greeks for bathing to the synthetic versions we know and love today. While their purpose has remained consistent – absorbing and cleaning – our understanding of how to properly care for them has evolved. In today’s busy world, who has time to constantly replace sponges? That’s where these sponge cleaning hacks come in. They’re designed to save you time, money, and the frustration of dealing with a perpetually dirty sponge. So, grab your rubber gloves, and let’s dive into the world of sponge sanitation!

DIY Sponge Cleaning Hacks: Extend the Life of Your Kitchen Companion!
Hey there, fellow DIY enthusiasts! Let’s face it, sponges are the unsung heroes of our kitchens. They tackle everything from greasy pans to sticky countertops. But, they also tend to get pretty gross, pretty quickly. Instead of constantly tossing them out, let’s explore some awesome DIY cleaning hacks to keep your sponges fresh, sanitized, and ready for action! I’m going to share my favorite methods for cleaning and sanitizing sponges, extending their lifespan, and even repurposing them when they’re past their prime.
Why Clean Your Sponges?
Before we dive in, let’s quickly chat about why cleaning your sponges is so important. Sponges are porous, which means they’re basically a breeding ground for bacteria, mold, and mildew. Yuck! Using a dirty sponge can actually spread germs around your kitchen instead of cleaning it. Regular cleaning not only keeps your kitchen healthier but also saves you money by extending the life of your sponges.
Hack #1: The Microwave Method (Quick & Easy)
This is my go-to method when I need a quick and easy way to sanitize my sponges. It’s super effective at killing bacteria, but make sure your sponge doesn’t have any metal on it!
What You’ll Need:
* Your dirty sponge
* Microwave-safe bowl
* Water
Step-by-Step Instructions:
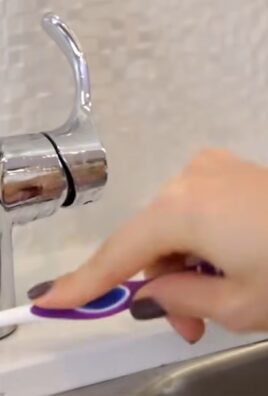
1. Rinse the Sponge: Thoroughly rinse your sponge under running water to remove any large food particles. Squeeze out as much excess water as possible.
2. Soak the Sponge: Place the sponge in the microwave-safe bowl and add enough water to completely submerge it.
3. Microwave It: Microwave the sponge on high for 2 minutes. Important: Keep a close eye on the sponge while it’s microwaving. It might get very hot and steamy.
4. Let it Cool: Carefully remove the bowl from the microwave (it will be hot!). Let the sponge cool down for a few minutes before handling it.
5. Squeeze and Dry: Once the sponge is cool enough to handle, squeeze out any excess water. You can let it air dry or toss it in the dryer on low heat.
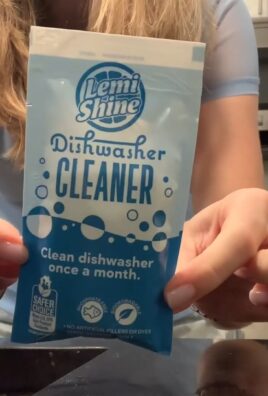
Hack #2: The Dishwasher Delight (Effortless Cleaning)
If you’re already running the dishwasher, this is a super convenient way to clean your sponges. Just toss them in!
What You’ll Need:
* Your dirty sponges
* Dishwasher
Step-by-Step Instructions:
1. Rinse the Sponges: As with the microwave method, start by rinsing your sponges thoroughly to remove any large food particles.
2. Place in Dishwasher: Place the sponges in the top rack of your dishwasher. Make sure they’re not blocking the spray arms.
3. Run a Cycle: Run a normal dishwasher cycle with your regular detergent.
4. Dry Thoroughly: Once the cycle is complete, remove the sponges and let them air dry completely.
Hack #3: The Vinegar Soak (Natural Disinfectant)
Vinegar is a natural disinfectant and deodorizer, making it perfect for cleaning sponges. This method is great for removing stubborn odors and grime.
What You’ll Need:
* Your dirty sponge
* White vinegar
* Bowl or container
Step-by-Step Instructions:
1. Rinse the Sponge: Rinse your sponge thoroughly under running water.
2. Soak in Vinegar: Place the sponge in a bowl or container and pour enough white vinegar over it to completely submerge it.
3. Let it Soak: Let the sponge soak in the vinegar for at least 5 minutes, or even longer for heavily soiled sponges (I sometimes let mine soak overnight!).
4. Rinse Thoroughly: After soaking, rinse the sponge thoroughly under running water until all traces of vinegar are gone.
5. Squeeze and Dry: Squeeze out any excess water and let the sponge air dry.
Hack #4: The Bleach Bath (Heavy-Duty Sanitizing)
For sponges that are particularly dirty or smelly, a bleach bath can be a lifesaver. However, it’s important to use bleach safely and sparingly.
What You’ll Need:
* Your dirty sponge
* Bleach
* Water
* Bowl or container
* Gloves (optional, but recommended)
Step-by-Step Instructions:
1. Rinse the Sponge: Rinse your sponge thoroughly under running water.
2. Prepare Bleach Solution: In a bowl or container, mix 3/4 cup of bleach with one gallon of water. Important: Always add bleach to water, never the other way around.
3. Soak the Sponge: Place the sponge in the bleach solution and let it soak for 5 minutes. Do not soak for longer than 5 minutes, as this can damage the sponge.
4. Rinse Thoroughly: Rinse the sponge *very* thoroughly under running water until all traces of bleach are gone. This is crucial!
5. Squeeze and Dry: Squeeze out any excess water and let the sponge air dry.
Safety Note: When working with bleach, always wear gloves and work in a well-ventilated area. Avoid contact with skin and eyes. Never mix bleach with ammonia or other cleaning products, as this can create dangerous fumes.
Hack #5: The Baking Soda Boost (Odor Removal)
Baking soda is another fantastic natural cleaner and deodorizer. This method is great for removing lingering odors from your sponges.
What You’ll Need:
* Your dirty sponge
* Baking soda
* Water
* Bowl or container
Step-by-Step Instructions:
1. Rinse the Sponge: Rinse your sponge thoroughly under running water.
2. Make a Baking Soda Paste: In a bowl or container, mix baking soda with enough water to form a thick paste.
3. Apply the Paste: Spread the baking soda paste all over the sponge, making sure to get it into all the nooks and crannies.
4. Let it Sit: Let the paste sit on the sponge for at least 15 minutes, or even longer for stubborn odors.
5. Rinse Thoroughly: Rinse the sponge thoroughly under running water until all traces of baking soda are gone.
6. Squeeze and Dry: Squeeze out any excess water and let the sponge air dry.
Extending the Life of Your Sponges: Pro Tips!
Cleaning your sponges is essential, but here are a few extra tips to help them last even longer:
* Rinse After Every Use: This seems obvious, but it’s crucial! Rinse your sponge thoroughly after each use to remove food particles and prevent them from building up.
* Squeeze Out Excess Water: After rinsing, squeeze out as much excess water as possible. This helps prevent the growth of bacteria and mold.
* Store Properly: Store your sponge in a well-ventilated area where it can dry completely. Avoid leaving it in a damp sink or on a wet countertop. I like to use a sponge holder that allows air to circulate around the sponge.
* Rotate Sponges: If you use multiple sponges, rotate them regularly to give each one time to dry out completely.
* Replace Regularly: Even with regular cleaning, sponges will eventually wear out. Replace your sponges every 2-4 weeks, or sooner if they start to smell or look worn.
Repurposing Old Sponges: Don’t Throw Them Away!
Even when your sponges are past their prime for kitchen use, you can still repurpose them for other cleaning tasks around the house. Here are a few ideas:
* Cleaning Bathrooms: Old sponges are great for cleaning bathroom surfaces like sinks, toilets, and showers.
* Washing Cars: Use old sponges to wash your car. Just make sure they’re clean and free of any abrasive materials that could scratch the paint.
* Gardening: Place sponges in the bottom of flower pots to help retain moisture and prevent soil from washing away.
* Craft Projects: Cut sponges into different shapes and use them for painting or other craft projects.
* Packing Material: Use old sponges as packing material to protect fragile items during shipping or moving.
Choosing the Right Sponge: A Quick Guide
Not all sponges are created equal! Here’s a quick guide to help you choose the right sponge for your needs:
* Cellulose Sponges: These are the most common type of sponge. They’re absorbent, affordable, and biodegradable.
* Synthetic Sponges: These sponges are more durable than cellulose sponges and are less likely to harbor bacteria.
* Scrub Sponges:

Conclusion
So, there you have it! These sponge cleaning hacks aren’t just about saving a few bucks; they’re about extending the life of your hardest-working kitchen companion and ensuring a cleaner, healthier home. We’ve explored methods that go beyond a simple rinse, delving into the power of microwave sanitization, the effectiveness of bleach solutions, and the surprising cleaning prowess of your dishwasher. Each technique offers a unique approach to tackling the grime and bacteria that inevitably accumulate within your sponges.
Why is this a must-try? Because a clean sponge is a cornerstone of a clean kitchen. Think about it: you use your sponge to wipe down counters, wash dishes, and clean up spills. If your sponge is harboring bacteria, you’re essentially spreading that bacteria around your kitchen, defeating the purpose of cleaning in the first place. These hacks empower you to break that cycle and maintain a truly hygienic environment.
But don’t stop there! Feel free to experiment with variations. For instance, if you’re sensitive to bleach, try using a vinegar solution instead. While not as potent as bleach, vinegar still possesses antibacterial properties and can help to deodorize your sponges. You could also add a few drops of essential oils, like lemon or tea tree, to your cleaning solution for a fresh, invigorating scent. Just be sure to use essential oils safely and avoid using them on surfaces that come into direct contact with food. Another variation is to use baking soda paste to scrub particularly stubborn stains off your sponges before sanitizing them. This can help to loosen the grime and make the sanitization process more effective.
Ultimately, the best sponge cleaning hack is the one that you’ll consistently use. Find a method that fits your lifestyle and cleaning routine, and stick with it. Consistency is key to keeping your sponges clean and preventing the buildup of harmful bacteria.
We’re confident that these sponge cleaning hacks will revolutionize your kitchen cleaning routine. They’re simple, effective, and environmentally friendly. So, ditch the disposable sponges and embrace these sustainable solutions.
Now, it’s your turn! We encourage you to try these DIY tricks and share your experiences with us. Did you find one method more effective than another? Did you discover any new variations or tips? Let us know in the comments below! We’re eager to hear your feedback and learn from your experiences. Together, we can create a community of clean-kitchen enthusiasts who are committed to keeping their homes healthy and hygienic.
Don’t underestimate the power of a clean sponge. It’s a small change that can make a big difference in the overall cleanliness and hygiene of your kitchen. So, give these hacks a try and see for yourself! You’ll be amazed at how much cleaner and fresher your sponges can be. And remember, a clean sponge is a happy sponge, and a happy sponge is a happy kitchen!
Frequently Asked Questions (FAQ)
How often should I clean my sponges using these hacks?
This depends on how frequently you use your sponges. As a general rule, you should aim to clean your sponges at least every other day, or even daily if you use them heavily. If you notice your sponge developing a foul odor or becoming visibly dirty, it’s definitely time for a cleaning. Regular cleaning will prevent the buildup of bacteria and extend the lifespan of your sponges.
Which of these sponge cleaning hacks is the most effective?
The effectiveness of each method can vary depending on the type and amount of grime on your sponge. However, using a bleach solution is generally considered the most effective for killing bacteria. The microwave method is also quite effective, but it’s crucial to ensure your sponge is thoroughly wet to prevent it from catching fire. The dishwasher method is a convenient option for regular cleaning, but it may not be as effective for heavily soiled sponges. Experiment with different methods to find what works best for you.
Is it safe to microwave a sponge?
Yes, it is generally safe to microwave a sponge, but it’s crucial to follow these precautions:
* Ensure the sponge is thoroughly wet: A dry sponge can easily catch fire in the microwave.
* Microwave for a short period: Start with one minute and increase the time as needed, but never exceed two minutes.
* Monitor the sponge closely: Watch for any signs of smoke or burning.
* Let the sponge cool before handling: The sponge will be very hot after microwaving.
Can I use these sponge cleaning hacks on all types of sponges?
These hacks are generally safe for most types of cellulose sponges. However, avoid using bleach on sponges that contain microfiber, as it can damage the fibers. For natural sea sponges, it’s best to use a gentler cleaning solution, such as vinegar or baking soda, and avoid microwaving them. Always check the manufacturer’s instructions for specific cleaning recommendations.
What if my sponge still smells bad after cleaning it?
If your sponge still smells bad after cleaning it, it may be time to replace it. A persistent odor can indicate that the sponge is heavily contaminated with bacteria and may not be salvageable. You can also try soaking the sponge in a solution of baking soda and water overnight to help neutralize the odor.
Are there any alternatives to using bleach for cleaning sponges?
Yes, there are several alternatives to using bleach, including:
* Vinegar: Soak the sponge in a solution of equal parts vinegar and water for 30 minutes.
* Baking soda: Make a paste of baking soda and water and scrub the sponge thoroughly.
* Hydrogen peroxide: Soak the sponge in a 3% hydrogen peroxide solution for 10 minutes.
* Dish soap: Wash the sponge thoroughly with dish soap and hot water.
While these alternatives may not be as potent as bleach, they can still effectively kill bacteria and deodorize your sponges.
How often should I replace my sponges, even if I’m cleaning them regularly?
Even with regular cleaning, sponges should be replaced every two to three weeks, or sooner if they show signs of wear and tear, such as crumbling or tearing. Over time, sponges can accumulate bacteria and grime that are difficult to remove completely, making them less effective at cleaning and potentially harmful to your health.
Can I use these hacks to clean other cleaning tools, like dishcloths?
Yes, many of these hacks can also be used to clean other cleaning tools, such as dishcloths. Dishcloths can be microwaved, washed in the dishwasher, or soaked in a bleach or vinegar solution. Just be sure to follow the same precautions as you would when cleaning sponges.
What are the environmental benefits of cleaning my sponges instead of replacing them frequently?
Cleaning your sponges instead of replacing them frequently reduces waste and conserves resources. Sponges are typically made from non-biodegradable materials, so throwing them away contributes to landfill waste. By extending the lifespan of your sponges, you can reduce your environmental impact and save money in the long run.
Leave a Comment