
Squash vine garden takeover can feel like a horticultural horror movie! One day, you’re admiring your burgeoning squash plants, envisioning a bountiful harvest of zucchini, pumpkins, or butternut squash. The next, it seems like a green, leafy monster is consuming everything in its path. I’ve been there, battling the relentless spread of squash vines that threatened to engulf my entire vegetable patch.
For centuries, squash has been a staple crop in many cultures, providing sustenance and playing a vital role in traditional diets. From the Three Sisters planting method of Indigenous American agriculture to the vibrant squash dishes of Mediterranean cuisine, this versatile vegetable has deep roots. But let’s be honest, sometimes those roots (and vines!) can get a little *too* enthusiastic.
That’s why I’m sharing my tried-and-true DIY tricks to tame the squash vine garden takeover and reclaim your precious garden space. We’ll explore simple, effective methods to manage those sprawling vines, encourage healthy growth, and maximize your squash yield without sacrificing your other plants. Because let’s face it, nobody wants their tomatoes strangled by a rogue squash tendril! So, grab your gardening gloves, and let’s get started on taking back control of your garden!

Kürbisranken-Gartenübernahme: So zähmst du das Monster!
Okay, Leute, lasst uns ehrlich sein: Kürbisse sind fantastisch. Kürbiskuchen, Kürbissuppe, geschnitzte Kürbisse – die Liste ist endlos. Aber diese Kürbispflanzen? Die sind wie kleine, grüne Monster, die deinen Garten übernehmen wollen! Ich spreche hier aus Erfahrung. Ich habe schon einige Kürbisse angebaut, und jedes Mal denke ich: “Dieses Mal habe ich es im Griff!” Und jedes Mal werde ich von einem Dschungel aus Ranken überrascht. Aber keine Angst, ich habe gelernt, wie man diese grünen Tyrannen zähmt. Hier ist mein Leitfaden, wie du deine Kürbisranken im Zaum hältst und trotzdem eine reiche Ernte einfährst.
Warum Kürbisranken so wild wachsen
Bevor wir uns in die Zähmung stürzen, lasst uns kurz verstehen, *warum* Kürbisranken so ausufernd sind. Es ist eigentlich ganz einfach:
* Sie suchen nach Nährstoffen: Kürbisse sind hungrige Pflanzen. Sie brauchen viele Nährstoffe, um diese riesigen Früchte zu produzieren. Die Ranken breiten sich aus, um so viele Nährstoffe wie möglich aus dem Boden zu ziehen.
* Sie suchen nach Licht: Kürbisse lieben die Sonne. Die Ranken strecken sich dem Licht entgegen und versuchen, andere Pflanzen zu überwachsen, um die volle Sonneneinstrahlung zu erhalten.
* Sie sind darauf ausgelegt, sich auszubreiten: Kürbisse sind von Natur aus Kletterpflanzen. In der Wildnis würden sie sich an Bäumen und Sträuchern hochranken. In unserem Garten versuchen sie, alles zu erobern, was ihnen in den Weg kommt.
Die Strategie: Vorbeugung ist besser als Nachsorge
Der beste Weg, eine Kürbisranken-Gartenübernahme zu verhindern, ist, von Anfang an strategisch vorzugehen. Hier sind einige vorbeugende Maßnahmen, die ich empfehle:
* Wähle die richtige Sorte: Einige Kürbissorten sind kompakter als andere. Wenn du wenig Platz hast, wähle eine Buschsorte oder eine Sorte, die für den Anbau in Containern geeignet ist.
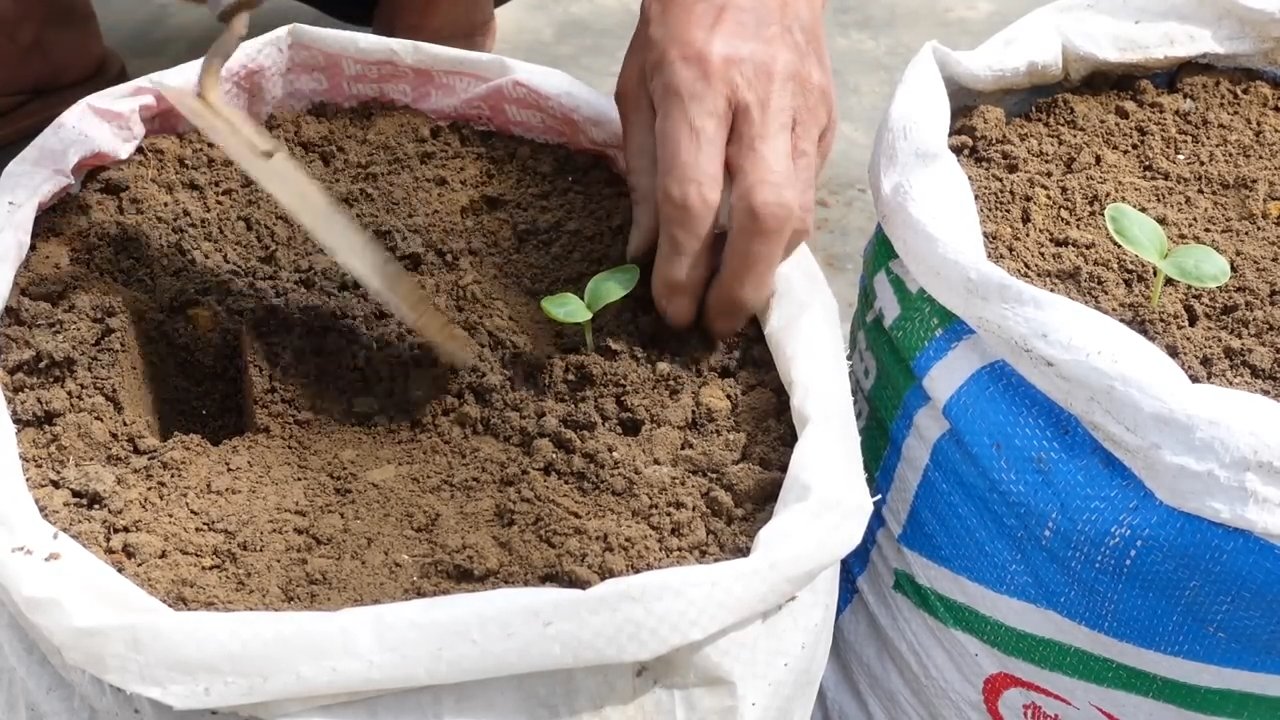
* Pflanze mit Bedacht: Gib deinen Kürbispflanzen genügend Platz. Lies die Anweisungen auf dem Saatguttütchen sorgfältig durch und halte dich an die empfohlenen Abstände. Ich weiß, es ist verlockend, alles auf einmal zu pflanzen, aber glaube mir, du wirst es später bereuen.
* Verwende Rankhilfen: Wenn du eine Klettersorte anbaust, gib ihr etwas zum Klettern. Ein stabiles Rankgitter oder ein Zaun kann helfen, die Ranken in Schach zu halten und den Platz zu maximieren.
* Regelmäßiges Beschneiden: Das ist der Schlüssel! Regelmäßiges Beschneiden hilft, das Wachstum der Ranken zu kontrollieren und die Energie der Pflanze auf die Fruchtproduktion zu lenken.
Die Zähmung: Schritt-für-Schritt-Anleitung
Okay, jetzt geht es ans Eingemachte. Hier ist, wie du deine Kürbisranken zähmst, auch wenn sie bereits außer Kontrolle geraten sind.
Benötigte Materialien:
* Gartenschere oder Messer: Achte darauf, dass sie scharf und sauber sind, um Krankheiten vorzubeugen.
* Gartenhandschuhe: Kürbisranken können stachelig sein, also schütze deine Hände.
* Kompostbehälter oder Müllsack: Für die abgeschnittenen Ranken.
* Pflanzenbinder oder Schnur: Um Ranken an Rankhilfen zu befestigen.
* Geduld: Das ist ein Marathon, kein Sprint!
Schritt 1: Inspektion und Planung
1. Begutachte die Lage: Nimm dir Zeit, um deine Kürbispflanzen genau zu betrachten. Welche Ranken sind am wildesten? Welche nehmen den meisten Platz ein? Welche blockieren das Sonnenlicht für andere Pflanzen?
2. Identifiziere die Hauptranken: Die Hauptranken sind die dicksten und längsten Ranken, die aus der Basis der Pflanze wachsen. Diese sind wichtig für die Nährstoffversorgung.
3. Suche nach Seitentrieben: Seitentriebe sind kleinere Ranken, die von den Hauptranken abzweigen. Diese sind oft die Übeltäter, die sich überallhin ausbreiten.
4. Plane deinen Angriff: Entscheide, welche Ranken du beschneiden willst und welche du behalten willst. Konzentriere dich darauf, Seitentriebe zu entfernen, die unnötig Platz einnehmen oder andere Pflanzen behindern.
Schritt 2: Das Beschneiden
1. Schneide Seitentriebe ab: Verwende deine Gartenschere oder dein Messer, um Seitentriebe direkt an der Stelle abzuschneiden, wo sie von der Hauptranke abzweigen. Achte darauf, nicht in die Hauptranke zu schneiden.
2. Entferne beschädigte oder kranke Blätter: Entferne alle Blätter, die gelb, braun oder von Krankheiten befallen sind. Dies hilft, die Ausbreitung von Krankheiten zu verhindern und die Luftzirkulation zu verbessern.
3. Kürze lange Ranken: Wenn eine Hauptranke zu lang wird und sich nicht mehr kontrollieren lässt, kannst du sie kürzen. Schneide sie an einer Stelle ab, wo ein Blatt oder ein Seitentrieb abzweigt.
4. Sei nicht zu radikal: Beschneide nicht mehr als ein Drittel der Pflanze auf einmal. Zu viel Beschneiden kann die Pflanze stressen und die Fruchtproduktion beeinträchtigen.
Schritt 3: Rankhilfen nutzen
1. Befestige Ranken an Rankhilfen: Wenn du Rankhilfen verwendest, befestige die Hauptranken mit Pflanzenbindern oder Schnur daran. Achte darauf, die Ranken nicht zu fest zu binden, da dies das Wachstum behindern kann.
2. Leite Ranken um: Wenn Ranken in unerwünschte Richtungen wachsen, versuche, sie vorsichtig umzuleiten. Du kannst sie an Rankhilfen befestigen oder sie einfach in die gewünschte Richtung lenken.
3. Kontrolliere das Wachstum: Überprüfe regelmäßig, ob Ranken aus der Reihe tanzen, und beschneide sie bei Bedarf.
Schritt 4: Pflege und Beobachtung
1. Gieße regelmäßig: Kürbisse brauchen viel Wasser, besonders während der Fruchtbildung. Gieße tief und regelmäßig, besonders bei trockenem Wetter.
2. Dünge regelmäßig: Kürbisse sind hungrige Pflanzen. Dünge sie regelmäßig mit einem ausgewogenen Dünger, um eine reiche Ernte zu gewährleisten.
3. Beobachte auf Schädlinge und Krankheiten: Überprüfe deine Kürbispflanzen regelmäßig auf Schädlinge und Krankheiten. Je früher du Probleme erkennst, desto einfacher ist es, sie zu behandeln.
4. Wiederhole den Beschneidungsprozess: Kürbisranken wachsen schnell, also musst du den Beschneidungsprozess regelmäßig wiederholen. Überprüfe deine Pflanzen mindestens einmal pro Woche und beschneide sie bei Bedarf.
Zusätzliche Tipps und Tricks
* Mulchen: Mulchen um deine Kürbispflanzen hilft, Feuchtigkeit zu speichern, Unkraut zu unterdrücken und den Boden kühl zu halten.
* Drehe die Früchte: Wenn deine Kürbisse auf dem Boden liegen, drehe sie regelmäßig, um sicherzustellen, dass sie gleichmäßig reifen.
* Ernte rechtzeitig: Ernte deine Kürbisse, wenn sie reif sind. Dies signalisiert der Pflanze, dass sie keine Energie mehr in die Fruchtproduktion stecken muss und sich stattdessen auf das Wachstum konzentrieren kann.
* Kompostiere die abgeschnittenen Ranken: Die abgeschnittenen Ranken können kompostiert werden und als Dünger für deine anderen Pflanzen verwendet werden.
Häufige Fehler, die du vermeiden solltest
* Zu spätes Beschneiden: Warte nicht, bis deine Kürbisranken deinen gesamten Garten übernommen haben, bevor du mit dem Beschneiden beginnst. Je früher du anfängst, desto einfacher ist es, das Wachstum zu kontrollieren.
* Zu viel Beschneiden auf einmal: Beschneide nicht mehr als ein Drittel der Pflanze auf einmal. Zu viel Beschneiden kann die Pflanze stressen und die Fruchtproduktion beeinträchtigen.
Conclusion
So, there you have it! Taking control of a squash vine garden takeover doesn’t have to be a daunting task. With a little proactive planning, some strategic pruning, and a dash of creative support, you can transform your sprawling squash jungle into a thriving and manageable garden. This DIY approach isn’t just about aesthetics; it’s about maximizing your yield, preventing disease, and ensuring your squash plants get the sunlight and airflow they need to flourish.
Why is this a must-try? Because it empowers you to be the master of your garden’s destiny. Instead of letting your squash vines run rampant, potentially choking out other plants or becoming susceptible to pests and diseases, you’re actively shaping their growth and creating a healthier, more productive environment. Think of it as giving your squash plants a little guidance and structure, allowing them to focus their energy on producing those delicious, bountiful fruits you’re craving.
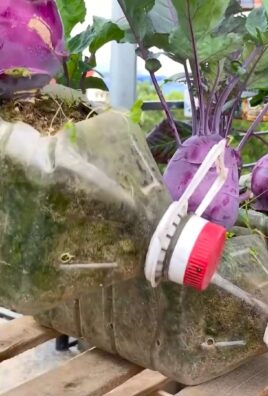
But the beauty of this DIY trick lies in its adaptability. Feel free to experiment with different support structures. Instead of traditional trellises, consider repurposing old ladders, creating A-frame supports from branches, or even using sturdy tomato cages for smaller squash varieties. You can also adjust your pruning strategy based on the specific type of squash you’re growing. Some varieties, like zucchini, benefit from more aggressive pruning to encourage fruit production, while others, like butternut squash, may prefer a more hands-off approach.
And don’t forget about companion planting! Interplanting your squash with beneficial herbs like basil, rosemary, or thyme can help deter pests and attract pollinators, further enhancing the health and productivity of your garden. Marigolds are also excellent companions, known for their ability to repel nematodes and other soil-borne pests.
We encourage you to embrace this DIY approach and reclaim your garden from the squash vine takeover. It’s a rewarding experience that will not only improve the health and yield of your squash plants but also give you a deeper connection to your garden.
Don’t be afraid to get your hands dirty, experiment with different techniques, and find what works best for you and your specific growing conditions. The most important thing is to be observant, patient, and willing to adapt your strategy as needed.
Once you’ve tried this DIY trick, we’d love to hear about your experience! Share your photos, tips, and challenges in the comments below. Let’s create a community of squash-loving gardeners who are passionate about maximizing their yields and creating beautiful, thriving gardens. Your insights could help other gardeners overcome their own squash vine challenges and enjoy the fruits (or rather, vegetables) of their labor. So, go ahead, give it a try, and let us know how it goes! Happy gardening!
Frequently Asked Questions (FAQ)
What if my squash vines are already too overgrown? Is it too late to start pruning and training them?
It’s generally never too late to start managing your squash vines, even if they’re already quite overgrown. However, the earlier you start, the easier it will be. If your vines are significantly overgrown, you might need to be a bit more strategic in your pruning. Start by removing any dead, damaged, or diseased leaves and stems. Then, gradually thin out the vines, focusing on removing non-fruiting stems and those that are crossing or overlapping. Be careful not to remove too much foliage at once, as this can stress the plant. Aim to remove no more than one-third of the plant’s foliage at any given time. After pruning, provide your plants with adequate water and fertilizer to help them recover and encourage new growth.
How do I know which stems to prune? Should I only prune non-fruiting stems?
Identifying which stems to prune can seem tricky, but here’s a general guideline: prioritize pruning stems that are not producing fruit or flowers. These stems are essentially taking up valuable resources without contributing to your harvest. Also, remove any stems that are crossing or overlapping, as this can restrict airflow and create a breeding ground for pests and diseases. If you have stems that are producing fruit but are growing in an undesirable direction (e.g., into a walkway or over other plants), you can carefully prune them back to a point just above a leaf node. This will encourage the plant to redirect its growth in a more favorable direction. Remember to use clean, sharp pruning shears to minimize the risk of disease transmission.
What type of support structure is best for squash vines?
The best type of support structure for your squash vines depends on the variety of squash you’re growing and the space you have available. For smaller squash varieties like zucchini or yellow squash, sturdy tomato cages or small trellises may suffice. For larger vining varieties like butternut squash or pumpkins, you’ll need a more robust support structure, such as a large trellis, A-frame support, or even a repurposed ladder. The key is to choose a support structure that is strong enough to support the weight of the mature vines and fruits. Also, consider the height of the support structure. Vining squash can grow quite tall, so make sure your support structure is tall enough to accommodate their growth.
How often should I water my squash plants after pruning and training them?
After pruning and training your squash plants, it’s important to maintain consistent watering to help them recover and thrive. Water deeply and regularly, especially during hot, dry weather. Aim to water at the base of the plant, avoiding wetting the foliage, as this can increase the risk of fungal diseases. The frequency of watering will depend on your climate, soil type, and the size of your plants. As a general rule, water when the top inch of soil feels dry to the touch. You can also use a moisture meter to get a more accurate reading of the soil moisture level. Mulching around your squash plants can help retain moisture in the soil and reduce the need for frequent watering.
Can I use this DIY trick for other vining plants besides squash?
Absolutely! The principles of pruning and training vining plants can be applied to a wide range of other plants, including cucumbers, melons, tomatoes, and even some types of beans. The specific techniques may vary depending on the plant species, but the underlying goal remains the same: to manage the plant’s growth, improve airflow, and maximize fruit production. For example, you can use similar pruning techniques to train tomato plants to grow vertically on stakes or trellises, or to prune cucumber vines to encourage more fruit production. Just be sure to research the specific needs of each plant species before you start pruning and training them.
What are some common pests and diseases that affect squash vines, and how can I prevent them?
Squash vines are susceptible to a variety of pests and diseases, including squash vine borers, squash bugs, powdery mildew, and downy mildew. To prevent these problems, start by choosing disease-resistant varieties of squash. Practice good garden hygiene by removing any dead or diseased leaves and stems promptly. Rotate your crops each year to prevent the buildup of soil-borne pests and diseases. Use row covers to protect your plants from pests early in the season. Encourage beneficial insects, such as ladybugs and lacewings, which prey on common squash pests. Water at the base of the plant to avoid wetting the foliage, and provide good airflow to prevent fungal diseases. If you do encounter pests or diseases, treat them promptly with appropriate organic or chemical controls.
How do I encourage more female flowers on my squash plants?
Squash plants produce both male and female flowers. Only the female flowers will develop into fruit. To encourage more female flowers, ensure your plants are getting adequate sunlight, water, and nutrients. Avoid over-fertilizing with nitrogen, as this can promote vegetative growth at the expense of flower production. You can also try hand-pollinating your squash flowers to ensure successful fruit set. To do this, use a small paintbrush to transfer pollen from the male flowers to the female flowers. The female flowers have a small immature fruit at the base of the flower, while the male flowers do not. Pollinate in the morning, when the flowers are open and the pollen is most viable.
Leave a Comment