
Start Coconut Trees from Seed: Imagine sipping fresh coconut water harvested from your very own backyard! It sounds like a tropical dream, right? Well, it’s more attainable than you might think. For centuries, coconuts have been a staple in tropical cultures, providing food, drink, and materials for everything from shelter to clothing. Beyond their practical uses, coconuts hold a special place in many traditions, symbolizing prosperity and life.
But you don’t need to live on a tropical island to enjoy the benefits of these amazing trees. I’m here to show you how to start coconut trees from seed, right in your own home or garden! Many people shy away from the idea, thinking it’s too difficult or requires specialized knowledge. But trust me, with a little patience and the right guidance, you can nurture your own coconut palm from a simple seed.
This DIY guide will walk you through each step of the process, from selecting the perfect coconut to providing the ideal growing conditions. Why is this DIY trick so important? Because growing your own coconut tree is not only incredibly rewarding, but it also allows you to connect with nature, learn about plant life cycles, and potentially enjoy fresh coconuts for years to come. Plus, it’s a fantastic conversation starter! So, let’s get started and bring a touch of the tropics to your home!
Growing Your Own Coconut Palm: A DIY Guide From Seed to Sprout
Okay, coconut lovers, gather ’round! Ever dreamed of having your own mini-tropical paradise right in your backyard? Well, you can! Growing a coconut palm from seed isn’t as tricky as you might think. It takes patience, sure, but the reward of watching that little sprout emerge is totally worth it. I’m going to walk you through the whole process, step-by-step, so you can start your coconut-growing adventure today.
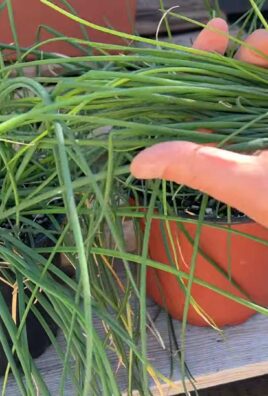
Finding the Perfect Coconut
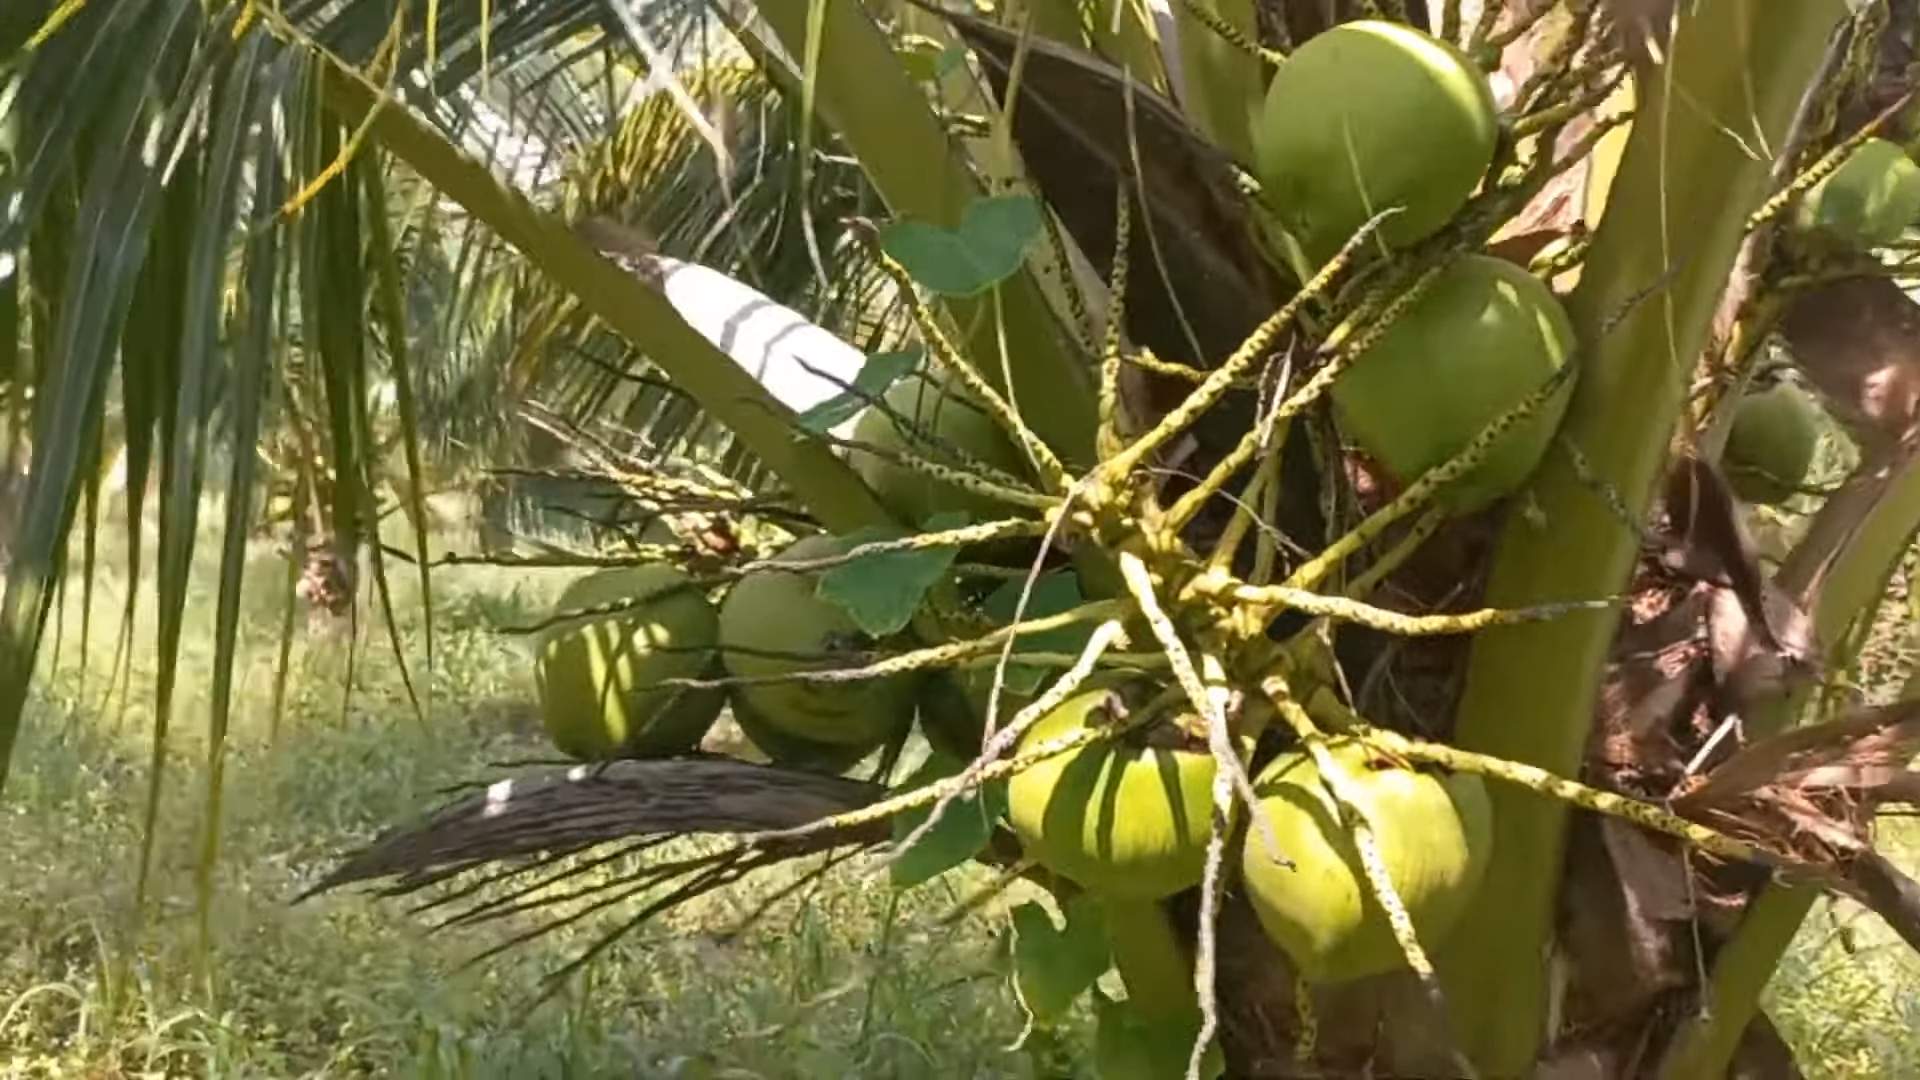
First things first, you need a viable coconut. Not just any coconut from the grocery store will do. We’re looking for a mature, brown coconut that still has its husk intact.
* Look for a mature coconut: The coconut should be brown and feel heavy for its size. Avoid green coconuts, as they are not mature enough to germinate.
* Check for water sloshing inside: Give the coconut a shake. You should hear water sloshing around inside. This indicates that the coconut is still fresh and hasn’t dried out.
* Inspect the eyes: The coconut has three “eyes” at one end. Make sure none of them are damaged or moldy. A healthy coconut will have eyes that are firm and intact.
* Source matters: If possible, get your coconut from a local farmer or a nursery that specializes in tropical plants. They’ll be more likely to have coconuts that are suitable for germination. Grocery store coconuts are often treated to prevent sprouting, which makes them unsuitable for our purposes.
Preparing Your Coconut for Germination
Now that you’ve got your coconut, it’s time to get it ready to sprout! This involves creating the perfect environment for germination.
* Soaking the coconut (Optional but Recommended): Soaking the coconut in water for 2-3 days can help to soften the husk and encourage germination. Change the water daily to prevent bacterial growth. This step isn’t absolutely necessary, but I’ve found it speeds things up a bit.
* Choosing your germination method: There are a few different ways to germinate a coconut. I’ll cover two popular methods: the container method and the bag method. Both work well, so choose the one that best suits your space and resources.
Germination Method 1: The Container Method
This method involves planting the coconut in a container filled with a suitable growing medium.
1. Prepare your container: Choose a large container, at least 12 inches in diameter and 12 inches deep. Make sure it has drainage holes at the bottom. A plastic pot or a large bucket will work perfectly.
2. Choose your growing medium: A well-draining potting mix is essential. I recommend a mix of equal parts coco coir, perlite, and sand. This combination provides good drainage and aeration, which are crucial for coconut germination. You can also use a commercial potting mix specifically designed for palms.
3. Plant the coconut: Place the coconut horizontally in the container, with one of the eyes facing upwards. Bury the coconut about halfway in the growing medium, leaving the top half exposed.
4. Water thoroughly: Water the growing medium until it is evenly moist but not soggy. Avoid overwatering, as this can lead to rot.
5. Provide warmth and humidity: Coconuts need warmth and humidity to germinate. The ideal temperature is between 85-95°F (29-35°C). You can create a humid environment by placing a clear plastic bag over the container, creating a mini-greenhouse effect. Make sure to leave a small opening for ventilation to prevent mold growth.
6. Place in a sunny location: Place the container in a warm, sunny location that receives at least 6-8 hours of sunlight per day. A south-facing window is ideal.
7. Be patient: Germination can take anywhere from 2-6 months, so don’t get discouraged if you don’t see results right away. Keep the growing medium consistently moist and maintain a warm, humid environment.
Germination Method 2: The Bag Method
This method involves placing the coconut in a plastic bag with a moist growing medium.
1. Prepare your bag: Choose a large, clear plastic bag that is big enough to hold the coconut and some growing medium. A gallon-sized zip-lock bag works well.
2. Choose your growing medium: Similar to the container method, a well-draining growing medium is essential. I recommend using coco coir or sphagnum moss. Moisten the growing medium thoroughly before placing it in the bag.
3. Place the coconut in the bag: Place the coconut in the bag, with one of the eyes facing upwards. Surround the coconut with the moist growing medium, ensuring that it is in contact with the husk.
4. Seal the bag: Seal the bag tightly, creating a humid environment.
5. Provide warmth and indirect light: Place the bag in a warm location that receives indirect sunlight. Avoid direct sunlight, as this can overheat the bag and damage the coconut.
6. Monitor moisture levels: Check the bag regularly to ensure that the growing medium remains moist. If it starts to dry out, add a small amount of water.
7. Be patient: As with the container method, germination can take several months. Keep the growing medium consistently moist and maintain a warm environment.
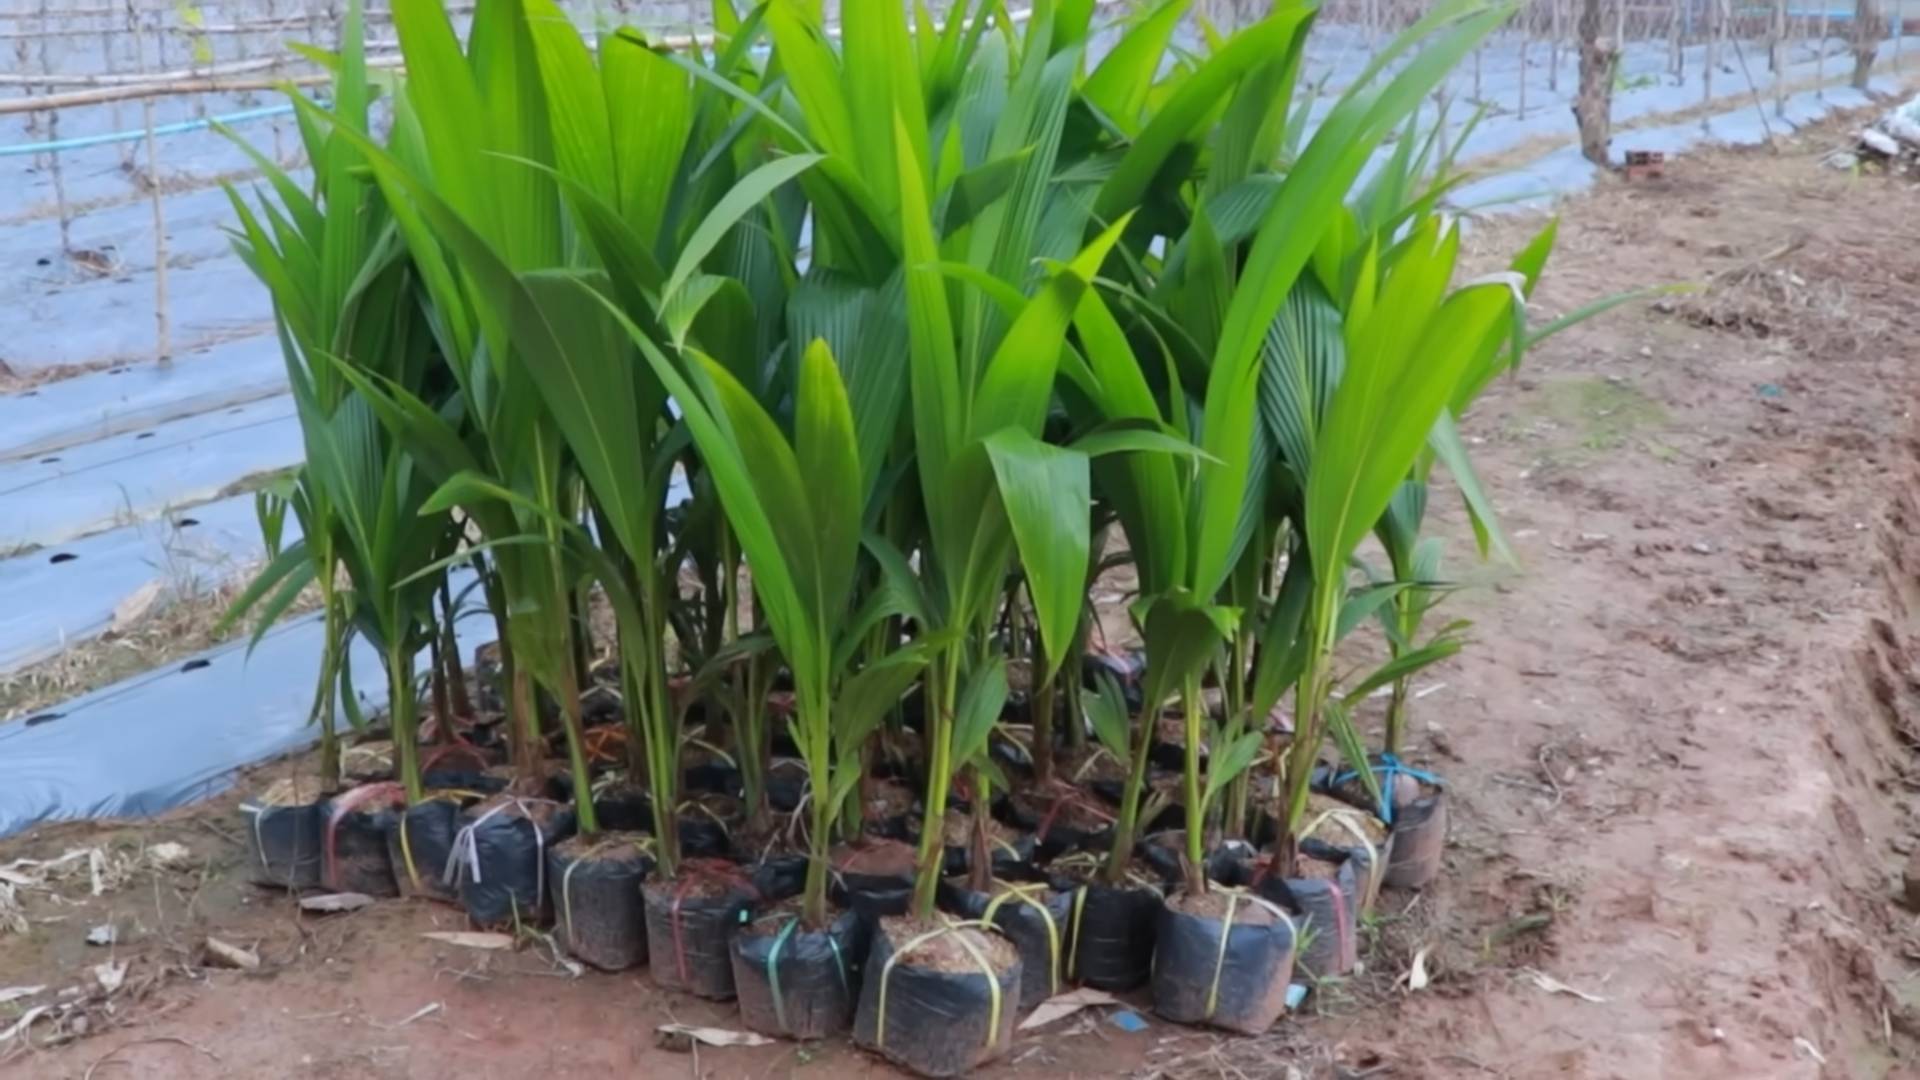
Caring for Your Coconut Sprout
Once your coconut sprouts, congratulations! You’re one step closer to having your own coconut palm. Now, it’s crucial to provide the right care to ensure its continued growth.
* Transplanting (if using the bag method): If you germinated your coconut in a bag, it’s time to transplant it to a container. Choose a large container, similar to the one described in the container method. Gently remove the coconut from the bag, being careful not to damage the roots. Plant the coconut in the container, using a well-draining potting mix.
* Watering: Water your coconut sprout regularly, keeping the soil consistently moist but not soggy. Allow the top inch of soil to dry out between waterings. Overwatering can lead to root rot, so be careful not to overdo it.
* Fertilizing: Feed your coconut sprout with a balanced fertilizer every 2-3 months during the growing season (spring and summer). Use a fertilizer specifically formulated for palms. Follow the instructions on the fertilizer label carefully.
* Sunlight: Coconut palms need plenty of sunlight to thrive. Provide your sprout with at least 6-8 hours of direct sunlight per day. If you’re growing your coconut indoors, place it near a sunny window or use a grow light.
* Temperature: Coconut palms prefer warm temperatures. The ideal temperature range is between 70-90°F (21-32°C). Protect your sprout from frost and cold temperatures.
* Humidity: Coconut palms thrive in humid environments. If you live in a dry climate, you can increase humidity by misting your sprout regularly or placing a humidifier nearby.
* Pest and disease control: Keep an eye out for pests and diseases. Common pests that can affect coconut palms include spider mites, scale, and mealybugs. Treat infestations promptly with an appropriate insecticide. Root rot is a common disease that can affect coconut palms, especially if they are overwatered. Prevent root rot by ensuring that your soil is well-draining and avoiding overwatering.
Potential Problems and Solutions
Even with the best care, you might encounter some challenges along the way. Here are a few common problems and how to address them:
* Coconut not sprouting: If your coconut hasn’t sprouted after several months, don’t give up hope just yet. Make sure the growing medium is consistently moist and the temperature is warm enough. You can also try gently scratching the husk to help the sprout emerge. If all else fails, try a different coconut.
* Yellowing leaves: Yellowing leaves can be a sign of nutrient deficiency. Try fertilizing your sprout with a balanced fertilizer. Yellowing leaves can also be caused by overwatering or underwatering, so adjust your watering schedule accordingly.
* Brown leaf tips: Brown leaf tips are often caused by dry air. Increase humidity by misting your sprout regularly or placing a humidifier nearby.
* Slow growth: Slow growth can be caused by a variety of factors, including insufficient sunlight, nutrient deficiency, or cold temperatures. Make sure your sprout is getting enough sunlight and fertilizer, and protect it from cold temperatures.
Moving Outdoors
Once your coconut palm is established and the weather is consistently warm, you can consider moving it outdoors.
* Acclimatize gradually: Don’t move your coconut palm directly from indoors to full sun. Gradually acclimatize it to outdoor conditions by placing it in a shady spot for a few hours each day, gradually increasing the amount of sunlight it receives over a period of several weeks.
* Choose a suitable location: Choose a location that receives plenty of sunlight and has well-draining soil. Coconut palms can grow
Conclusion
So, there you have it! Starting coconut trees from seed might seem like a tropical dream best left to the experts, but with a little patience and the right approach, you can absolutely cultivate your own little piece of paradise. This DIY trick isn’t just about growing a plant; it’s about embarking on a journey, connecting with nature, and experiencing the satisfaction of nurturing life from its very beginning.
Why is this a must-try? Because beyond the sheer novelty of growing your own coconut tree, you’re gaining a resilient, adaptable plant perfectly suited to your local environment. Commercially grown seedlings are often raised in controlled conditions, making them potentially more vulnerable when transplanted. By starting from seed, you’re essentially giving your coconut tree a head start, allowing it to acclimate to your specific climate and soil conditions from day one. Plus, let’s be honest, there’s a certain magic in watching a coconut sprout and transform into a majestic tree.
But the benefits don’t stop there. This method allows you to select the best coconuts for germination, increasing your chances of success. You can also experiment with different varieties, choosing coconuts known for their sweetness, size, or disease resistance. Imagine harvesting your own delicious, homegrown coconuts in a few years!
Looking for variations? Consider experimenting with different germination mediums. While well-draining soil is generally recommended, some growers have had success using coir (coconut fiber) or even just water. You can also try scarifying the coconut husk slightly to encourage faster germination, but be careful not to damage the seed inside. Another interesting variation is to try different planting locations. Some people prefer to start their coconuts indoors in a controlled environment, while others opt for direct planting outdoors in a sheltered spot.
Don’t be afraid to get creative and adapt the process to suit your specific needs and resources. The key is to provide consistent moisture, warmth, and plenty of sunlight. Remember, patience is crucial. It can take several months for a coconut to germinate, so don’t get discouraged if you don’t see results immediately.
We wholeheartedly encourage you to give this DIY trick a try. It’s a rewarding experience that will connect you with nature and provide you with a beautiful, productive plant for years to come. And most importantly, we want to hear about your journey! Share your experiences, tips, and photos with us in the comments below. Let’s create a community of coconut enthusiasts and learn from each other’s successes and challenges. Let us know if you have any questions about how to start coconut trees from seed!
Frequently Asked Questions (FAQ)
How long does it take for a coconut to germinate?
Germination time can vary significantly, ranging from 2 to 6 months, and sometimes even longer. Several factors influence this, including the freshness of the coconut, the temperature, and the humidity levels. Maintaining consistent moisture and warmth is crucial for successful germination. Don’t be discouraged if you don’t see sprouts within a few weeks; patience is key. Check the coconut regularly for signs of growth, such as the emergence of roots or a shoot.
What is the best type of coconut to use for starting a tree?
The best coconuts for germination are mature, brown coconuts that are still heavy with water. Shake the coconut; you should hear the water sloshing around inside. Avoid coconuts that are cracked, damaged, or feel light, as they may not be viable. Ideally, choose coconuts from a healthy, productive tree in your area, as they are more likely to be adapted to your local climate. If possible, select coconuts that have already started to sprout, as this will significantly reduce the germination time.
What kind of soil is best for planting the germinated coconut?
Well-draining soil is essential for coconut trees. A mixture of sandy loam, compost, and perlite is ideal. This combination provides good drainage, aeration, and nutrients. Avoid heavy clay soils, as they can become waterlogged and lead to root rot. You can also add some coconut coir to the soil mix to improve water retention and drainage. Ensure the soil is slightly acidic to neutral (pH 6.0-7.0) for optimal growth.
How much sunlight does a coconut tree need?
Coconut trees thrive in full sunlight, requiring at least 6-8 hours of direct sunlight per day. Insufficient sunlight can lead to stunted growth and reduced fruit production. When starting your coconut tree from seed, place it in a location that receives ample sunlight throughout the day. If you are growing it indoors initially, use grow lights to supplement natural sunlight. As the tree grows, gradually acclimate it to outdoor conditions before transplanting it to its permanent location.
How often should I water my coconut seedling?
Water your coconut seedling regularly, keeping the soil consistently moist but not waterlogged. The frequency of watering will depend on the climate, soil type, and drainage. In hot, dry weather, you may need to water daily, while in cooler, wetter weather, you can reduce the frequency. Check the soil moisture regularly by sticking your finger into the soil; if it feels dry to the touch, it’s time to water. Avoid overwatering, as this can lead to root rot.
When should I transplant my coconut seedling to its permanent location?
Transplant your coconut seedling when it has developed a strong root system and is about 1-2 feet tall. This typically takes several months to a year after germination. Choose a sunny location with well-draining soil and plenty of space for the tree to grow. Dig a hole that is twice as wide and as deep as the root ball. Gently remove the seedling from its container and place it in the hole. Backfill with soil, ensuring the top of the root ball is level with the ground. Water thoroughly after transplanting.
What are some common problems when growing coconut trees from seed?
Some common problems include slow germination, root rot, nutrient deficiencies, and pest infestations. Slow germination can be caused by using old or damaged coconuts, insufficient warmth or moisture, or poor soil conditions. Root rot is often caused by overwatering or poorly draining soil. Nutrient deficiencies can be addressed by fertilizing the tree with a balanced fertilizer. Pests such as spider mites, scale, and mealybugs can be controlled with insecticidal soap or neem oil. Regularly inspect your coconut tree for signs of problems and take action promptly to prevent them from escalating.
Can I grow a coconut tree indoors permanently?
While it’s possible to start a coconut tree indoors, it’s challenging to grow it to full maturity indoors due to space limitations and the need for intense sunlight. Coconut trees can grow very tall, and they require a large root system. However, you can keep a coconut tree as a houseplant for several years by providing it with plenty of sunlight, well-draining soil, and regular fertilization. Consider using a large pot and pruning the tree to control its size. Eventually, you may need to transplant it outdoors or accept that it will not reach its full potential indoors.
What kind of fertilizer should I use for my coconut tree?
Use a balanced fertilizer specifically formulated for palm trees or tropical plants. Look for a fertilizer with a ratio of 8-2-12 or similar, which provides the necessary nutrients for healthy growth. Fertilize your coconut tree every 3-4 months during the growing season (spring and summer). Follow the instructions on the fertilizer label for proper application rates. Avoid over-fertilizing, as this can damage the tree. You can also supplement with organic fertilizers such as compost or manure.
How do I protect my coconut tree from cold weather?
Coconut trees are sensitive to cold weather and can be damaged by frost or freezing temperatures. If you live in an area with cold winters, you will need to take precautions to protect your coconut tree. If it’s in a pot, move it indoors to a sunny location. If it’s planted in the ground, wrap the trunk with burlap or blankets to insulate it. You can also cover the tree with a frost cloth to protect it from frost. Water the tree deeply before a cold snap to help insulate the roots. Consider using heat lamps or string lights to provide additional warmth.
Leave a Comment