
Terrace Guava Tree Fruit – imagine plucking a juicy, sun-ripened guava straight from your own terrace! Sounds like a tropical dream, right? Well, it doesn’t have to be just a dream! For centuries, cultivating fruit trees in limited spaces has been a cherished practice, from the ancient hanging gardens to modern-day urban oases. There’s something incredibly satisfying about nurturing a plant and reaping its delicious rewards, especially when space is at a premium.
But let’s be honest, growing a guava tree, especially on a terrace, can seem daunting. Where do you even begin? That’s where these DIY tricks and hacks come in! Many people struggle with getting their guava trees to actually produce fruit, or they face challenges with pests and diseases in a confined space. I’ve been there, trust me! I’ve spent countless hours researching and experimenting, and I’m excited to share my tried-and-true methods for maximizing your terrace guava tree fruit yield.
This article is your ultimate guide to successfully growing a thriving guava tree on your terrace. We’ll cover everything from choosing the right variety and container to mastering essential pruning techniques and pest control strategies. Get ready to transform your terrace into a fruitful paradise!
Growing Guava on Your Terrace: A DIY Guide to Bountiful Harvests
Hey there, fellow gardening enthusiasts! Dreaming of plucking juicy, fragrant guavas right from your own terrace? Well, you’re in the right place! I’m going to walk you through everything you need to know to successfully grow a guava tree in a container on your terrace, from choosing the right variety to harvesting your delicious bounty. It might seem daunting at first, but trust me, with a little patience and the right know-how, you’ll be enjoying homegrown guavas in no time!
Choosing the Right Guava Variety
Not all guava varieties are created equal, especially when it comes to container gardening. You’ll want to select a dwarf or semi-dwarf variety that’s well-suited for growing in pots. Here are a few of my favorites:
* ‘Mexican Cream’ (also known as ‘White Indian’): This variety is known for its creamy white flesh, sweet flavor, and relatively small size. It’s a reliable producer and adapts well to container life.
* ‘Ruby Supreme’: If you’re looking for a guava with a beautiful pink flesh and a rich, sweet taste, ‘Ruby Supreme’ is an excellent choice. It’s also relatively compact, making it suitable for terrace gardens.
* ‘Dwarf Hawaiian’: As the name suggests, this variety is naturally smaller than other guavas, making it perfect for container growing. It produces small to medium-sized fruits with a sweet, slightly tangy flavor.
* ‘Redland’: This variety is known for its disease resistance and good fruit production. The fruit has a pink flesh and a sweet, slightly acidic flavor.
Important Note: Before you commit to a variety, check with your local nursery or agricultural extension office to see which guava varieties are best suited for your climate.
Preparing Your Container and Soil
The right container and soil are crucial for the success of your guava tree. Here’s what you need to consider:
* Container Size: Choose a large container, at least 24 inches in diameter and 24 inches deep. A larger container will provide ample space for the roots to grow and will help retain moisture.
* Drainage: Make sure your container has plenty of drainage holes. Guava trees don’t like to sit in soggy soil.
* Potting Mix: Use a well-draining potting mix that’s rich in organic matter. A good mix might include equal parts of:
* Potting soil
* Compost
* Perlite or vermiculite (to improve drainage)
Pro Tip: I like to add a layer of gravel or broken pottery at the bottom of the container to further improve drainage.
Planting Your Guava Tree
Now comes the fun part – planting your guava tree! Here’s a step-by-step guide:
1. Prepare the Container: Place the gravel or broken pottery at the bottom of the container, if using.
2. Add Potting Mix: Fill the container about one-third full with your prepared potting mix.
3. Remove the Guava Tree from its Nursery Pot: Gently loosen the root ball by squeezing the sides of the pot. If the roots are tightly bound, carefully tease them apart with your fingers.
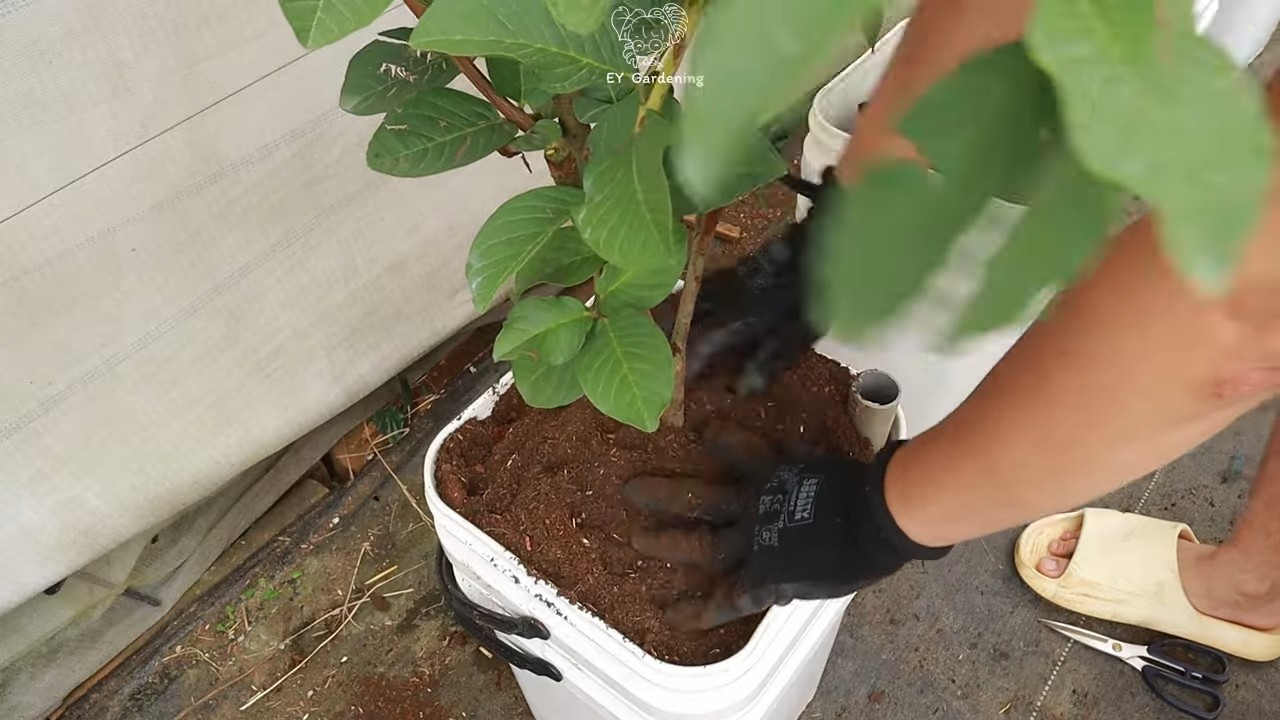
4. Position the Tree: Place the guava tree in the center of the container, making sure the top of the root ball is level with the soil surface.
5. Fill with Potting Mix: Fill the remaining space around the root ball with potting mix, gently firming the soil as you go.
6. Water Thoroughly: Water the newly planted tree thoroughly until water drains out of the drainage holes.
7. Mulch: Add a layer of organic mulch, such as wood chips or shredded bark, around the base of the tree to help retain moisture and suppress weeds. Keep the mulch a few inches away from the trunk to prevent rot.
Caring for Your Guava Tree
Once your guava tree is planted, it’s important to provide it with the proper care to ensure healthy growth and abundant fruit production.
Watering
* Frequency: Water your guava tree regularly, especially during the growing season (spring and summer). The frequency will depend on the weather and the drainage of your potting mix.
* How to Water: Water deeply, allowing the water to soak into the soil and drain out of the drainage holes. Avoid overwatering, as this can lead to root rot.
* Check the Soil: Before watering, check the soil moisture by sticking your finger into the soil. If the top inch or two feels dry, it’s time to water.
Fertilizing
* Type of Fertilizer: Use a balanced fertilizer specifically formulated for fruit trees. Look for a fertilizer with an N-P-K ratio of around 10-10-10 or 14-14-14.
* Frequency: Fertilize your guava tree every 2-3 months during the growing season.
* How to Fertilize: Follow the instructions on the fertilizer package. Generally, you’ll want to sprinkle the fertilizer around the base of the tree, avoiding direct contact with the trunk. Water thoroughly after fertilizing.
* Organic Options: You can also use organic fertilizers, such as compost tea or fish emulsion.
Sunlight
* Sunlight Requirements: Guava trees need at least 6-8 hours of direct sunlight per day to thrive.
* Placement: Choose a sunny spot on your terrace for your guava tree. If you live in a particularly hot climate, you may want to provide some afternoon shade to protect the tree from scorching.
Pruning
* Purpose of Pruning: Pruning helps to maintain the shape of the tree, improve air circulation, and encourage fruit production.
* When to Prune: Prune your guava tree in late winter or early spring, before new growth begins.
* How to Prune:
* Remove any dead, damaged, or diseased branches.
* Thin out crowded branches to improve air circulation.
* Shorten long, leggy branches to encourage bushier growth.
* Remove any suckers (shoots that grow from the base of the tree).
Pest and Disease Control
* Common Pests: Guava trees can be susceptible to pests such as aphids, scale, and mealybugs.
* Common Diseases: Common diseases include anthracnose and guava rust.
* Prevention: Regularly inspect your guava tree for signs of pests or diseases.
* Treatment: If you find pests or diseases, treat them promptly with appropriate insecticides or fungicides. You can also use organic pest control methods, such as neem oil or insecticidal soap.
Important Note: Always follow the instructions on the pesticide or fungicide label carefully.
Protecting Your Guava Tree from the Cold
Guava trees are relatively cold-hardy, but they can be damaged by frost. If you live in an area with cold winters, you’ll need to take steps to protect your guava tree from the cold.
* Move the Tree Indoors: If possible, move your guava tree indoors to a sunny location.
* Wrap the Tree: If you can’t move the tree indoors, wrap the trunk and branches with burlap or blankets to provide insulation.
* Mulch: Add a thick layer of mulch around the base of the tree to protect the roots from freezing.
* Watering: Water the tree sparingly during the winter months.
Harvesting Your Guavas
The moment you’ve been waiting for – harvesting your guavas!
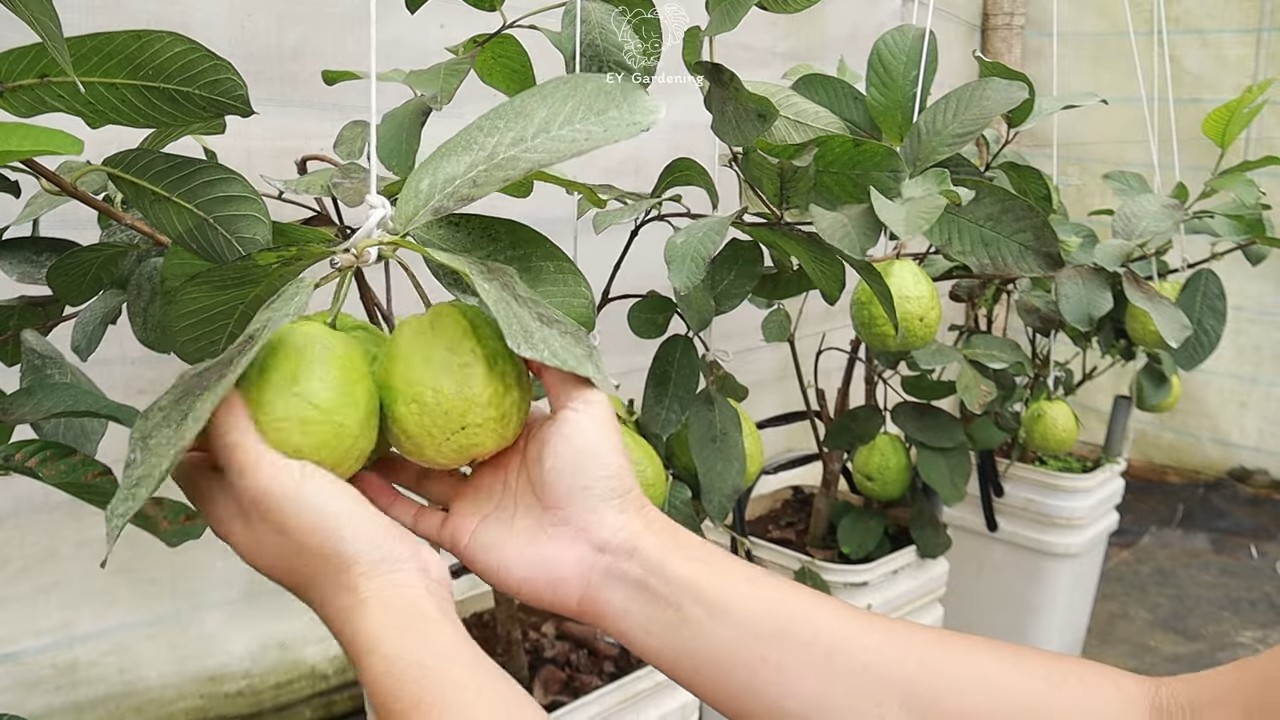
* When to Harvest: Guavas are typically ready to harvest when they turn from green to yellow or pink, depending on the variety. The fruit should also be slightly soft to the touch and have a fragrant aroma.
* How to Harvest: Gently twist the fruit from the branch. If it’s ripe, it should come off easily.
* Storage: Ripe guavas can be stored in the refrigerator for several days.
Enjoy Your Harvest!
Congratulations! You’ve successfully grown guavas on your terrace. Now it’s time to enjoy the fruits of your labor. Eat them fresh, make guava jam, or add them to your favorite recipes. The possibilities are endless!
I hope this guide has been helpful. Happy gardening!
Conclusion
So, there you have it! Transforming your terrace guava tree fruit from potentially bland to bursting with flavor is not only achievable but surprisingly simple. This DIY trick, a method of strategic ripening and flavor enhancement, is a game-changer for anyone growing guavas, especially in a confined space like a terrace.
Why is this a must-try? Because it addresses the most common complaint about homegrown guavas: their lack of sweetness and intense aroma. By understanding the guava’s ripening process and employing these techniques, you’re taking control of the final product, ensuring a delicious and satisfying harvest. Imagine biting into a guava that’s not just edible, but truly exceptional, a testament to your green thumb and a little bit of DIY magic.
This isn’t just about salvaging a mediocre crop; it’s about unlocking the full potential of your terrace guava tree fruit. It’s about experiencing the joy of harvesting something truly special, something that rivals or even surpasses store-bought varieties. Think of the possibilities: guava jam with an unparalleled depth of flavor, guava smoothies that are naturally sweet and aromatic, or simply enjoying a perfectly ripe guava straight from your own tree.
Variations and Suggestions:
Don’t be afraid to experiment! While the core principles remain the same, you can adapt the techniques to suit your specific guava variety and growing conditions.
* Spice Infusion: Try gently rubbing a small amount of cinnamon or nutmeg powder onto the guava skin during the ripening process. This can add a subtle warmth and complexity to the flavor.
* Honey Glaze: For an extra touch of sweetness, brush the guava with a thin layer of honey a day or two before harvesting.
* Citrus Boost: A light spritz of lime or lemon juice can enhance the guava’s natural tanginess and brighten its overall flavor profile.
* Controlled Environment: If you have a greenhouse or enclosed patio, consider moving your guava tree fruit indoors during the final stages of ripening. This can help to regulate temperature and humidity, leading to more consistent results.
* Bagging Technique Refinement: Experiment with different types of bags. Paper bags offer good breathability, while plastic bags can trap more moisture (use with caution to avoid rot). Consider using bags with small ventilation holes.
We strongly encourage you to try this DIY trick on your terrace guava tree fruit. The results are well worth the effort, and you’ll be amazed at the difference it makes. More importantly, we want to hear about your experience! Share your successes, your challenges, and any variations you’ve tried in the comments below. Let’s create a community of guava growers who are passionate about maximizing the flavor of their homegrown fruit. Your insights could help other gardeners achieve even better results. Let’s transform those terrace guavas into something truly extraordinary, one delicious bite at a time. Don’t just grow guavas, cultivate flavor!
Frequently Asked Questions (FAQ)
Q1: Why are my terrace-grown guavas often bland and not as sweet as store-bought ones?
A1: There are several reasons why terrace guava tree fruit might lack the desired sweetness and flavor. Firstly, guavas require ample sunlight to develop their sugars. Terrace environments, especially those with partial shade, might not provide enough light intensity. Secondly, soil conditions play a crucial role. Guavas thrive in well-draining soil that’s rich in organic matter. Poor soil quality can hinder nutrient uptake, affecting fruit quality. Thirdly, the variety of guava you’re growing matters. Some varieties are naturally sweeter and more flavorful than others. Finally, improper ripening can significantly impact the taste. Guavas picked too early will be starchy and lack sweetness, while those left on the tree for too long might become mushy and lose their flavor.
Q2: How does the bagging technique actually improve the flavor of my guava tree fruit?
A2: The bagging technique works in several ways to enhance the flavor of your terrace guava tree fruit. Primarily, it protects the developing fruit from pests and diseases, preventing damage that can negatively impact taste. Secondly, it creates a microclimate around the fruit, increasing humidity and temperature, which promotes sugar development and ripening. The bag also helps to concentrate the guava’s natural aromas, resulting in a more fragrant and flavorful fruit. Furthermore, bagging can help to prevent premature ripening caused by environmental stressors, allowing the guava to ripen gradually and evenly.
Q3: What’s the best type of bag to use for this DIY ripening trick?
A3: The best type of bag depends on your specific climate and growing conditions. Paper bags are a good option because they allow for good air circulation, reducing the risk of mold or rot. However, they might not be as effective in protecting against pests. Plastic bags can provide better pest protection and trap more moisture, but they also increase the risk of fungal diseases if not used carefully. If using plastic bags, make sure to create small ventilation holes to allow for some airflow. You can also experiment with specialized fruit protection bags, which are designed to provide both protection and breathability. Consider the humidity levels in your area when choosing a bag type. In humid climates, paper bags are generally preferred.
Q4: How do I know when my guavas are ready to be harvested after using this technique?
A4: There are several indicators to look for when determining the ripeness of your terrace guava tree fruit. The most obvious sign is a change in color. The guava’s skin will typically transition from green to yellow or pink, depending on the variety. The fruit will also become slightly softer to the touch. You should be able to gently press on the skin without causing significant damage. Another indicator is the aroma. Ripe guavas will have a strong, sweet, and characteristic fragrance. Finally, you can gently twist the fruit. If it comes off the branch easily, it’s likely ripe. Avoid pulling or tugging on the fruit, as this can damage the tree.
Q5: Can I use this technique on other types of fruit trees besides guava?
A5: While this specific DIY trick is tailored for guavas, the underlying principles can be applied to other fruit trees as well. The concept of protecting the fruit from pests and diseases, creating a favorable microclimate, and controlling the ripening process can be beneficial for fruits like mangoes, apples, and pears. However, you might need to adjust the specific techniques based on the fruit’s unique characteristics. For example, the type of bag you use and the timing of the bagging process might need to be modified. Research the specific needs of the fruit you’re trying to ripen and experiment to find what works best.
Q6: What if my guavas start to rot inside the bag? What am I doing wrong?
A6: If your guavas are rotting inside the bag, it’s likely due to excessive moisture buildup. This can happen if the bag is not breathable enough or if the humidity levels are too high. To prevent this, ensure that you’re using a bag that allows for adequate air circulation, such as a paper bag or a plastic bag with ventilation holes. Avoid bagging the fruit during periods of heavy rain or high humidity. You can also try adding a small packet of silica gel inside the bag to absorb excess moisture. Regularly inspect the bagged guavas for any signs of rot or mold. If you notice any problems, remove the affected fruit immediately to prevent the spread of disease.
Q7: How long does it typically take for guavas to ripen after being bagged?
A7: The ripening time after bagging can vary depending on several factors, including the guava variety, the climate, and the stage of ripeness when the fruit was bagged. Generally, it takes about 1 to 2 weeks for guavas to fully ripen after being bagged. However, it’s important to monitor the fruit regularly and check for the signs of ripeness mentioned earlier. Don’t rely solely on a specific timeframe, as environmental conditions can significantly impact the ripening process.
Q8: Is there anything else I can do to improve the flavor of my terrace guava tree fruit besides bagging?
A8: Absolutely! In addition to bagging, there are several other things you can do to enhance the flavor of your terrace guava tree fruit. Ensure that your tree is receiving adequate sunlight, water, and nutrients. Fertilize regularly with a balanced fertilizer that’s specifically formulated for fruit trees. Prune your tree to improve air circulation and sunlight penetration. Control pests and diseases to prevent damage to the fruit. Consider amending your soil with organic matter to improve drainage and nutrient retention. Finally, be patient and allow the fruit to ripen fully on the tree before harvesting.
Leave a Comment