
Lazy water spinach growing? Sounds like an oxymoron, right? But trust me, it’s totally achievable! I’m here to let you in on some seriously simple DIY tricks that will have you harvesting fresh, crunchy water spinach (also known as Ong Choy) without breaking a sweat. Forget spending hours toiling in the garden; we’re talking minimal effort, maximum reward.
Water spinach has a rich history, deeply rooted in Asian cuisine and culture. For centuries, it’s been a staple in stir-fries, soups, and salads, prized for its delicious flavor and nutritional benefits. But you don’t need to be a seasoned gardener to enjoy this leafy green.
Let’s face it, we’re all busy! Who has time for complicated gardening routines? That’s where these DIY hacks come in. Imagine effortlessly growing your own supply of fresh, organic water spinach, right in your backyard or even on your balcony. No more trips to the grocery store, no more worrying about pesticides. Just pure, homegrown goodness. These tricks are perfect for beginners, busy individuals, or anyone who wants to enjoy the satisfaction of growing their own food with minimal fuss. So, if you’re ready to embrace the art of lazy water spinach growing, keep reading! I’m about to share some game-changing tips that will transform your gardening experience.
Revive Your Lazy Water Spinach: A DIY Hydroponic Hack!
Okay, let’s face it. We’ve all been there. You plant some water spinach (ong choy), dreaming of fresh, crunchy greens, and then… nothing much happens. It just sits there, looking a bit sad and definitely not thriving. Well, I’m here to tell you that you can kickstart your lazy water spinach with a super simple, budget-friendly hydroponic setup. Trust me, it’s easier than you think, and the results are amazing!
What You’ll Need
Before we dive in, let’s gather our supplies. The beauty of this hack is that you probably already have most of these things lying around:
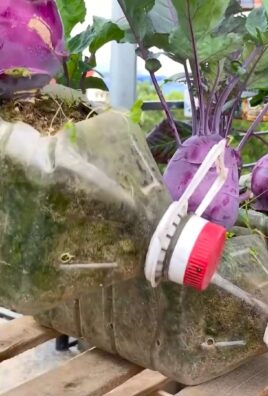
* A large plastic container (think storage bin, bucket, or even a repurposed laundry basket – just make sure it’s food-grade plastic if you’re using something recycled).
* A lid for your container (optional, but helpful for keeping out pests and algae).
* Net pots (these are small, mesh pots that will hold your water spinach). You can find these at most garden centers or online. I usually use 2-inch or 3-inch ones.
* Hydroponic growing medium (I prefer clay pebbles, also known as LECA, but you can also use coco coir or rockwool).
* An aquarium air pump and air stone (this is crucial for oxygenating the water and keeping your plants healthy).
* Air tubing (to connect the air pump to the air stone).
* Hydroponic nutrient solution (specifically formulated for leafy greens). I use a two-part nutrient solution for best results.
* A drill (with a hole saw attachment that matches the diameter of your net pots).
* Water spinach seeds or cuttings (if you’re starting from scratch, seeds are the way to go. If you already have some water spinach, you can take cuttings).
* pH testing kit (optional, but recommended for monitoring the pH of your nutrient solution).
* Measuring cups and spoons.
* Gloves (to protect your hands).
Step-by-Step Instructions: Building Your Hydroponic System
Alright, let’s get our hands dirty! Here’s how to build your DIY hydroponic system:
1. Prepare the Container: First, clean your plastic container thoroughly with soap and water. Rinse it well to remove any soap residue. This is important to prevent contamination of your nutrient solution.
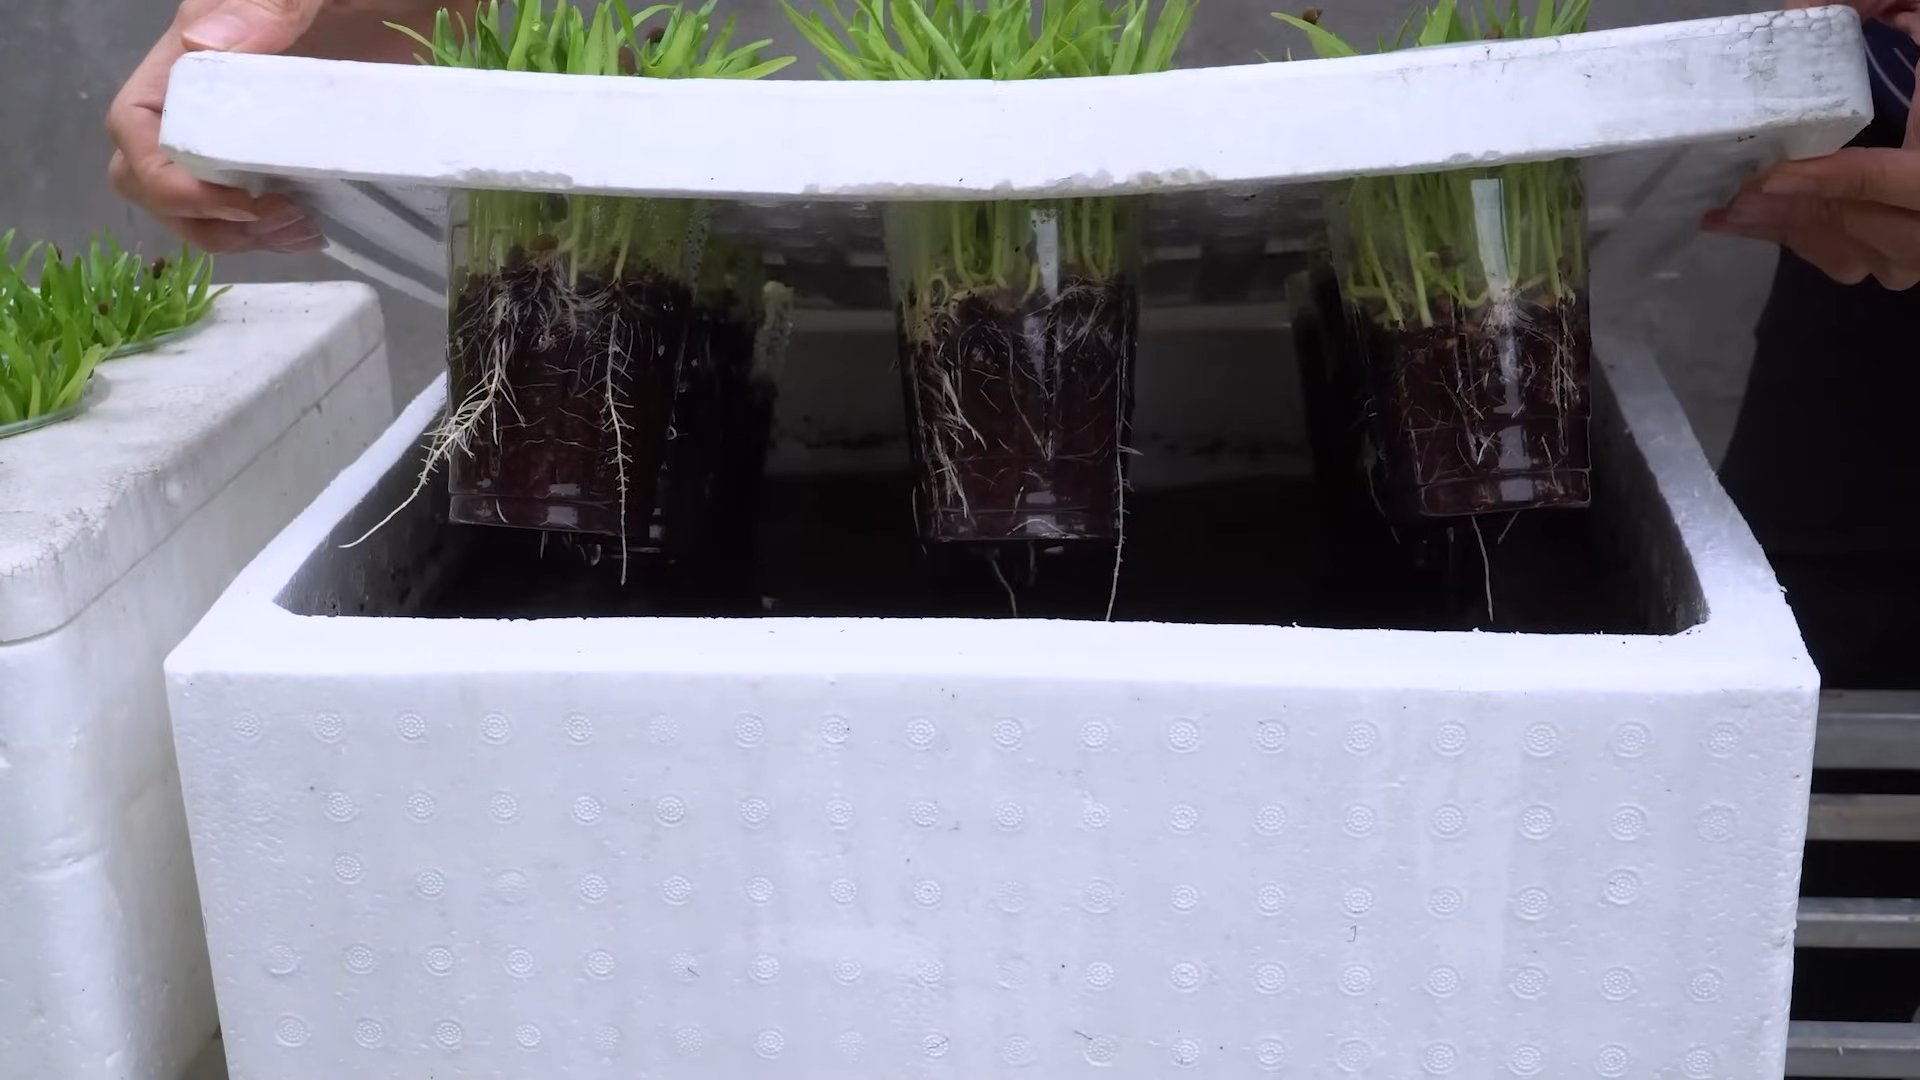
2. Drill the Holes: If you’re using a lid, now’s the time to drill the holes for your net pots. Space them evenly across the lid, making sure they’re far enough apart so the plants have room to grow. Use your hole saw attachment to create holes that are just slightly smaller than the diameter of your net pots. This will ensure a snug fit. If you’re not using a lid, you’ll need to find a way to suspend the net pots above the water level. You could use a piece of mesh or hardware cloth stretched across the top of the container.
3. Assemble the Air Pump System: Connect the air tubing to your air pump and air stone. Place the air stone at the bottom of the container. This will provide oxygen to the roots of your water spinach.
4. Prepare the Growing Medium: Rinse your clay pebbles (or coco coir/rockwool) thoroughly to remove any dust or debris. This will help prevent clogging of your system.
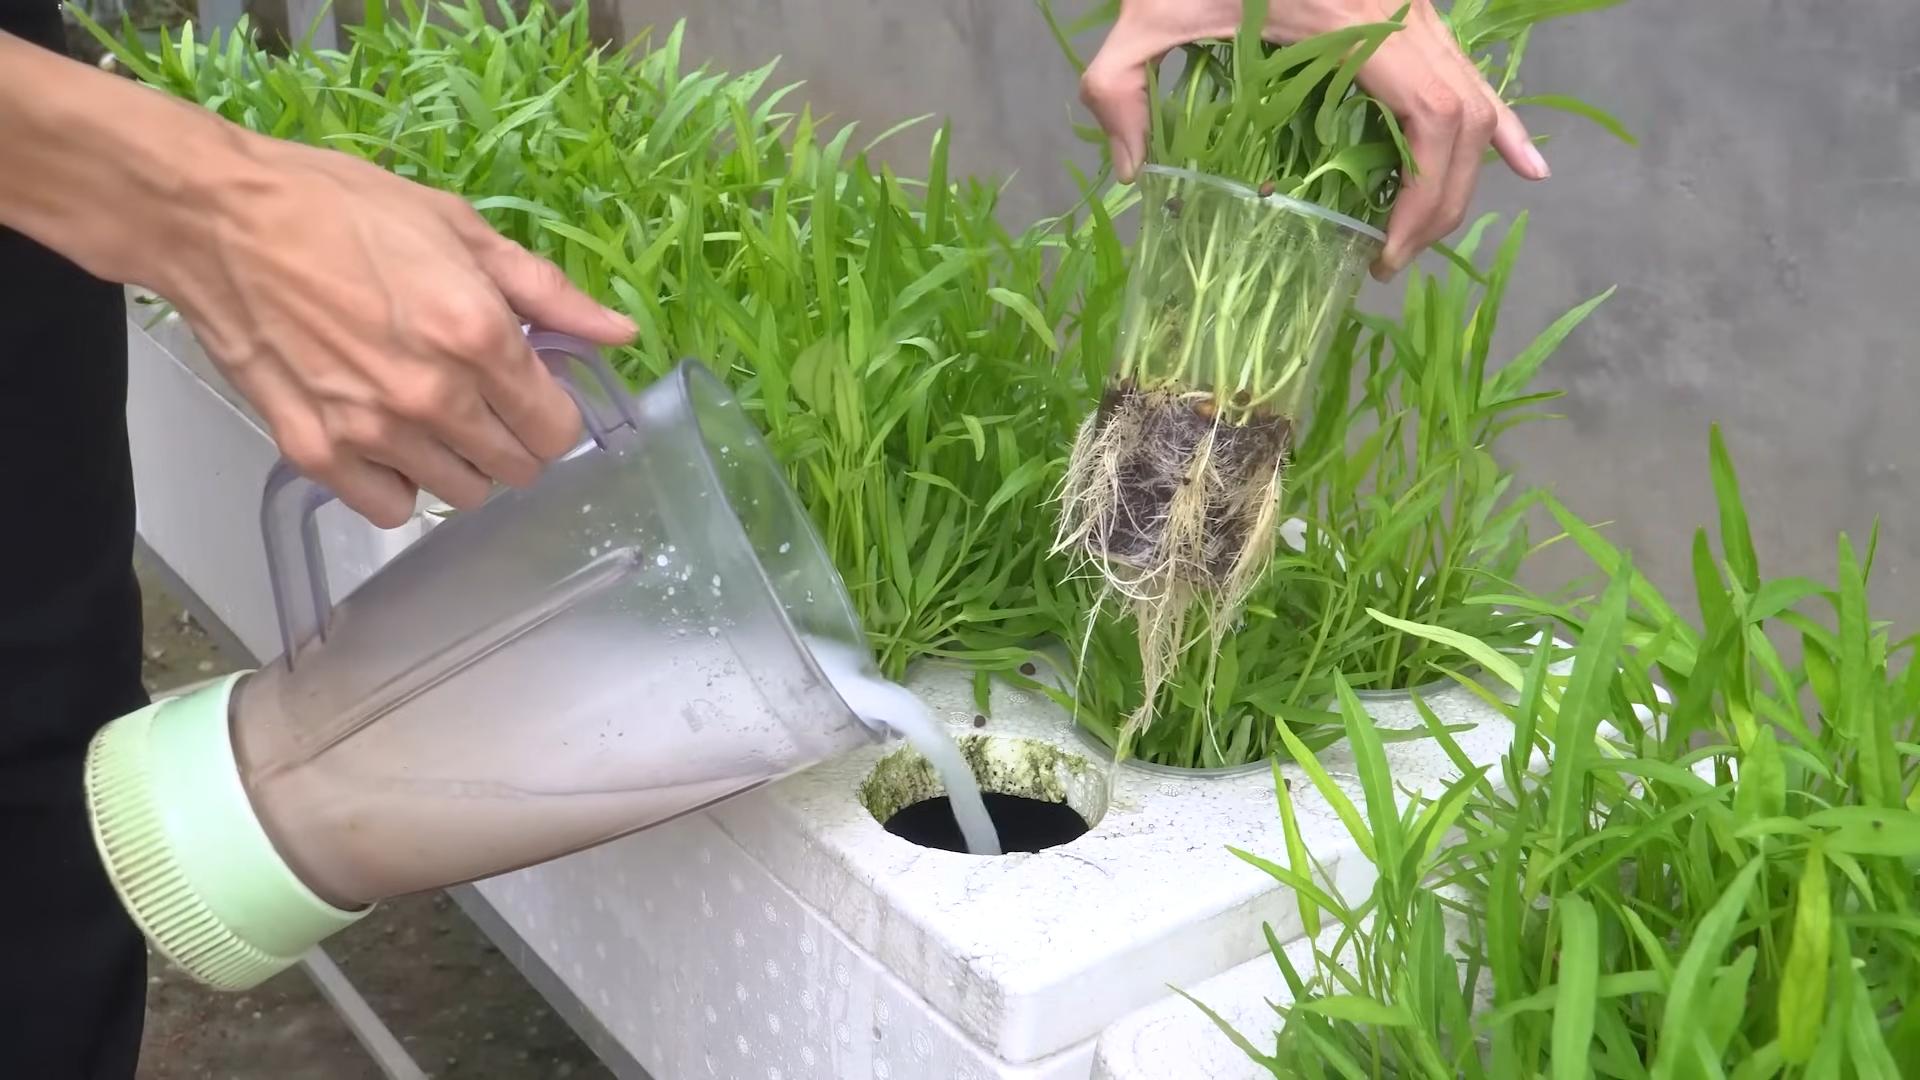
5. Fill the Container: Fill the container with water, leaving a few inches of space at the top. Add your hydroponic nutrient solution according to the manufacturer’s instructions. I usually start with a half-strength solution and gradually increase it as the plants grow.
6. Test the pH (Optional but Recommended): Use your pH testing kit to check the pH of the nutrient solution. Water spinach prefers a pH between 6.0 and 7.0. Adjust the pH as needed using pH up or pH down solutions.
Starting Your Water Spinach
Now that our hydroponic system is ready, let’s get our water spinach growing!
1. Starting from Seeds: If you’re starting from seeds, you’ll need to germinate them first. You can do this by placing the seeds on a damp paper towel, covering them with another damp paper towel, and placing them in a plastic bag. Keep the paper towels moist and the bag in a warm place. The seeds should germinate in a few days.
2. Transplanting Seedlings: Once the seeds have germinated and have a small root system, carefully transplant them into the net pots. Fill the net pots with your prepared growing medium and gently place the seedlings in the center. Make sure the roots are covered with the growing medium.
3. Using Cuttings: If you’re using cuttings, simply take a cutting from a healthy water spinach plant. The cutting should be about 4-6 inches long and have a few leaves. Remove the lower leaves from the cutting and place it directly into a net pot filled with your growing medium.
4. Place Net Pots in the System: Place the net pots into the holes in the lid (or suspend them above the water level if you’re not using a lid). Make sure the bottom of the net pots is submerged in the nutrient solution.
Maintaining Your Hydroponic System
Congratulations! You’ve successfully built and planted your DIY hydroponic system. Now, let’s talk about how to keep your water spinach happy and healthy:
1. Water Level: Regularly check the water level in the container and add more nutrient solution as needed. The roots of the water spinach should always be submerged in the solution.
2. Nutrient Solution: Change the nutrient solution every 1-2 weeks. This will prevent the buildup of salts and other impurities that can harm your plants.
3. pH Monitoring: Regularly monitor the pH of the nutrient solution and adjust as needed.
4. Air Pump: Make sure the air pump is running continuously to provide oxygen to the roots.
5. Lighting: Water spinach needs plenty of light to grow. Place your hydroponic system in a sunny location or provide artificial lighting. I use a simple LED grow light for about 12-14 hours a day.
6. Pest Control: Keep an eye out for pests and diseases. If you notice any problems, take action immediately. You can use organic pest control methods, such as neem oil or insecticidal soap.
7. Harvesting: You can start harvesting your water spinach when it’s about 6-8 inches tall. Simply cut the stems above the water level. The plant will continue to grow and produce more leaves.
Troubleshooting
Even with the best care, sometimes things can go wrong. Here are a few common problems and how to fix them:
* Yellowing Leaves: This could be a sign of nutrient deficiency. Try increasing the strength of your nutrient solution or changing it more frequently. It could also be a pH imbalance.
* Slow Growth: This could be due to insufficient light, low nutrient levels, or a pH imbalance. Make sure your plants are getting enough light and that your nutrient solution is properly balanced.
* Algae Growth: Algae can grow in your hydroponic system if it’s exposed to too much light. Try covering the container with a lid or using an opaque container. You can also add a small amount of hydrogen peroxide to the nutrient solution to kill the algae.
* Root Rot: This is a fungal disease that can occur if the roots are not getting enough oxygen. Make sure your air pump is working properly and that the air stone is providing adequate aeration.
Enjoy Your Fresh Water Spinach!
And there you have it! A simple, effective, and budget-friendly way to grow your own water spinach hydroponically. With a little bit of care and attention, you’ll be enjoying fresh, delicious greens in no time. Happy growing!
Conclusion
So, there you have it! This simple yet effective DIY trick for lazy water spinach growing is a game-changer for anyone who wants fresh, delicious greens without the fuss. Forget complicated setups and constant monitoring. This method allows you to cultivate a thriving patch of water spinach with minimal effort, making it perfect for busy individuals, beginner gardeners, or anyone who simply prefers a more relaxed approach to growing their own food.
Why is this a must-try? Because it’s incredibly efficient. You’ll be amazed at how quickly your water spinach will sprout and flourish using this method. It’s also cost-effective, utilizing readily available materials you likely already have around the house. Plus, it’s incredibly rewarding to harvest your own homegrown vegetables, knowing you nurtured them from seed to table with your own two hands. The taste of freshly harvested water spinach is simply unmatched – crisp, slightly sweet, and bursting with flavor.
But the beauty of this DIY trick lies in its adaptability. Feel free to experiment with different containers. While a simple bucket or tub works perfectly, you could also repurpose old storage bins or even create a more aesthetically pleasing setup using decorative planters. Just ensure the container is large enough to accommodate the growing roots and has adequate drainage.
Consider experimenting with different nutrient solutions as well. While plain water works initially, supplementing with a diluted liquid fertilizer or compost tea can significantly boost growth and yield. Observe your plants closely and adjust the nutrient levels accordingly. You can also try adding a small amount of Epsom salt to the water to provide magnesium, which is essential for healthy plant growth.
Don’t be afraid to get creative! You can even try growing different varieties of water spinach using this method. Some varieties are more heat-tolerant than others, so choose one that’s well-suited to your local climate. You can also experiment with different planting densities to see what works best for your setup.
We are confident that this DIY trick will revolutionize your water spinach growing experience. It’s simple, effective, and incredibly rewarding. So, what are you waiting for? Gather your supplies, follow the steps outlined, and prepare to be amazed by the abundance of fresh, delicious water spinach you’ll be harvesting in no time.
We encourage you to try this DIY trick for lazy water spinach growing and share your experiences with us! Let us know how it worked for you, what variations you tried, and any tips or tricks you discovered along the way. Your feedback will help us refine this method and make it even better for everyone. Share your photos and stories on our social media pages using #LazyWaterSpinach or leave a comment below. We can’t wait to see your thriving water spinach gardens! Happy growing!
Frequently Asked Questions (FAQ)
What exactly is water spinach, and why should I grow it?
Water spinach, also known as Ong Choy or Kang Kong, is a semi-aquatic leafy green vegetable popular in Asian cuisine. It’s incredibly versatile and can be stir-fried, steamed, boiled, or added to soups and salads. Growing your own water spinach ensures you have a fresh, readily available supply of this nutritious vegetable. It’s packed with vitamins A and C, iron, and fiber, making it a healthy and delicious addition to your diet. Plus, it grows incredibly fast, providing a quick and rewarding gardening experience.
How much sunlight does water spinach need when using this lazy growing method?
Water spinach thrives in full sun, meaning at least 6-8 hours of direct sunlight per day. However, it can tolerate partial shade, especially in hotter climates. If you live in a region with intense summer heat, providing some afternoon shade can prevent the leaves from scorching. Observe your plants closely and adjust their location as needed to ensure they’re getting enough sunlight without being burned. If you are growing indoors, consider using grow lights to supplement natural sunlight.
What kind of container is best for this DIY water spinach growing trick?
The beauty of this method is its flexibility. You can use almost any container that can hold water and has adequate drainage. A simple plastic bucket, a large tub, or even a repurposed storage bin will work perfectly. The size of the container will depend on how much water spinach you want to grow. A 5-gallon bucket is a good starting point for a small patch. Make sure the container is clean and free of any harmful chemicals. If you’re using a container that doesn’t have drainage holes, you’ll need to be extra careful not to overwater the plants.
How often should I change the water in the container?
The frequency of water changes will depend on several factors, including the size of the container, the temperature, and the amount of sunlight the plants are receiving. As a general rule, you should change the water every 1-2 weeks. However, if the water becomes cloudy or develops an unpleasant odor, you should change it more frequently. When changing the water, be sure to use fresh, clean water. You can also add a small amount of diluted liquid fertilizer to the water to provide the plants with essential nutrients.
What kind of fertilizer should I use for water spinach?
Water spinach is a heavy feeder, so it benefits from regular fertilization. You can use a variety of fertilizers, including liquid fertilizers, compost tea, or even slow-release granular fertilizers. A balanced fertilizer with an NPK ratio of 10-10-10 is a good starting point. Follow the instructions on the fertilizer packaging carefully and avoid over-fertilizing, as this can damage the plants. Compost tea is a great organic option that provides a slow-release source of nutrients.
How do I know when my water spinach is ready to harvest?
Water spinach is typically ready to harvest about 4-6 weeks after planting. You can harvest the leaves and stems when they are about 6-8 inches long. To harvest, simply cut the stems a few inches above the water line. The plants will continue to produce new growth, so you can harvest them multiple times. Regular harvesting encourages bushier growth and prevents the plants from becoming leggy.
Can I grow water spinach indoors using this method?
Yes, you can absolutely grow water spinach indoors using this method. However, you’ll need to provide adequate lighting, as water spinach requires plenty of sunlight. A grow light is a great option for indoor growing. You’ll also need to ensure that the plants have good air circulation to prevent fungal diseases.
What are some common pests and diseases that affect water spinach, and how can I prevent them?
Water spinach is generally resistant to pests and diseases, but it can be susceptible to aphids, spider mites, and fungal diseases like powdery mildew. To prevent pests and diseases, keep the plants clean and well-ventilated. Inspect the plants regularly for signs of infestation or disease. If you find any pests, you can try spraying them with insecticidal soap or neem oil. For fungal diseases, you can try spraying the plants with a fungicide.
Is it possible to grow water spinach from cuttings using this lazy method?
Yes, growing water spinach from cuttings is a very effective way to propagate new plants. Simply take cuttings from healthy stems, about 4-6 inches long, and remove the lower leaves. Place the cuttings in water, and they will typically root within a few days. Once the roots are about an inch long, you can transplant the cuttings into your container using the lazy water spinach growing method. This is a great way to expand your water spinach patch quickly and easily.
What if my water spinach leaves are turning yellow?
Yellowing leaves can indicate a few different problems. It could be a sign of nutrient deficiency, especially nitrogen. Try adding a diluted liquid fertilizer to the water. It could also be a sign of overwatering or poor drainage. Make sure the container has adequate drainage and that you’re not overwatering the plants. Finally, yellowing leaves can also be a sign of disease. Inspect the plants carefully for any signs of pests or fungal infections.


Leave a Comment