
Tomato garden for family: Imagine biting into a juicy, sun-ripened tomato, bursting with flavor, knowing you grew it yourself! There’s nothing quite like the taste of homegrown tomatoes, and creating a thriving tomato garden for your family is easier than you might think. Forget those bland, store-bought tomatoes – we’re about to embark on a DIY adventure that will transform your backyard (or even your balcony!) into a tomato paradise.
Growing your own food, especially tomatoes, has deep roots in human history. From the ancient Aztecs who first cultivated these vibrant fruits to the Italian immigrants who popularized them in America, tomatoes have always been a symbol of abundance and fresh, wholesome eating. Today, with concerns about food security and the desire for healthier, more sustainable living, the appeal of a home garden is stronger than ever.
But let’s be honest, gardening can sometimes feel overwhelming. That’s where these DIY tricks and hacks come in! I’m going to share my favorite, tried-and-true methods for creating a flourishing tomato garden for family, even if you’re a complete beginner. We’ll cover everything from choosing the right varieties and preparing your soil to warding off pests and maximizing your harvest. So, grab your gardening gloves, and let’s get started on this rewarding journey to delicious, homegrown tomatoes!
Dein eigener Tomatengarten für die Familie: So geht’s!
Hey Leute! Ich zeige euch heute, wie ihr einen eigenen Tomatengarten anlegen könnt, der eure ganze Familie mit leckeren, frischen Tomaten versorgt. Es ist einfacher als ihr denkt und macht richtig Spaß! Glaubt mir, es gibt nichts Besseres als eine selbstgezogene Tomate direkt vom Strauch.
Was du brauchst: Die Einkaufsliste
Bevor wir loslegen, hier eine Liste mit allem, was du für deinen Tomatengarten benötigst:
* Tomatensamen oder Jungpflanzen: Wähle Sorten, die dir schmecken und für dein Klima geeignet sind. Ich liebe Cocktailtomaten und San Marzano für Soßen.
* Anzuchterde: Für die Voranzucht im Haus.
* Pflanztöpfe oder Anzuchtschalen: Für die Samen oder Jungpflanzen.
* Gartenerde: Gute, nährstoffreiche Erde für das Beet oder die Töpfe.
* Kompost oder organischer Dünger: Um die Erde anzureichern.
* Pflanzstäbe oder Tomatenkäfige: Für den Halt der Pflanzen.
* Gießkanne oder Gartenschlauch: Zum Bewässern.
* Gartengeräte: Spaten, Schaufel, Harke.
* Mulchmaterial: Stroh, Holzhackschnitzel oder Rasenschnitt, um die Feuchtigkeit im Boden zu halten und Unkraut zu unterdrücken.
* Etiketten und Stift: Um die verschiedenen Tomatensorten zu kennzeichnen.
* (Optional) Gewächshaus oder Folientunnel: Für einen früheren Start und Schutz vor schlechtem Wetter.
Phase 1: Die Voranzucht (wenn du mit Samen startest)
Wenn du mit Tomatensamen beginnst, musst du sie vorziehen, bevor du sie ins Freie pflanzen kannst. Das gibt ihnen einen Vorsprung und verlängert die Erntezeit.
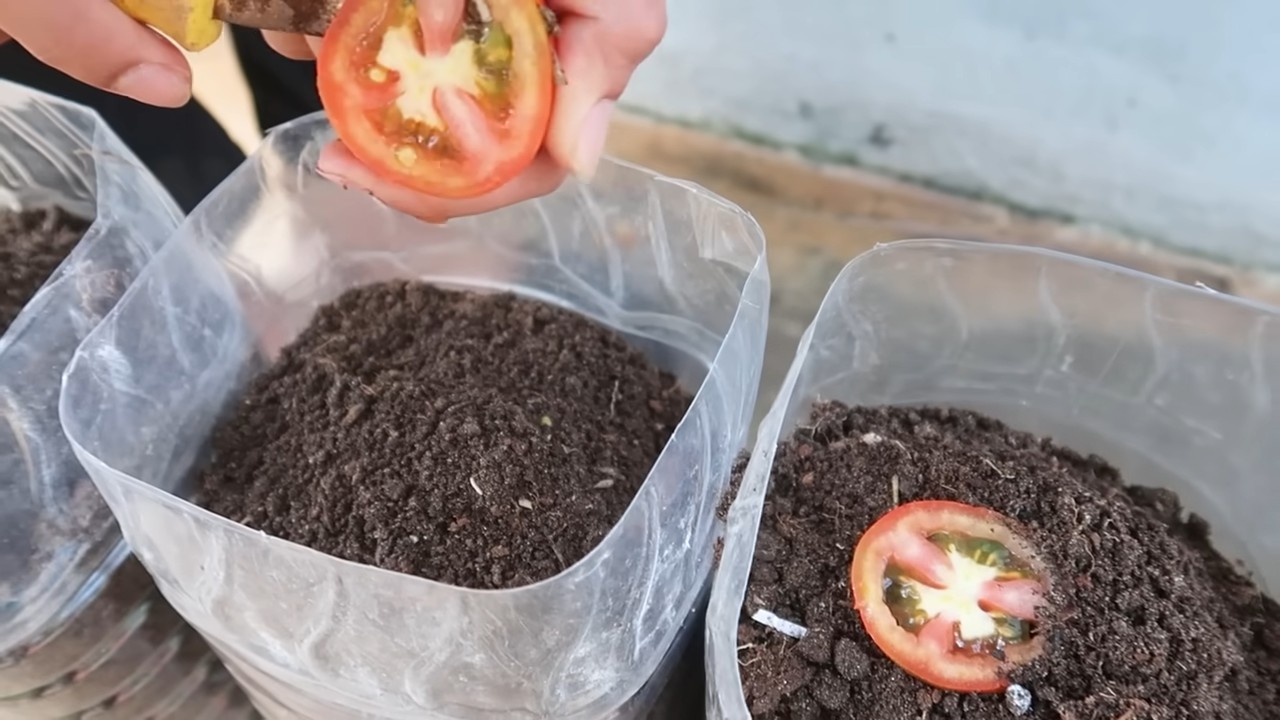
1. Aussaat: Fülle deine Anzuchttöpfe oder -schalen mit Anzuchterde. Drücke die Erde leicht an und säe die Tomatensamen etwa 0,5 cm tief ein. Bedecke sie leicht mit Erde und gieße sie vorsichtig an.
2. Standort: Stelle die Töpfe an einen warmen, hellen Ort. Eine Fensterbank oder ein beheiztes Gewächshaus sind ideal. Die optimale Keimtemperatur liegt bei 20-25°C.
3. Feuchtigkeit: Halte die Erde feucht, aber nicht nass. Besprühe sie regelmäßig mit einer Sprühflasche.
4. Keimung: Die Samen keimen in der Regel innerhalb von 7-14 Tagen.
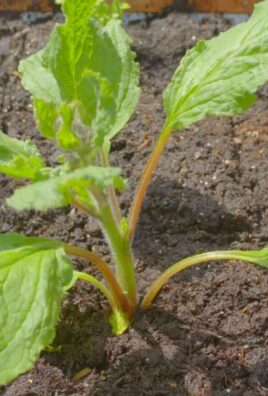
5. Pikieren: Sobald die Sämlinge ihre ersten richtigen Blätter (nach den Keimblättern) entwickelt haben, kannst du sie pikieren. Das bedeutet, du setzt jeden Sämling in einen eigenen, größeren Topf um. Sei dabei vorsichtig, um die Wurzeln nicht zu beschädigen.
Phase 2: Die Vorbereitung des Beetes oder der Töpfe
Egal ob du ein Beet oder Töpfe verwendest, die richtige Vorbereitung ist entscheidend für den Erfolg.
1. Standortwahl: Tomaten lieben die Sonne! Wähle einen sonnigen Standort, der mindestens 6-8 Stunden Sonne pro Tag bekommt.
2. Bodenvorbereitung (Beet): Lockere die Erde mit einem Spaten auf und entferne Unkraut und Steine. Arbeite Kompost oder organischen Dünger ein, um die Erde anzureichern. Tomaten brauchen einen nährstoffreichen, gut durchlässigen Boden.
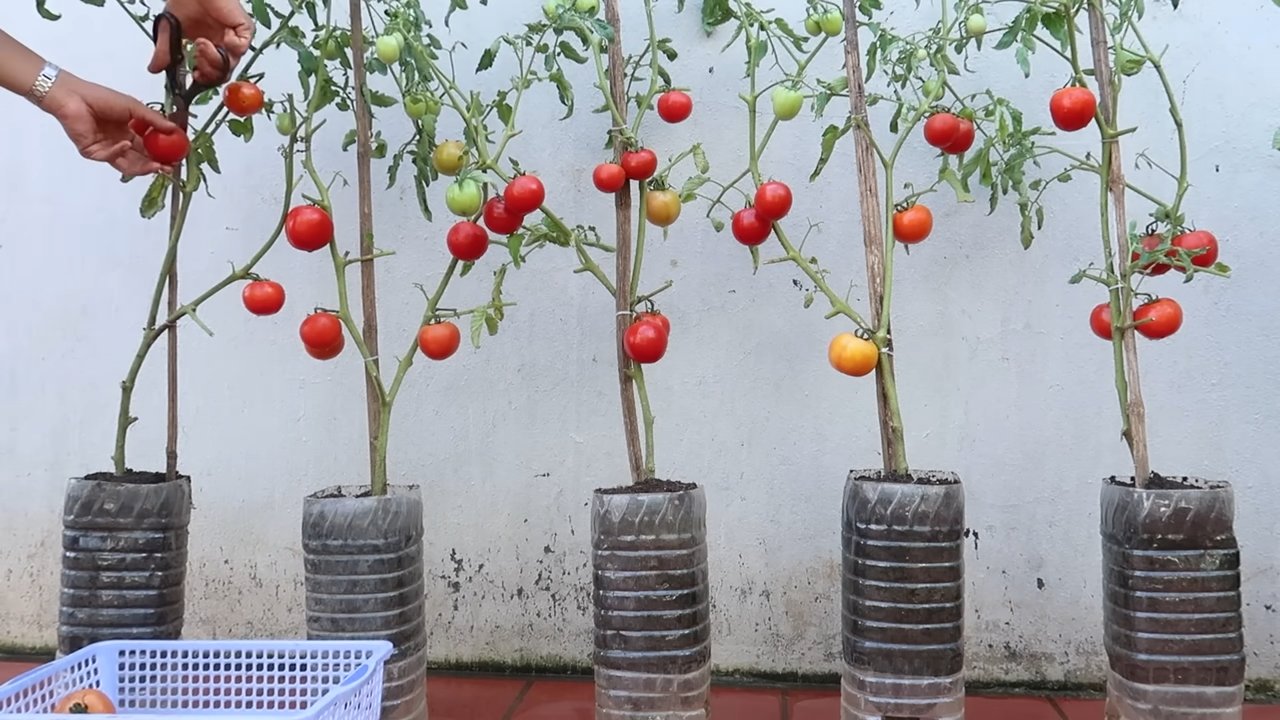
3. Topfvorbereitung (Töpfe): Wähle große Töpfe mit einem Durchmesser von mindestens 30 cm. Fülle sie mit guter Gartenerde und mische etwas Kompost oder organischen Dünger unter. Achte darauf, dass die Töpfe Abzugslöcher haben, damit das Wasser ablaufen kann.
Phase 3: Das Auspflanzen
Sobald die Tomatenpflanzen groß genug sind und die Frostgefahr vorüber ist (Mitte Mai nach den Eisheiligen), können sie ins Freie gepflanzt werden.
1. Abhärten: Bevor du die Pflanzen ins Freie pflanzt, solltest du sie abhärten. Das bedeutet, du stellst sie für ein paar Tage tagsüber ins Freie und holst sie nachts wieder rein. So gewöhnen sie sich an die Sonne und den Wind.
2. Pflanzabstand: Pflanze die Tomatenpflanzen mit einem Abstand von 50-60 cm zueinander. Bei Buschtomaten reicht ein geringerer Abstand.
3. Pflanzloch: Grabe ein Loch, das groß genug ist, um den Wurzelballen der Pflanze aufzunehmen.
4. Einsetzen: Setze die Pflanze vorsichtig in das Loch und fülle es mit Erde auf. Drücke die Erde leicht an.
5. Angießen: Gieße die Pflanzen nach dem Einsetzen gründlich an.
6. Stütze: Setze sofort einen Pflanzstab oder einen Tomatenkäfig neben die Pflanze, um sie zu stützen. Tomatenpflanzen werden schwer, wenn sie Früchte tragen, und brauchen Unterstützung.
Phase 4: Die Pflege
Die Pflege ist entscheidend für eine reiche Ernte.
1. Gießen: Gieße die Tomatenpflanzen regelmäßig, besonders bei trockenem Wetter. Gieße am besten morgens, damit die Blätter tagsüber abtrocknen können. Vermeide es, die Blätter zu gießen, da dies Pilzkrankheiten fördern kann.
2. Düngen: Dünge die Tomatenpflanzen alle 2-3 Wochen mit einem Tomatendünger. Achte darauf, dass der Dünger ausreichend Kalium enthält, da dies die Fruchtbildung fördert.
3. Ausgeizen: Entferne regelmäßig die Seitentriebe (Geiztriebe), die sich in den Blattachseln bilden. Das Ausgeizen fördert das Wachstum der Haupttriebe und sorgt für eine bessere Belüftung der Pflanze. Bei Buschtomaten ist das Ausgeizen nicht notwendig.
4. Mulchen: Bedecke den Boden um die Tomatenpflanzen mit Mulchmaterial. Das hält die Feuchtigkeit im Boden, unterdrückt Unkraut und schützt die Früchte vor Schmutz.
5. Krankheiten und Schädlinge: Achte auf Anzeichen von Krankheiten und Schädlingen. Bei Bedarf kannst du biologische Pflanzenschutzmittel einsetzen. Die Kraut- und Braunfäule ist eine häufige Tomatenkrankheit, die durch Pilze verursacht wird. Vorbeugend kannst du die Pflanzen mit einem Kupferpräparat behandeln.
Phase 5: Die Ernte
Endlich! Der schönste Teil: die Ernte!
1. Reife: Tomaten sind reif, wenn sie ihre typische Farbe haben und sich leicht vom Stiel lösen lassen.
2. Ernten: Ernte die Tomaten regelmäßig, um die Fruchtbildung anzuregen.
3. Lagerung: Lagere die Tomaten an einem kühlen, trockenen Ort. Nicht im Kühlschrank, da sie sonst an Aroma verlieren.
Zusätzliche Tipps und Tricks
* Sortenwahl: Wähle Sorten, die für dein Klima und deine Bedürfnisse geeignet sind. Es gibt unzählige Tomatensorten, von kleinen Cocktailtomaten bis hin zu großen Fleischtomaten.
* Fruchtfolge: Pflanze Tomaten nicht jedes Jahr am selben Standort, um Krankheiten vorzubeugen.
* Begleitpflanzen: Pflanze Basilikum, Ringelblumen oder Kapuzinerkresse neben deine Tomaten. Sie halten Schädlinge fern und fördern das Wachstum.
* Bewässerungssystem: Wenn du wenig Zeit hast, kannst du ein automatisches Bewässerungssystem installieren.
* Tomatenhaus: Ein Tomatenhaus schützt die Pflanzen vor Regen und Wind und verlängert die Erntezeit.
Ich hoffe, diese Anleitung hilft dir dabei, deinen eigenen Tomatengarten anzulegen. Es ist wirklich ein tolles Gefühl, seine eigenen Tomaten zu ernten und zu genießen. Viel Spaß beim Gärtnern!
Conclusion
So, there you have it! Transforming your backyard into a thriving tomato garden is not just a possibility; it’s a rewarding and surprisingly simple endeavor. We’ve walked through the essential steps, from selecting the perfect tomato varieties for your family’s taste to nurturing those seedlings into robust, fruit-bearing plants. The beauty of this DIY project lies not only in the delicious, sun-ripened tomatoes you’ll harvest but also in the connection you’ll forge with nature and the satisfaction of providing fresh, healthy food for your loved ones.
This isn’t just about growing tomatoes; it’s about creating an experience. Imagine the joy of your children picking their own snacks straight from the vine, the pride of serving a salad made entirely from your garden’s bounty, and the satisfaction of knowing exactly where your food comes from. A home-grown tomato garden offers a taste experience that store-bought tomatoes simply can’t match.
But the journey doesn’t end here. Feel free to experiment with different tomato varieties. Perhaps you’d like to try growing heirloom tomatoes for their unique flavors and colors, or maybe you’re interested in exploring container gardening if you have limited space. Consider companion planting – basil, marigolds, and carrots are excellent choices for enhancing tomato growth and deterring pests. You could even try your hand at making your own tomato sauce or salsa using your homegrown harvest. The possibilities are endless!
Why is this DIY tomato garden a must-try? Because it’s more than just a garden; it’s a source of fresh, healthy food, a fun family activity, and a way to connect with nature. It’s a chance to reduce your carbon footprint, save money on groceries, and enjoy the unparalleled flavor of homegrown tomatoes.
We wholeheartedly encourage you to embark on this exciting adventure. Don’t be afraid to get your hands dirty, to learn from your mistakes, and to celebrate your successes. Every gardener, no matter how experienced, started somewhere. And remember, even a small tomato plant can yield a surprising amount of fruit.
Once you’ve harvested your first crop, we’d love to hear about your experience! Share your tips, tricks, and triumphs in the comments below. Let us know what varieties you grew, what challenges you faced, and what you learned along the way. Your insights could inspire others to take the plunge and create their own thriving tomato gardens. Let’s build a community of passionate tomato growers, sharing our knowledge and celebrating the joys of homegrown goodness. So, grab your gardening gloves, gather your seeds, and get ready to experience the magic of a DIY tomato garden! You won’t regret it.
Frequently Asked Questions (FAQ)
What are the best tomato varieties to grow for beginners?
For beginners, determinate tomato varieties like Roma, Celebrity, and Better Bush are excellent choices. Determinate tomatoes grow to a specific size and produce most of their fruit at once, making them easier to manage. They also require less staking or pruning. Indeterminate varieties, such as Beefsteak, Cherry, and Early Girl, continue to grow and produce fruit throughout the season, but they require more support and pruning. Ultimately, the best variety depends on your personal preferences and the space you have available. Consider your climate and local growing conditions when making your selection.
How much space do I need for a tomato garden?
The amount of space you need depends on the number of plants you want to grow and the variety you choose. Determinate tomatoes typically need about 2-3 feet of space between plants, while indeterminate tomatoes need 3-4 feet. If you’re growing in containers, choose pots that are at least 12 inches in diameter for determinate varieties and 18 inches for indeterminate varieties. Even a small balcony or patio can accommodate a few tomato plants in containers. Remember to consider the mature size of the plant when planning your garden layout.
What kind of soil is best for tomatoes?
Tomatoes thrive in well-draining soil that is rich in organic matter. Amend your soil with compost, aged manure, or other organic materials to improve its fertility and drainage. The ideal soil pH for tomatoes is between 6.0 and 6.8. You can test your soil pH with a home testing kit or by sending a sample to your local agricultural extension office. If your soil is too acidic, you can add lime to raise the pH. If it’s too alkaline, you can add sulfur to lower the pH.
How often should I water my tomato plants?
Water your tomato plants deeply and regularly, especially during hot, dry weather. Aim to water at the base of the plant to avoid wetting the foliage, which can lead to fungal diseases. The frequency of watering will depend on the weather, soil type, and the size of your plants. Check the soil moisture regularly by sticking your finger into the soil about an inch deep. If the soil feels dry, it’s time to water. As a general rule, tomato plants need about 1-2 inches of water per week.
What are some common tomato pests and diseases, and how can I prevent them?
Common tomato pests include aphids, whiteflies, tomato hornworms, and spider mites. Common diseases include early blight, late blight, and blossom end rot. To prevent pests and diseases, choose disease-resistant varieties, practice crop rotation, and keep your garden clean and free of debris. Use organic pest control methods, such as insecticidal soap or neem oil, to control pests. Ensure good air circulation around your plants by spacing them properly and pruning them regularly. Blossom end rot is caused by a calcium deficiency, so make sure your soil is rich in calcium and water your plants consistently.
How do I know when my tomatoes are ripe?
Tomatoes are ripe when they have reached their mature color and are slightly soft to the touch. The color will vary depending on the variety. Gently twist the tomato from the vine; if it comes off easily, it’s ripe. Avoid squeezing the tomato too hard, as this can bruise it. Ripe tomatoes will also have a distinct aroma.
Can I grow tomatoes indoors?
Yes, you can grow tomatoes indoors, but it requires more effort than growing them outdoors. Choose dwarf or compact tomato varieties that are specifically bred for indoor growing. Provide your plants with plenty of light, either from a sunny window or grow lights. Use a well-draining potting mix and fertilize regularly. Hand-pollinate the flowers by gently shaking the plants or using a small brush to transfer pollen from one flower to another.
What are some good companion plants for tomatoes?
Good companion plants for tomatoes include basil, marigolds, carrots, onions, garlic, and beans. Basil repels tomato hornworms and whiteflies, while marigolds deter nematodes and other soil pests. Carrots improve soil drainage, and onions and garlic repel aphids and other insects. Beans fix nitrogen in the soil, which benefits tomato growth. Avoid planting tomatoes near brassicas (such as cabbage and broccoli) or fennel, as these can inhibit tomato growth.
How do I prune my tomato plants?
Pruning tomato plants helps to improve air circulation, reduce disease, and encourage fruit production. For determinate tomatoes, minimal pruning is required. Simply remove any suckers (small shoots that grow between the main stem and the branches) below the first flower cluster. For indeterminate tomatoes, prune regularly by removing suckers to encourage the plant to focus its energy on fruit production. Also, remove any yellow or diseased leaves.
How can I save seeds from my tomato plants?
Saving seeds from your tomato plants is a great way to preserve your favorite varieties and save money. Choose ripe, healthy tomatoes from disease-free plants. Scoop out the seeds and pulp into a jar and add a little water. Let the mixture ferment for 3-4 days, stirring occasionally. This process helps to remove the gelatinous coating around the seeds. After fermentation, rinse the seeds thoroughly and spread them out on a paper towel to dry completely. Store the dried seeds in an airtight container in a cool, dark place.

Leave a Comment