
Toothbrush cleaning tight spaces – sounds simple, right? But trust me, unlocking the power of this everyday tool in your garden is a game-changer! I’m about to show you how this humble household item can become your secret weapon for a thriving, beautiful outdoor space. Forget struggling with bulky tools and frustratingly inaccessible nooks and crannies.
For generations, gardeners have relied on ingenuity and resourcefulness. Think about it – our grandparents didn’t have fancy gadgets; they used what they had! And that’s the spirit we’re tapping into. While the modern toothbrush was only invented in the 1930s, the concept of using small, bristled tools for cleaning dates back centuries. Ancient civilizations used twigs and frayed sticks to clean their teeth, a testament to the effectiveness of targeted cleaning. Now, we’re repurposing that same principle for our beloved gardens.
Why do you need this DIY trick? Because your garden deserves the best, and sometimes, the best care comes in the smallest packages. Over time, algae, moss, and dirt accumulate in those hard-to-reach spots – between pavers, around delicate seedlings, and even on the intricate details of your garden art. These build-ups not only look unsightly but can also harbor pests and diseases that threaten your plants. With toothbrush cleaning tight spaces, you can gently and effectively remove these unwanted guests, promoting healthier growth and a more visually appealing garden. I’m excited to share these simple yet powerful techniques that will transform the way you care for your green haven!
DIY Deep Clean: Repurposing Your Old Toothbrush for Sparkling Tight Spaces
Hey there, fellow DIY enthusiasts! I’m always on the lookout for clever ways to save money and make my life a little easier. One of my favorite tricks involves something you probably throw away regularly: your old toothbrush! Before you toss it, consider giving it a second life as a super-effective cleaning tool for those hard-to-reach nooks and crannies. Trust me, you’ll be amazed at how much grime you can banish with this simple hack.
Why a Toothbrush? The Perfect Tool for Tight Spaces
Think about it: toothbrushes are designed to get into small spaces and scrub away plaque. That makes them perfect for cleaning:
* Grout lines in your bathroom and kitchen
* Around faucets and sink fixtures
* Window tracks and sliding door grooves
* Small appliance crevices (like blenders and coffee makers)
* Car interiors (vents, dashboards, etc.)
* Jewelry (especially intricate pieces)
* Keyboards and electronics
* And so much more!
The bristles are firm enough to dislodge dirt and debris, but gentle enough to avoid scratching most surfaces. Plus, the handle provides a comfortable grip for precise cleaning.
Gathering Your Supplies
Before we dive in, let’s make sure you have everything you need. This is a pretty low-key project, so you probably already have most of these items on hand:
* **Old Toothbrush(es):** Obviously! Make sure they’re clean (rinse them thoroughly after their last use as a toothbrush). I like to keep a stash of old toothbrushes specifically for cleaning.
* **Cleaning Solution:** This will depend on what you’re cleaning. Here are a few options:
* **All-Purpose Cleaner:** Great for general cleaning and disinfecting.
* **Baking Soda Paste:** Mix baking soda with a little water to form a paste. This is excellent for scrubbing grout and removing stubborn stains.
* **Vinegar:** A natural disinfectant and degreaser. Dilute it with water for most surfaces.
* **Dish Soap:** Works well for greasy areas and general cleaning.
* **Hydrogen Peroxide:** A powerful disinfectant and stain remover (use with caution on colored surfaces).
* **CLR (Calcium, Lime, Rust Remover):** For tough calcium and lime buildup around faucets and showerheads. Use with proper ventilation and follow the manufacturer’s instructions.
* **Water:** For rinsing and diluting cleaning solutions.
* **Small Bowl or Container:** To hold your cleaning solution.
* **Gloves (Optional):** To protect your hands, especially when using harsh chemicals.
* **Paper Towels or Cleaning Cloths:** For wiping away dirt and excess cleaning solution.
* **Safety Glasses (Optional):** To protect your eyes, especially when cleaning overhead.
* **Small Pick or Pointed Tool (Optional):** A toothpick, dental pick, or safety pin can be helpful for dislodging stubborn debris in very tight spaces.
Step-by-Step Guide: Toothbrush Cleaning in Action
Okay, let’s get down to business! I’ll walk you through the general process, and then we’ll look at some specific examples.
1. **Prepare Your Toothbrush:** Rinse the toothbrush thoroughly with water to remove any lingering toothpaste residue. If it’s particularly dirty, you can soak it in a solution of warm water and dish soap for a few minutes.
2. **Choose Your Cleaning Solution:** Select the appropriate cleaning solution for the surface you’re cleaning. Remember to test the solution in an inconspicuous area first to ensure it doesn’t damage the material.
3. **Apply the Cleaning Solution:** Dip the toothbrush into your chosen cleaning solution. You don’t need to saturate it; just a light coating will do. Alternatively, you can spray the cleaning solution directly onto the surface you’re cleaning.
4. **Scrub the Area:** Use the toothbrush to scrub the area you want to clean. Apply gentle pressure and use small, circular motions. Focus on getting into those tight spaces and crevices.
5. **Rinse (If Necessary):** If you’re using a cleaning solution that needs to be rinsed, use a damp cloth or sponge to wipe away any residue. You can also use a spray bottle filled with water to rinse the area.
6. **Dry the Area:** Use a clean, dry cloth or paper towel to dry the area. This will prevent water spots and help to prevent mold and mildew growth.
7. **Repeat as Needed:** For heavily soiled areas, you may need to repeat the process several times.
Specific Cleaning Applications: Let’s Get Detailed!
Now, let’s look at some specific examples of how you can use your old toothbrush to tackle common cleaning challenges.
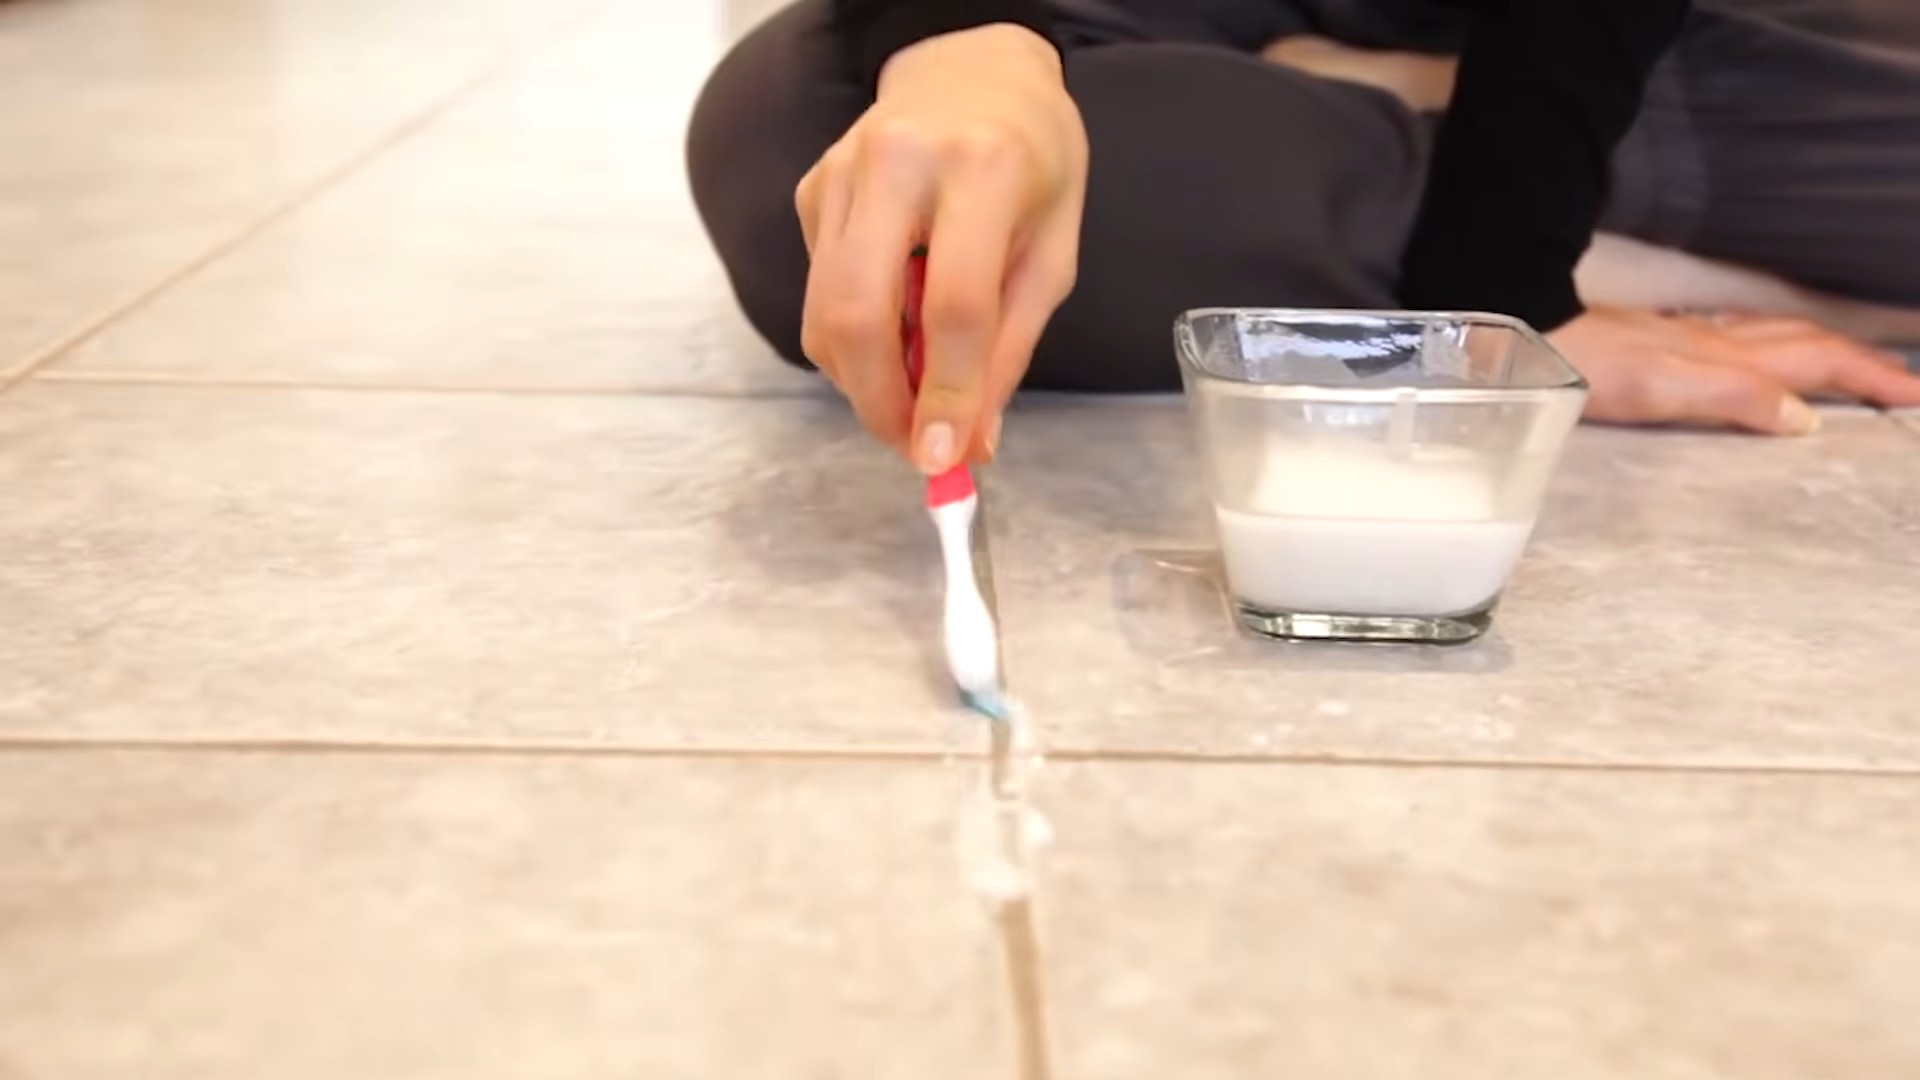
Cleaning Grout Lines
Grout lines can be a breeding ground for dirt, mildew, and stains. Here’s how to get them sparkling clean:
1. **Prepare a Baking Soda Paste:** Mix baking soda with a little water to form a thick paste.
2. **Apply the Paste:** Use your finger or a small spatula to apply the baking soda paste to the grout lines.
3. **Scrub with the Toothbrush:** Use the toothbrush to scrub the grout lines, focusing on areas with heavy staining.
4. **Let it Sit:** Allow the baking soda paste to sit on the grout lines for 10-15 minutes. This will give it time to loosen the dirt and grime.
5. **Rinse Thoroughly:** Rinse the grout lines thoroughly with water. You may need to use a damp sponge or cloth to remove all of the baking soda residue.
6. **Dry the Area:** Dry the grout lines with a clean cloth or paper towel.
For extra stubborn stains, you can try using a solution of bleach and water (always wear gloves and eye protection when working with bleach).
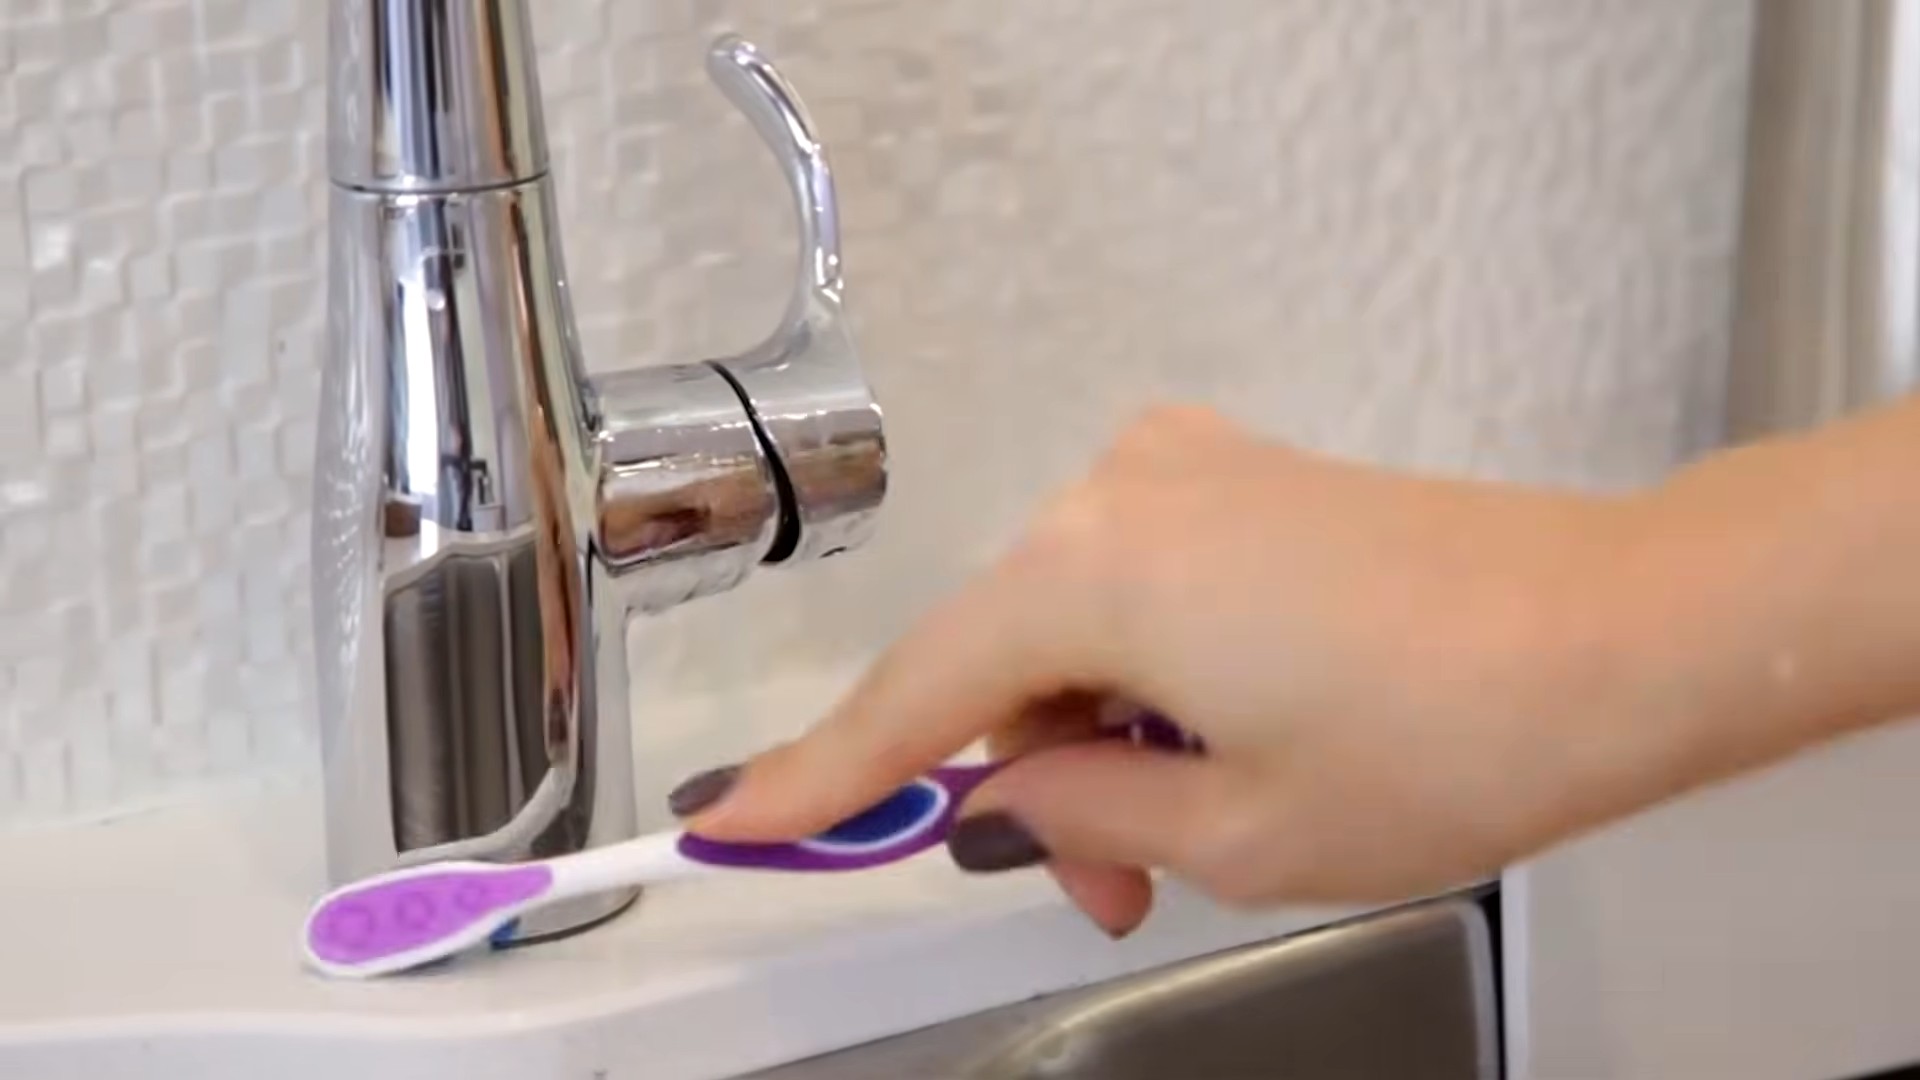
Cleaning Around Faucets and Sink Fixtures
The area around faucets and sink fixtures can accumulate soap scum, hard water stains, and mildew. Here’s how to clean it effectively:
1. **Choose Your Cleaning Solution:** You can use an all-purpose cleaner, vinegar, or a commercial bathroom cleaner. For hard water stains, CLR can be very effective.
2. **Apply the Cleaning Solution:** Spray the cleaning solution directly onto the area around the faucet and sink fixtures.
3. **Scrub with the Toothbrush:** Use the toothbrush to scrub around the base of the faucet, the handles, and any other hard-to-reach areas.
4. **Rinse Thoroughly:** Rinse the area thoroughly with water.
5. **Dry the Area:** Dry the area with a clean cloth or paper towel.
To prevent future buildup, wipe down the area around your faucets and sink fixtures after each use.
Cleaning Window Tracks and Sliding Door Grooves
Window tracks and sliding door grooves can collect dust, dirt, and debris. Here’s how to clean them out:
1. **Vacuum the Area:** Use a vacuum cleaner with a crevice tool to remove any loose dirt and debris from the window tracks and sliding door grooves.
2. **Apply Cleaning Solution:** Spray the area with an all-purpose cleaner or a solution of vinegar and water.
3. **Scrub with the Toothbrush:** Use the toothbrush to scrub the tracks and grooves, paying attention to corners and hard-to-reach areas.
4. **Use a Pick (If Needed):** If there’s any stubborn debris that the toothbrush can’t remove, use a toothpick, dental pick, or safety pin to dislodge it.
5. **Wipe Clean:** Wipe the area clean with a damp cloth or paper towel.
6. **Dry the Area:** Dry the area with a clean cloth or paper towel.
To make cleaning easier in the future, try lining your window tracks and sliding door grooves with aluminum foil or painter’s tape. When they get dirty, simply remove the foil or tape and replace it.
Cleaning Small Appliance Crevices
Blenders, coffee makers, and other small appliances often have hard-to-reach crevices that can accumulate food particles and grime. Here’s how to clean them:
1. **Unplug the Appliance:** Always unplug the appliance before cleaning it.
2. **Disassemble (If Possible):** Disassemble the appliance as much as possible to make it easier to clean.
3. **Apply Cleaning Solution:** Dip the toothbrush into a solution of warm water and dish soap.
4. **Scrub the Crevices:** Use the toothbrush to scrub the crevices, paying attention to areas where food particles tend to accumulate.
5. **Rinse Thoroughly:** Rinse the appliance thoroughly with water.
6. **Dry the Appliance:** Dry the appliance thoroughly before reassembling it.
Refer to the manufacturer’s instructions for specific cleaning recommendations for your appliance.
Cleaning Jewelry
Toothbrushes are great for cleaning jewelry, especially intricate pieces with lots of nooks and crannies.
1. **Prepare a Cleaning Solution:** Mix a few drops of mild dish soap with warm water.
2. **Soak the
Conclusion
So, there you have it! This simple yet incredibly effective DIY trick using a toothbrush to clean those frustratingly tight spaces is more than just a cleaning hack; it’s a game-changer for maintaining a spotless home. We’ve all been there, staring at the grime nestled in window tracks, the dust clinging to grout lines, or the crumbs stubbornly lodged around appliance buttons. Traditional cleaning methods often fall short, leaving you feeling defeated and your spaces still less than pristine. But with this toothbrush cleaning tight spaces method, you’re armed with a precise and powerful tool to conquer even the most challenging cleaning tasks.
Why is this a must-try? Because it’s cost-effective, readily accessible, and remarkably efficient. You’re likely already equipped with the primary tool – an old toothbrush! No need for expensive specialty brushes or harsh chemicals. This method is gentle on surfaces while being tough on dirt, making it ideal for a wide range of materials, from delicate plastics to robust metals. Plus, it’s environmentally friendly, repurposing an item that would otherwise end up in the trash.
But the beauty of this DIY trick lies in its versatility. Feel free to experiment with different cleaning solutions to tailor it to your specific needs. For stubborn grime, try a paste of baking soda and water. For mold and mildew, a diluted bleach solution (always with proper ventilation and safety precautions) can work wonders. You can even use specialized cleaning products designed for specific surfaces, like stainless steel or tile.
Consider these variations to further enhance your cleaning prowess:
* Add a handle extension: For those hard-to-reach areas, attach the toothbrush to a longer handle, such as a chopstick or skewer, using tape or glue. This will give you extra reach and leverage.
* Customize the bristles: If you need a softer touch, try using a toothbrush with softer bristles. Conversely, for tougher jobs, you can trim the bristles at an angle to create a more aggressive scrubbing surface.
* Combine with steam: For particularly stubborn dirt, use the toothbrush in conjunction with a steam cleaner. The steam will loosen the grime, making it easier to remove with the toothbrush.
We wholeheartedly encourage you to try this DIY toothbrush cleaning tight spaces trick and experience the satisfaction of a truly clean home. Don’t just take our word for it – put it to the test! We’re confident that you’ll be amazed by the results.
And most importantly, we want to hear about your experiences! Share your before-and-after photos, your favorite cleaning solutions, and any variations you’ve discovered in the comments section below. Let’s create a community of cleaning enthusiasts who are dedicated to finding innovative and effective ways to keep our homes sparkling. Your tips and tricks could help others achieve cleaning success and inspire even more creative solutions. So, grab that old toothbrush, choose your cleaning solution, and get ready to transform those tight spaces from grimy to gleaming!
Frequently Asked Questions (FAQ)
Q: What kind of toothbrush should I use?
A: An old toothbrush is ideal for this DIY cleaning trick. You don’t want to use a toothbrush that you’re still using for oral hygiene. Any type of toothbrush will work, but those with angled bristles or smaller heads may be particularly useful for reaching tight spaces. Consider keeping a dedicated stash of old toothbrushes specifically for cleaning purposes. This ensures you always have one on hand when you need it.
Q: What cleaning solutions are safe to use with a toothbrush?
A: The best cleaning solution depends on the surface you’re cleaning and the type of grime you’re trying to remove. Here are a few options:
* All-purpose cleaner: A diluted all-purpose cleaner is a good starting point for general cleaning.
* Baking soda paste: Mix baking soda with water to create a paste for tackling stubborn stains and grime.
* Vinegar solution: A mixture of equal parts vinegar and water is effective for removing hard water stains and mildew.
* Dish soap: A few drops of dish soap in water can help cut through grease and grime.
* Bleach solution: For mold and mildew, a diluted bleach solution (1 part bleach to 10 parts water) can be used, but always wear gloves and eye protection and ensure proper ventilation.
* Specialty cleaners: For specific surfaces like stainless steel or tile, use cleaners designed for those materials.
Always test the cleaning solution in an inconspicuous area first to ensure it doesn’t damage the surface.
Q: Can I use this toothbrush cleaning tight spaces method on electronics?
A: Yes, but with extreme caution. Ensure the electronic device is unplugged and completely dry. Use a dry toothbrush or one very lightly dampened with isopropyl alcohol (rubbing alcohol). Avoid getting any liquid inside the device. The toothbrush can be used to gently remove dust and debris from keyboards, remote controls, and other electronic components.
Q: How do I clean the toothbrush after using it for cleaning?
A: After each use, rinse the toothbrush thoroughly with hot water to remove any remaining cleaning solution and debris. You can also soak it in a solution of vinegar and water for a few minutes to disinfect it. Allow the toothbrush to air dry completely before storing it.
Q: What are some other areas where I can use this toothbrush cleaning trick?
A: The possibilities are endless! Here are a few more ideas:
* Around faucets and sinks
* Inside shower door tracks
* Around toilet bases
* Car interiors (vents, dashboards, etc.)
* Jewelry
* Small appliances (coffee makers, blenders, etc.)
* Sewing machines
* Computer keyboards
Q: Is it safe to use a toothbrush with bleach?
A: Yes, but with precautions. Always wear gloves and eye protection when working with bleach. Ensure adequate ventilation to avoid inhaling fumes. Use a diluted bleach solution (1 part bleach to 10 parts water). After using the toothbrush with bleach, rinse it thoroughly with water and allow it to air dry completely. Consider dedicating a specific toothbrush solely for bleach cleaning to avoid cross-contamination.
Q: How often should I clean tight spaces?
A: The frequency depends on the area and how much use it gets. High-traffic areas like kitchens and bathrooms may need to be cleaned more frequently than less-used areas. As a general rule, aim to clean tight spaces at least once a month, or more often if you notice dirt or grime buildup. Regular cleaning will prevent dirt from becoming ingrained and make it easier to maintain a clean home.
Q: Can I use an electric toothbrush for cleaning?
A: While you *can* use an electric toothbrush, it’s generally not recommended. The vibrations can be too strong for delicate surfaces and may cause damage. Additionally, the larger size of the electric toothbrush head may make it difficult to reach tight spaces. A manual toothbrush offers more control and precision.
Q: What if the grime is really stuck on?
A: For particularly stubborn grime, try letting the cleaning solution sit on the area for a few minutes before scrubbing with the toothbrush. You can also use a small amount of elbow grease and apply more pressure while scrubbing. If the grime is still resistant, try using a different cleaning solution or a combination of solutions. For example, you could try soaking the area in a baking soda paste overnight before scrubbing.
Q: How can I prevent grime from building up in tight spaces in the first place?
A: Prevention is key! Regularly wipe down surfaces to remove spills and splatters before they have a chance to dry and harden. Use a vacuum cleaner with a crevice tool to remove dust and debris from hard-to-reach areas. Consider applying a sealant to grout lines to prevent water and dirt from penetrating. By taking these preventative measures, you can significantly reduce the amount of grime that accumulates in tight spaces and make cleaning much easier.
Leave a Comment