
Unique Chili Variety: Ever dreamt of setting your taste buds ablaze with a chili pepper so unique, so fiery, it’s unlike anything you’ve ever experienced? I know I have! Forget the grocery store staples; we’re diving headfirst into the exciting world of cultivating your very own unique chili variety right in your backyard (or even on your balcony!).
Chili peppers have a rich history, dating back thousands of years to South America, where they were revered not only for their flavor but also for their medicinal properties. From the Aztecs to modern-day foodies, chilies have captivated cultures worldwide. But why settle for the ordinary when you can embark on a journey to create something truly special?
This DIY guide is your passport to unlocking a world of flavor possibilities. Imagine impressing your friends and family with a chili pepper they’ve never seen before, one that you nurtured from seed to table. We’ll explore simple yet effective techniques for cross-pollinating different chili varieties, allowing you to experiment with heat levels, flavors, and even colors. Plus, growing your own chilies is incredibly rewarding and often more cost-effective than buying them at the store. So, grab your gardening gloves, and let’s get started on this exciting adventure!
Chili-Kreuzung leicht gemacht: Deine eigene Chili-Sorte züchten!
Hey Chili-Liebhaber! Hast du dich jemals gefragt, wie die ganzen verrückten Chili-Sorten entstehen? Die Antwort ist: Kreuzung! Und das Beste daran? Du kannst das auch zu Hause machen! Ich zeige dir, wie du deine eigene, einzigartige Chili-Sorte kreuzen kannst. Es ist ein spannendes Projekt, das Geduld erfordert, aber die Belohnung – eine Chili, die es so noch nie gab – ist unbezahlbar!
Was du brauchst:
* Zwei Chili-Pflanzen deiner Wahl: Wähle Sorten mit unterschiedlichen Eigenschaften, die du kombinieren möchtest (z.B. Schärfe, Farbe, Form). Denk daran, dass die Kreuzung nur zwischen Pflanzen der gleichen Art (Capsicum annuum, Capsicum chinense, Capsicum baccatum, Capsicum frutescens, Capsicum pubescens) funktioniert.
* Feine Pinsel: Künstlerpinsel oder spezielle Bestäubungspinsel sind ideal.
* Kleine Schere oder Pinzette: Für präzises Arbeiten.
* Kleine Etiketten und Stift: Zum Beschriften der Blüten und Früchte.
* Kleine Organzasäckchen oder ähnliches: Um die Blüten vor ungewollter Bestäubung zu schützen.
* Geduld: Das ist das Wichtigste! Es dauert, bis du Ergebnisse siehst.
Grundlagen der Chili-Kreuzung
Bevor wir loslegen, ein bisschen Biologie: Chilis sind selbstbestäubend, das heißt, sie können sich selbst befruchten. Um eine Kreuzung zu erzielen, müssen wir verhindern, dass die Blüte sich selbst bestäubt und stattdessen den Pollen einer anderen Pflanze einbringen. Das erfordert ein bisschen Fingerspitzengefühl, aber keine Sorge, ich führe dich durch jeden Schritt!
Phase 1: Vorbereitung der Mutterpflanze
Die Mutterpflanze ist die Pflanze, deren Frucht du am Ende ernten und deren Samen du für die nächste Generation verwenden wirst.
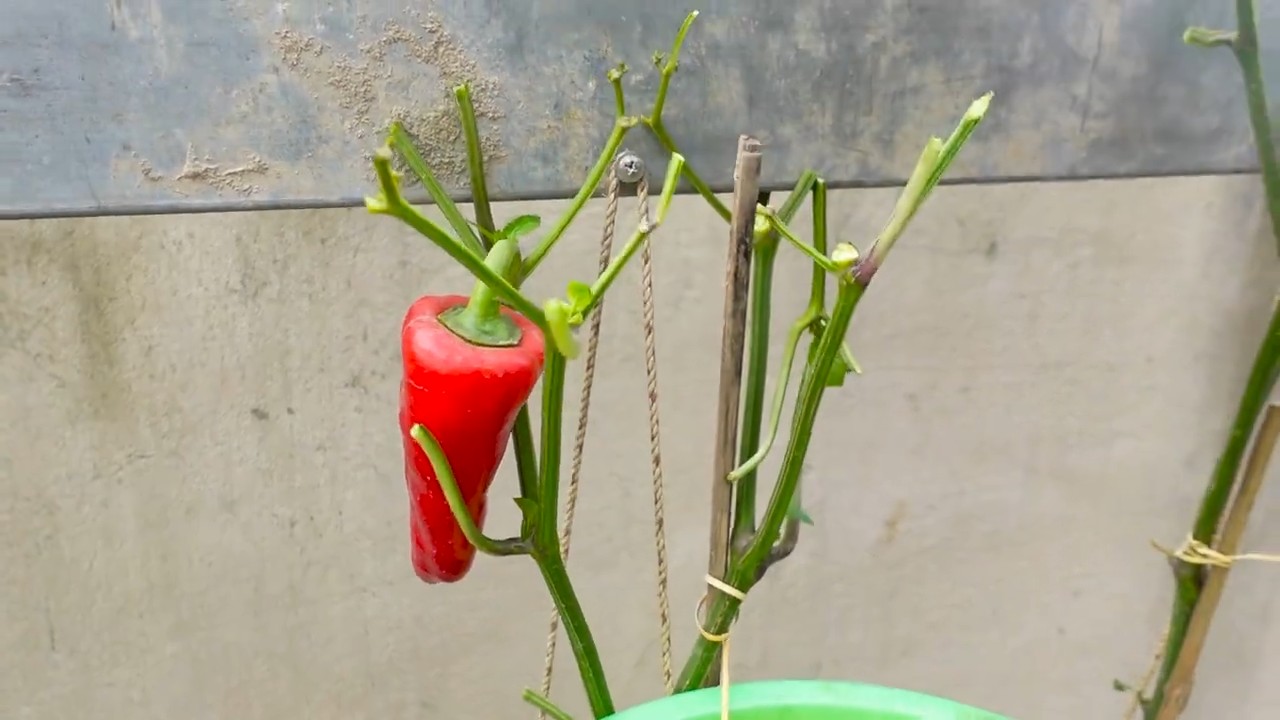
1. Blüten auswählen: Suche dir an deiner Mutterpflanze (die Pflanze, die die Frucht tragen soll) einige gesunde, noch geschlossene Blüten aus. Es ist wichtig, dass die Blüten noch nicht geöffnet sind, da sie sich sonst schon selbst bestäubt haben könnten.
2. Entfernen der Staubbeutel (Entmannung): Das ist der wichtigste Schritt! Mit der kleinen Schere oder Pinzette musst du vorsichtig die Staubbeutel (die kleinen gelben Dinger im Inneren der Blüte) entfernen. Achte darauf, dass du den Stempel (das längliche Teil in der Mitte) nicht beschädigst. Das ist der weibliche Teil der Blüte, der den Pollen aufnehmen muss.
3. Blüte isolieren: Nachdem du die Staubbeutel entfernt hast, stülpe ein kleines Organzasäckchen über die Blüte und fixiere es vorsichtig am Stiel. Das verhindert, dass Insekten oder der Wind ungewollt Pollen auf die Blüte bringen. Beschrifte das Säckchen mit dem Namen der Mutterpflanze und dem Datum der Entmannung.
Phase 2: Pollen sammeln von der Vaterpflanze
Die Vaterpflanze ist die Pflanze, von der du den Pollen nimmst, um die Mutterpflanze zu bestäuben.
1. Pollen auswählen: Suche dir an deiner Vaterpflanze reife, geöffnete Blüten aus. Du erkennst reifen Pollen daran, dass er leicht und pudrig ist.
2. Pollen sammeln: Mit dem feinen Pinsel nimmst du vorsichtig den Pollen von den Staubbeuteln der Vaterpflanze auf. Achte darauf, dass du genügend Pollen aufnimmst.
Phase 3: Bestäubung der Mutterpflanze
Jetzt kommt der spannende Teil: Die eigentliche Bestäubung!
1. Säckchen entfernen: Entferne vorsichtig das Organzasäckchen von der Mutterpflanze.
2. Bestäubung: Mit dem Pinsel trägst du den Pollen der Vaterpflanze vorsichtig auf den Stempel der Mutterpflanze auf. Achte darauf, dass der Stempel gut mit Pollen bedeckt ist.
3. Säckchen wieder anbringen: Stülpe das Organzasäckchen sofort wieder über die Blüte und fixiere es. Beschrifte das Säckchen mit dem Namen der Mutterpflanze, dem Namen der Vaterpflanze und dem Datum der Bestäubung. Das ist wichtig, damit du später weißt, welche Kreuzung du gemacht hast.
4. Wiederholung: Wiederhole die Bestäubung an den folgenden Tagen (2-3 Tage lang), um sicherzustellen, dass die Bestäubung erfolgreich war.
Phase 4: Nach der Bestäubung
Jetzt heißt es abwarten und beobachten!
1. Beobachtung: Beobachte die bestäubten Blüten. Wenn die Bestäubung erfolgreich war, sollte die Blüte nicht abfallen, sondern sich stattdessen eine kleine Frucht bilden.
2. Fruchtentwicklung: Wenn sich eine Frucht bildet, lass sie an der Pflanze reifen.
3. Samen gewinnen: Sobald die Frucht reif ist, kannst du sie ernten und die Samen entnehmen. Lass die Samen gut trocknen, bevor du sie lagerst.
Phase 5: Anbau der F1-Generation
Die Samen, die du gewonnen hast, sind die F1-Generation (Filialgeneration 1). Diese Pflanzen werden die Eigenschaften beider Elternteile zeigen, aber es ist wichtig zu wissen, dass sie nicht unbedingt stabil sind. Das bedeutet, dass die Pflanzen der F1-Generation untereinander variieren können.
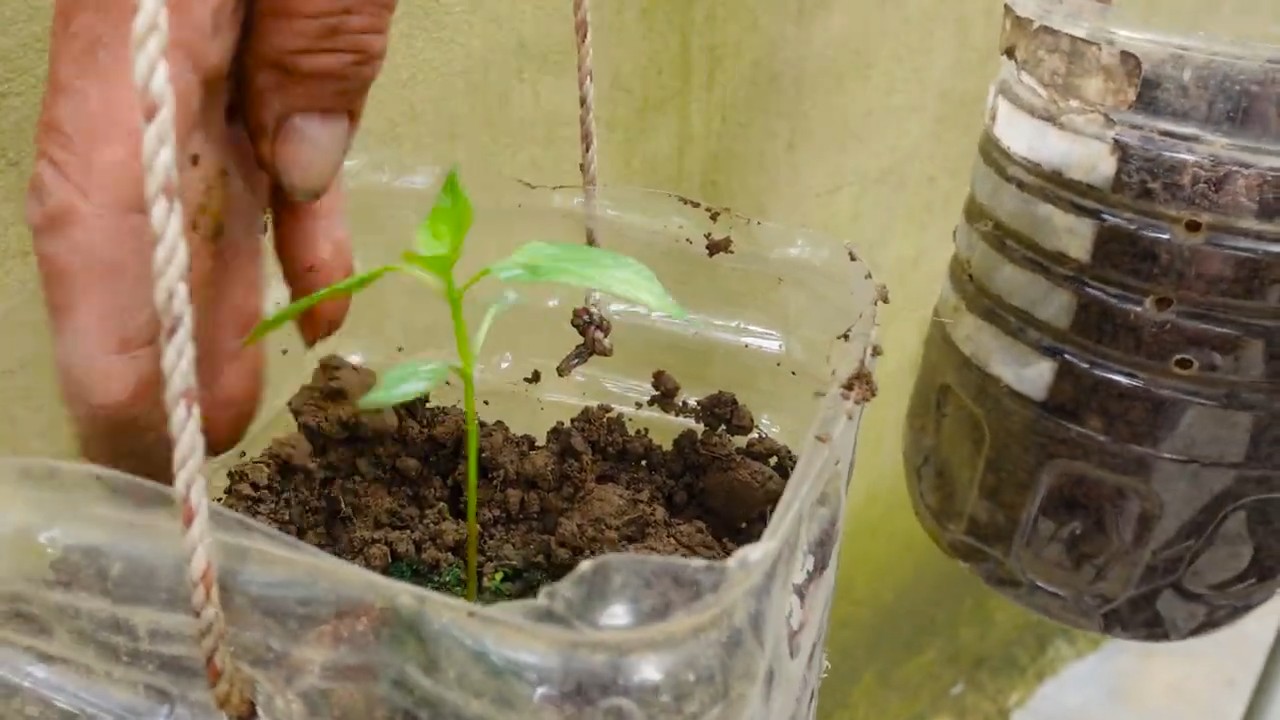
1. Aussaat: Säe die Samen der F1-Generation aus.
2. Pflanzen beobachten: Beobachte die Pflanzen genau und notiere dir ihre Eigenschaften (Schärfe, Farbe, Form, Größe usw.).
3. Auswahl: Wähle die Pflanzen aus, die die gewünschten Eigenschaften am besten zeigen.
4. Selbstbestäubung oder weitere Kreuzung: Um eine stabile Sorte zu erhalten, musst du die ausgewählten Pflanzen entweder selbstbestäuben (indem du die Blüten isolierst und den Pollen der gleichen Pflanze verwendest) oder sie untereinander kreuzen. Diesen Prozess musst du mehrere Generationen lang wiederholen, bis die Pflanzen stabile Eigenschaften zeigen.
Wichtige Tipps und Tricks
* Sauberkeit ist wichtig: Achte darauf, dass deine Werkzeuge sauber sind, um Verunreinigungen zu vermeiden.
* Dokumentation: Führe ein genaues Protokoll über deine Kreuzungen. Notiere dir, welche Pflanzen du gekreuzt hast, wann du sie gekreuzt hast und welche Eigenschaften die Pflanzen der F1-Generation zeigen.
* Geduld: Die Züchtung einer neuen Chili-Sorte ist ein langwieriger Prozess. Hab Geduld und lass dich nicht entmutigen, wenn es nicht gleich beim ersten Mal klappt.
* Experimentieren: Hab Spaß am Experimentieren! Probiere verschiedene Kreuzungen aus und entdecke neue Geschmacksrichtungen und Formen.
* Isolierung: Um ungewollte Kreuzungen zu vermeiden, solltest du deine Chili-Pflanzen räumlich trennen oder die Blüten isolieren.
* Bestäubungszeitpunkt: Der beste Zeitpunkt für die Bestäubung ist am frühen Morgen, wenn der Pollen frisch ist.
* Luftfeuchtigkeit: Eine hohe Luftfeuchtigkeit kann die Bestäubung erschweren. Versuche, die Luftfeuchtigkeit zu senken, indem du die Pflanzen gut belüftest.
Häufige Fehler und wie man sie vermeidet
* Selbstbestäubung nicht verhindert: Achte darauf, dass du die Staubbeutel vor der Bestäubung vollständig entfernst und die Blüten isolierst.
* Falsche Pflanzen gekreuzt: Stelle sicher, dass du Pflanzen der gleichen Art kreuzt.
* Zu wenig Pollen verwendet: Verwende genügend Pollen, um sicherzustellen, dass die Bestäubung erfolgreich ist.
* Keine Dokumentation: Führe ein genaues Protokoll über deine Kreuzungen.
* Ungeduld: Hab Geduld und lass dich nicht entmutigen, wenn es nicht gleich beim ersten Mal klappt.
Zusätzliche Informationen
* Capsicum Arten: Es gibt fünf Hauptarten von Capsicum (Chili): Capsicum annuum (z.B. Jalapeño, Paprika), Capsicum chinense (z.B. Habanero, Scotch Bonnet), Capsicum baccatum (z.B. Aji), Capsicum frutescens (z.B.
Conclusion
So, there you have it! Mastering the art of creating your own unique chili variety is not just about following a recipe; it’s about embarking on a culinary adventure, a journey of flavor discovery that allows you to tailor every single bite to your exact preferences. We’ve explored the fundamental principles, delved into the nuances of spice blending, and armed you with the knowledge to confidently craft a chili that is truly your own.
Why is this DIY approach a must-try? Because store-bought chili mixes, while convenient, often lack the depth, complexity, and personalized touch that a homemade blend can offer. They can be bland, overly salty, or simply not aligned with your specific taste profile. By taking control of the ingredients, you can create a chili that is perfectly balanced, bursting with flavor, and uniquely suited to your palate. Imagine a chili that’s smoky and sweet, fiery and fruity, or earthy and robust – the possibilities are truly endless.
But the benefits extend beyond just taste. Crafting your own chili blend allows you to control the quality of the ingredients. You can opt for organic spices, locally sourced peppers, and ethically produced ingredients, ensuring that your chili is not only delicious but also aligned with your values. Furthermore, it’s a fantastic way to reduce your reliance on processed foods and embrace a more wholesome and sustainable approach to cooking.
Ready to take your chili game to the next level? Here are a few suggestions and variations to inspire you:
* Spice Level Experimentation: Don’t be afraid to experiment with different chili peppers to achieve your desired heat level. Start with milder varieties like ancho or poblano and gradually add hotter peppers like cayenne or habanero until you reach your sweet spot. Remember, you can always add more heat, but it’s difficult to take it away.
* Smoked Paprika Power: Incorporate smoked paprika for a deep, smoky flavor that adds complexity and depth to your chili. A little goes a long way, so start with a small amount and adjust to taste.
* Chocolate Indulgence: For a truly unique and decadent chili, add a small amount of dark chocolate or cocoa powder. This will add richness, depth, and a subtle sweetness that complements the savory flavors beautifully.
* Coffee Kick: A touch of ground coffee can enhance the earthy notes of your chili and add a subtle bitterness that balances the sweetness of the tomatoes.
* Vegetarian/Vegan Delight: Easily adapt this DIY chili blend for vegetarian or vegan chili by using vegetable broth instead of beef broth and adding plant-based protein sources like beans, lentils, or crumbled tofu.
* Regional Twists: Explore regional chili variations by incorporating ingredients like cumin, oregano, and coriander for a Tex-Mex flavor, or cinnamon, cloves, and allspice for a Cincinnati-style chili.
We are confident that once you experience the satisfaction of creating your own unique chili variety, you’ll never go back to store-bought mixes again. It’s a rewarding and delicious way to express your creativity in the kitchen and impress your friends and family with your culinary skills.
So, what are you waiting for? Gather your spices, unleash your inner chef, and start experimenting! We encourage you to try this DIY trick and share your experience with us. Let us know what unique flavor combinations you discover and what variations you come up with. Share your photos, recipes, and stories in the comments below. We can’t wait to see what you create! Happy chili-making!
Frequently Asked Questions (FAQ)
What is the best way to store my homemade chili spice blend?
To ensure your homemade chili spice blend retains its potency and flavor, proper storage is crucial. The ideal storage environment is cool, dark, and dry. Exposure to heat, light, and moisture can degrade the quality of the spices over time. We recommend storing your blend in an airtight container, such as a glass jar with a tight-fitting lid or a resealable plastic bag. Avoid storing it near the stove or in direct sunlight. A pantry or spice cabinet is usually the best option. Properly stored, your chili spice blend should last for at least 6-12 months.
How can I adjust the heat level of my chili spice blend?
Adjusting the heat level is one of the most exciting aspects of creating your own unique chili variety. The key is to understand the Scoville Heat Units (SHU) of different chili peppers. Start with milder peppers like ancho or poblano, which have a lower SHU, and gradually add hotter peppers like cayenne or habanero, which have a much higher SHU. Taste your blend frequently as you add peppers and remember that the heat will intensify as the chili simmers. If you accidentally add too much heat, you can try to balance it out with ingredients like sugar, vinegar, or dairy products.
Can I use fresh chili peppers instead of dried spices?
Yes, you can definitely use fresh chili peppers in your chili spice blend. However, keep in mind that fresh peppers have a higher moisture content than dried spices, so you may need to adjust the recipe accordingly. To use fresh peppers, you’ll need to roast, peel, and seed them before chopping them finely and adding them to your blend. Roasting the peppers will enhance their flavor and make them easier to peel. You can roast them in the oven, on the grill, or over an open flame. Be sure to wear gloves when handling hot peppers to avoid skin irritation.
What are some good substitutes for chili powder in this recipe?
While chili powder is a common ingredient in chili recipes, it’s not essential. If you don’t have chili powder on hand, you can create your own substitute by combining a blend of other spices. A good starting point is to mix equal parts of ground cumin, paprika, oregano, and garlic powder. You can also add a pinch of cayenne pepper for heat. Adjust the proportions to your liking and taste as you go. Another option is to use a pre-made chili seasoning blend, but be sure to check the ingredients list to ensure it doesn’t contain any unwanted additives.
How can I make my chili spice blend more flavorful?
There are several ways to enhance the flavor of your chili spice blend. One technique is to toast the spices before grinding them. Toasting the spices in a dry skillet over medium heat for a few minutes will release their essential oils and intensify their aroma. Be careful not to burn the spices, as this will make them bitter. Another way to add flavor is to use high-quality spices. Look for spices that are freshly ground and have a vibrant color and aroma. You can also experiment with different spice combinations to create your own signature blend. Don’t be afraid to try new things and see what works best for you.
Can I use this chili spice blend for other dishes besides chili?
Absolutely! This chili spice blend is incredibly versatile and can be used to add flavor to a wide variety of dishes. Try using it as a rub for grilled meats, poultry, or fish. Sprinkle it on roasted vegetables, such as sweet potatoes, corn, or Brussels sprouts. Add it to soups, stews, or sauces for a boost of flavor. You can even use it to season tacos, burritos, or enchiladas. The possibilities are endless! Just remember to adjust the amount of spice you use depending on the dish and your personal preferences.
How long will my homemade chili last?
Homemade chili, when stored properly, can last for 3-4 days in the refrigerator. Ensure the chili has cooled down completely before transferring it to an airtight container. For longer storage, you can freeze the chili for up to 2-3 months. When freezing, divide the chili into portion-sized containers for easy thawing. To reheat, thaw the chili in the refrigerator overnight or use the defrost setting on your microwave. Reheat thoroughly on the stovetop or in the microwave until it reaches an internal temperature of 165°F (74°C).

Leave a Comment