
Water Free Strawberry Growing – sounds like a dream, right? Imagine plump, juicy strawberries bursting with flavor, all without the constant worry of watering! I know, it seems too good to be true, but trust me, it’s absolutely achievable with a few clever DIY tricks. For centuries, gardeners have sought ways to simplify their lives and maximize their yields, and this method taps into that very spirit of innovation.
Think about it: watering can be time-consuming, especially during scorching summers. Plus, overwatering is a common pitfall that can lead to root rot and other problems. This DIY approach to Water Free Strawberry Growing not only saves you precious time and effort, but it also promotes healthier, more resilient plants. We’re talking about a system that mimics natural conditions, allowing your strawberries to thrive with minimal intervention.
Ready to ditch the watering can and unlock the secret to effortless strawberry harvests? This article is packed with simple, step-by-step instructions and insider tips that will transform your gardening experience. Let’s get started and create a thriving strawberry patch that practically takes care of itself!
DIY Water-Free Strawberry Growing: A Guide to Self-Sufficient Berries
Hey there, fellow gardening enthusiasts! I’m so excited to share this amazing DIY project with you: growing strawberries without constantly watering them! Yes, you read that right. This method is perfect for those of us who are busy, live in dry climates, or just want to be more eco-friendly. It’s all about creating a self-watering system that minimizes water waste and maximizes strawberry deliciousness. Let’s dive in!
What You’ll Need
Before we get started, let’s gather our supplies. This is a relatively inexpensive project, and you might even have some of these items lying around already.
* A large container (think a 5-gallon bucket, a large plastic storage bin, or even a repurposed trash can – just make sure it’s clean!). The bigger, the better, as it will hold more water and support more plants.
* A smaller container (a 2-liter soda bottle, a small plastic pot, or even a yogurt container will work). This will be our water reservoir.
* PVC pipe (about 1-2 inches in diameter and long enough to reach from the bottom of the large container to a few inches above the top). This is how we’ll refill the water reservoir.
* Strawberry plants (obviously!). Choose everbearing varieties for a continuous harvest throughout the season. I recommend starting with at least 5-6 plants for a good yield.
* Potting mix (a well-draining mix is crucial to prevent root rot). I like to use a mix of compost, peat moss, and perlite.
* Gravel or small rocks (for drainage at the bottom of the container).
* Landscape fabric (to prevent soil from clogging the drainage layer).
* Drill with various sized drill bits.
* Utility knife or scissors.
* Measuring tape or ruler.
* Gloves (to protect your hands).
* Safety glasses (when drilling).
Building Your Water-Free Strawberry Planter: Step-by-Step
Okay, now for the fun part! We’re going to build our self-watering strawberry paradise. Follow these steps carefully, and you’ll be enjoying fresh, juicy strawberries in no time.
1. Prepare the Large Container: First, we need to create drainage. Drill several holes (about ½ inch in diameter) in the bottom of your large container. Space them evenly apart to ensure good drainage. This is super important to prevent waterlogging, which strawberries hate.
2. Add the Drainage Layer: Pour a layer of gravel or small rocks (about 2-3 inches deep) into the bottom of the container. This will create a space for excess water to drain away from the roots.
3. Line with Landscape Fabric: Cut a piece of landscape fabric that’s slightly larger than the bottom of the container. Place it over the gravel layer. This will prevent the potting mix from washing down into the gravel and clogging the drainage.
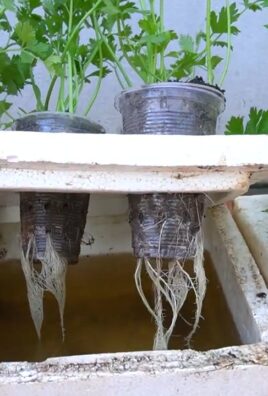
4. Prepare the Water Reservoir: Now, let’s get our smaller container ready. Drill several small holes (about ¼ inch in diameter) around the sides of the container, near the bottom. These holes will allow water to seep out into the surrounding soil. Don’t drill holes in the bottom of this container!
5. Position the Water Reservoir and PVC Pipe: Place the smaller container in the center of the large container, on top of the landscape fabric. Now, carefully insert the PVC pipe next to the smaller container, pushing it down until it reaches the bottom of the large container. Make sure the top of the PVC pipe extends a few inches above the rim of the large container. This will be our fill tube.
6. Add the Potting Mix: Carefully fill the large container with potting mix, surrounding the smaller container and the PVC pipe. Leave a few inches of space at the top of the container. Gently pack the soil around the water reservoir to keep it stable.
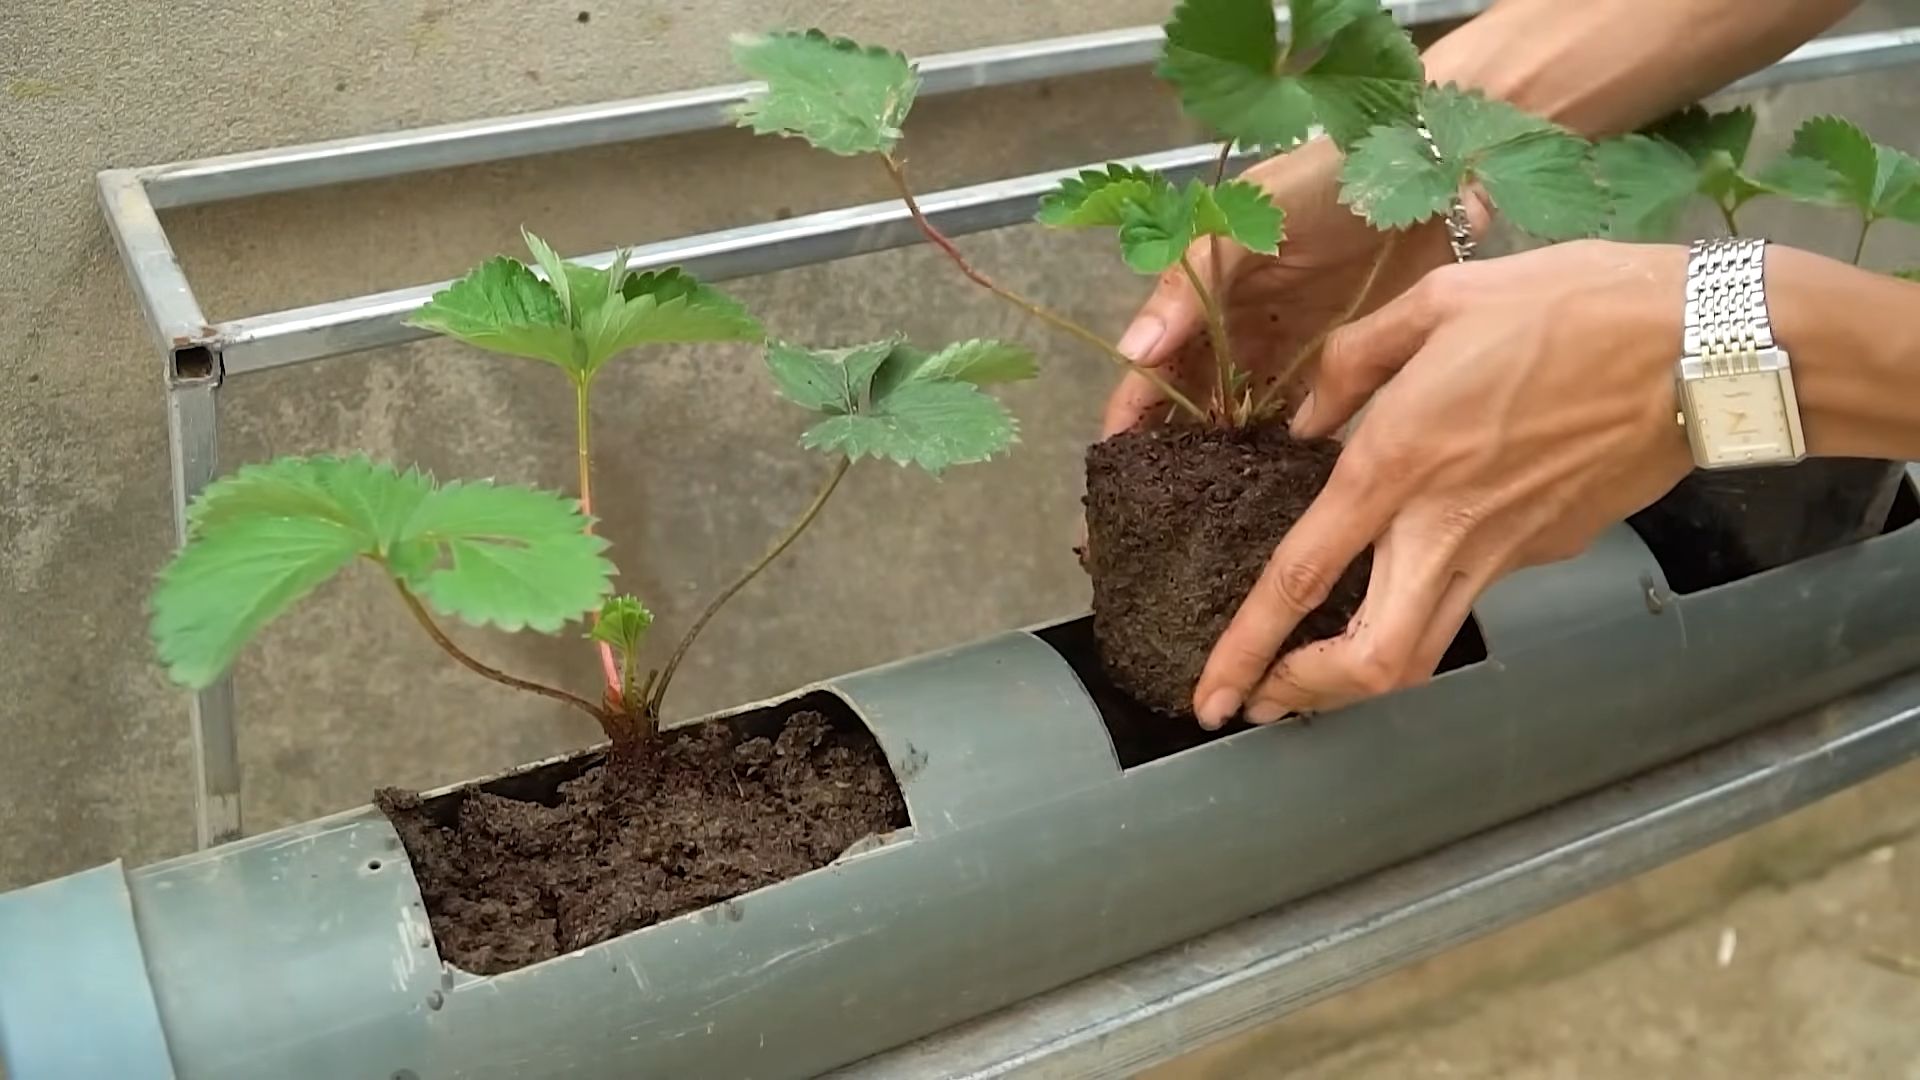
7. Plant Your Strawberry Plants: Now for the stars of the show! Gently remove your strawberry plants from their nursery pots. Loosen the roots a bit with your fingers. Dig small holes in the potting mix, spacing the plants evenly around the container. Plant the strawberries at the same depth they were in their original pots.
8. Water Thoroughly (Initially): This is the only time we’ll be doing a full watering. Water the entire container thoroughly until water drains out of the drainage holes at the bottom. This will help settle the soil and get the plants established.
9. Fill the Water Reservoir: Now, pour water down the PVC pipe until the smaller container is full. You’ll know it’s full when water starts to seep out of the holes you drilled earlier.
10. Mulch (Optional): Add a layer of mulch (straw, wood chips, or even shredded leaves) around the base of the strawberry plants. This will help retain moisture, suppress weeds, and keep the berries clean.
Maintaining Your Water-Free Strawberry Garden
Okay, the hard work is done! Now it’s time to enjoy the fruits (literally!) of your labor. Here’s how to keep your water-free strawberry garden thriving:
* Check the Water Reservoir Regularly: The frequency of refilling the water reservoir will depend on the weather and the size of your container. Check it every few days, especially during hot, dry periods. When the soil feels dry to the touch, it’s time to refill.
* Fertilize Sparingly: Strawberries are heavy feeders, but over-fertilizing can lead to leggy growth and fewer berries. Use a balanced fertilizer (10-10-10) diluted to half strength every few weeks. I prefer using organic fertilizers like compost tea or fish emulsion.
* Sunlight is Key: Strawberries need at least 6-8 hours of sunlight per day to produce a good crop. Place your container in a sunny location.
* Pest Control: Keep an eye out for common strawberry pests like slugs, snails, and aphids. Hand-picking them off the plants is often the best solution. You can also use organic pest control methods like diatomaceous earth or neem oil.
* Remove Runners: Strawberry plants produce runners (long stems that grow horizontally and develop new plantlets). If you want to maximize berry production, remove the runners as they appear. This will force the plant to put its energy into producing fruit instead of new plants. However, if you want to propagate new strawberry plants, you can allow the runners to root in small pots filled with potting mix.
* Harvest Regularly: Pick your strawberries when they are fully ripe and red. The more you harvest, the more the plants will produce.
* Overwintering: In colder climates, you’ll need to protect your strawberry plants during the winter. You can move the container to a sheltered location (like a garage or shed) or cover the plants with a thick layer of mulch.
Troubleshooting
Even with the best planning, sometimes things don’t go exactly as expected. Here are a few common problems you might encounter and how to fix them:
* Yellowing Leaves: This could be a sign of overwatering, underwatering, or nutrient deficiency. Check the soil moisture and adjust your watering schedule accordingly. If the soil is consistently wet, you may need to improve drainage. If the soil is dry, water more frequently. If the leaves are yellowing all over, it could be a sign of nutrient deficiency. Fertilize with a balanced fertilizer.
* Lack of Fruit: This could be due to insufficient sunlight, poor pollination, or over-fertilizing. Make sure your plants are getting enough sunlight. You can hand-pollinate the flowers by gently brushing them with a small paintbrush. Avoid over-fertilizing, as this can lead to excessive foliage growth at the expense of fruit production.
* Root Rot: This is caused by overwatering and poor drainage. If you suspect root rot, carefully remove the plant from the container and inspect the roots. If the roots are brown and mushy, trim away the affected areas. Repot the plant in fresh potting mix and improve drainage.
* Pests: As mentioned earlier, keep an eye out for common strawberry pests. Hand-picking them off the plants is often the best solution. You can also use organic pest control methods.
Why This Method Works
The beauty of this water-free system lies in its simplicity and efficiency. The water reservoir provides a constant source of moisture to the roots, while the drainage layer prevents waterlogging. The potting mix provides the necessary nutrients for healthy growth. By minimizing water waste and providing a stable environment, this system allows you to grow delicious strawberries with minimal effort.
Adapting the System
This system is incredibly versatile and can be adapted to suit your specific needs and preferences.
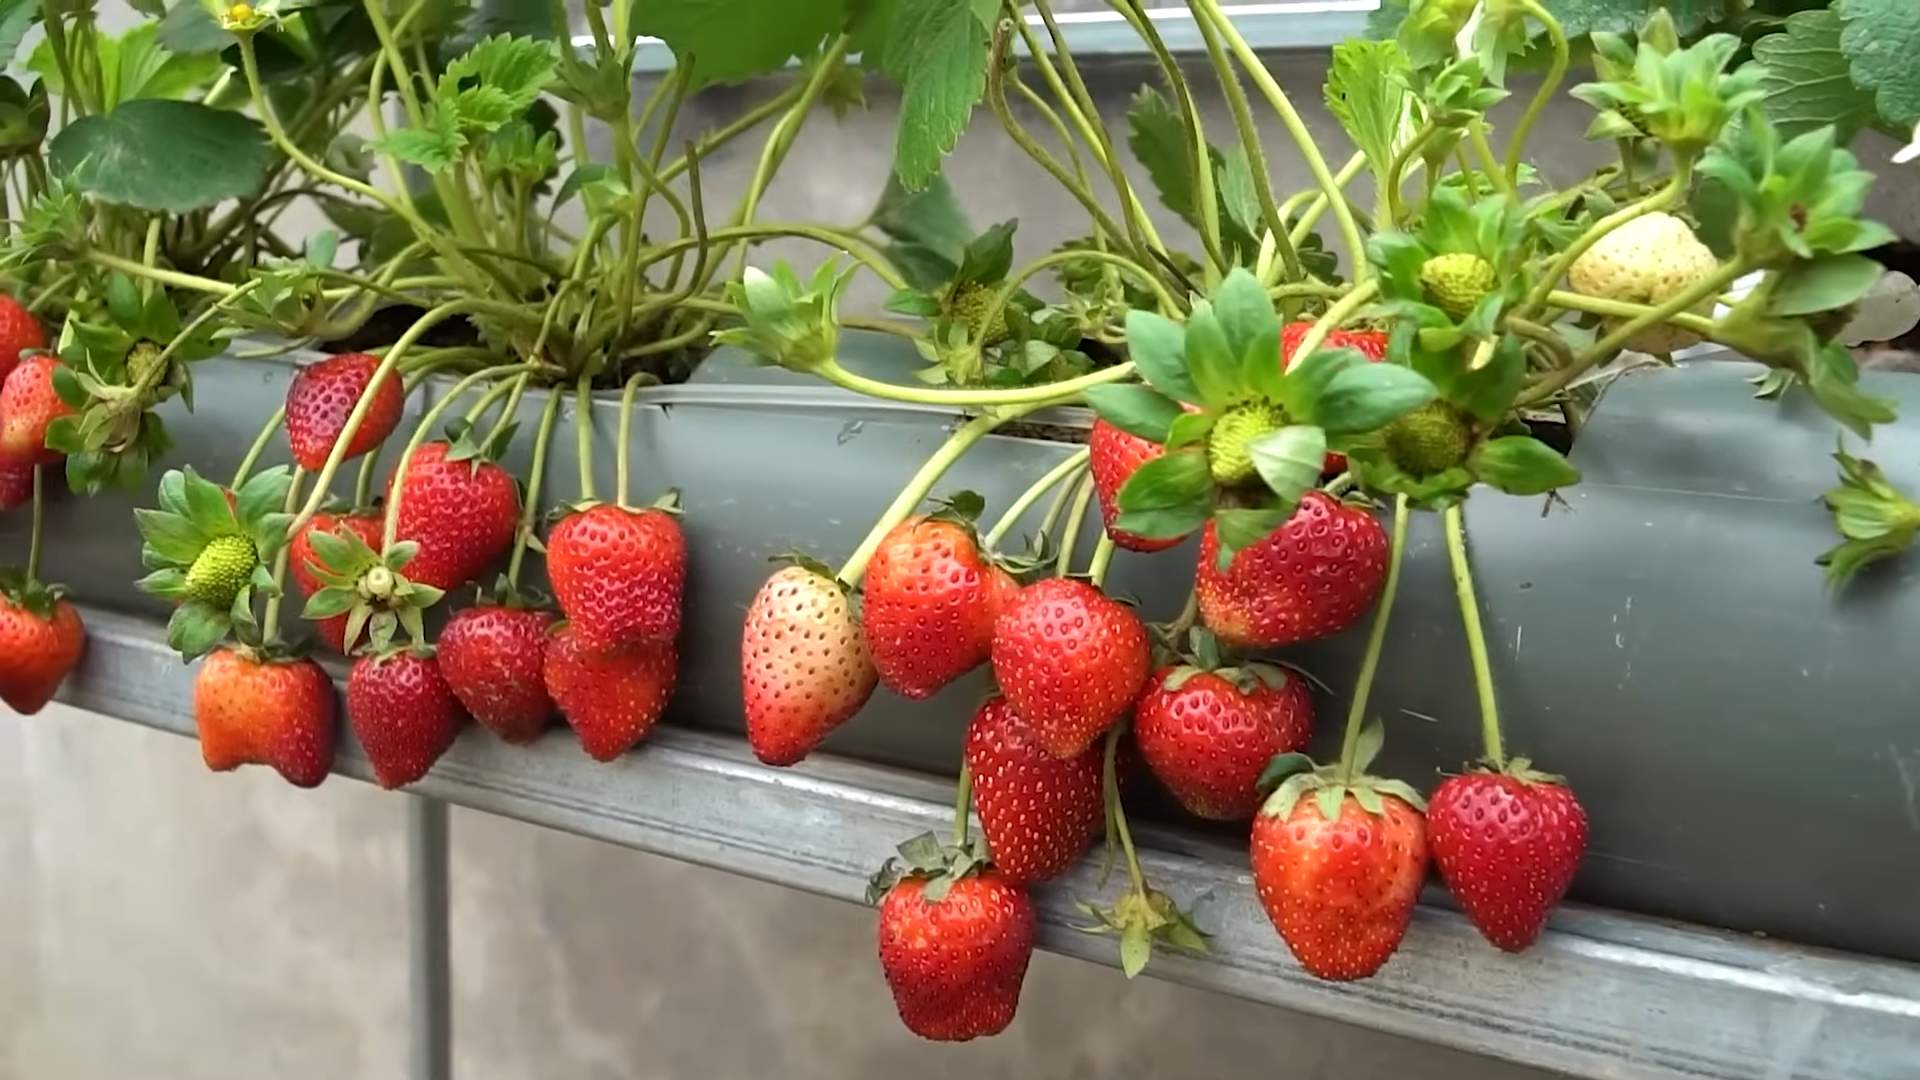
* Vertical Growing: You can adapt this system for vertical growing by using a tall, narrow container and drilling holes along the sides to plant the strawberries. This is a great option for small spaces.
* Different Plants: While this system is perfect for strawberries, it can also be used to grow other plants that prefer consistent moisture, such as herbs, tomatoes
Conclusion
So, there you have it! This water-free strawberry growing method isn’t just a quirky experiment; it’s a game-changer for anyone looking to enjoy fresh, delicious strawberries with minimal effort and maximum sustainability. We’ve walked you through the simple steps, highlighting how this innovative approach drastically reduces water consumption, minimizes the risk of fungal diseases, and ultimately, leads to a healthier, more bountiful harvest.
Think about it: no more lugging heavy watering cans, no more worrying about overwatering, and no more battling those pesky fungal infections that can decimate your strawberry patch. This method allows you to focus on the joy of gardening, the anticipation of ripe, juicy berries, and the satisfaction of knowing you’re doing your part for the environment.
But the beauty of this water-free strawberry growing technique lies not only in its efficiency but also in its adaptability. Feel free to experiment with different types of growing mediums. While we’ve highlighted the benefits of using a well-draining soil mix amended with compost, you could also explore other options like coco coir or even a combination of perlite and vermiculite. The key is to ensure excellent drainage to prevent root rot.
Consider also the variety of strawberries you choose to grow. While everbearing varieties are a popular choice for continuous harvests, don’t be afraid to try June-bearing varieties for a concentrated burst of flavor. You can even experiment with different cultivars to find the ones that thrive best in your specific climate and growing conditions.
Furthermore, you can adapt this method to different growing spaces. Whether you have a sprawling backyard garden, a sunny balcony, or even just a windowsill, you can successfully grow strawberries using this water-free approach. For smaller spaces, consider using hanging baskets or vertical planters to maximize your growing area.
This water-free strawberry growing method is truly a must-try for any gardener, regardless of experience level. It’s simple, effective, and environmentally friendly. It’s a win-win-win situation!
We’re confident that once you try this method, you’ll be amazed by the results. Imagine the taste of those sun-ripened strawberries, bursting with flavor, knowing that you grew them yourself with minimal water and effort. It’s a truly rewarding experience.
So, what are you waiting for? Gather your supplies, choose your strawberry varieties, and get ready to embark on a water-wise strawberry growing adventure. We encourage you to try this DIY trick and share your experiences with us! Let us know what works best for you, what challenges you encounter, and what delicious strawberry recipes you create with your homegrown bounty. Share your photos and stories on social media using #WaterFreeStrawberries and let’s inspire others to adopt this sustainable gardening practice. Together, we can make a difference, one strawberry at a time.
Frequently Asked Questions (FAQ)
What exactly does “water-free” mean in this context? Does it mean I never water the plants at all?
No, “water-free” is a bit of a misnomer. It doesn’t mean you completely eliminate watering. Instead, it refers to a significantly reduced watering schedule compared to traditional strawberry growing methods. The key is to create a well-draining environment that retains enough moisture to support the plants without becoming waterlogged. You’ll still need to water occasionally, especially during hot, dry periods, but the frequency and amount of water will be drastically reduced. Think of it as “water-wise” or “low-water” strawberry growing. The initial watering after planting is crucial to help the roots establish. After that, monitor the soil moisture regularly and water only when the top inch or two feels dry to the touch.
What type of soil is best for this water-free strawberry growing method?
The most crucial factor is excellent drainage. A heavy, clay-based soil will retain too much water and lead to root rot, defeating the purpose of the water-free approach. A well-draining soil mix amended with plenty of organic matter is ideal. We recommend a mix of equal parts garden soil (if it’s not too heavy), compost, and perlite or coarse sand. The compost provides essential nutrients and improves water retention, while the perlite or sand ensures proper drainage. You can also use a commercially available potting mix specifically formulated for containers, as these typically have good drainage properties. Avoid using garden soil straight from the ground unless you amend it significantly with organic matter and drainage-improving materials.
How often should I water my strawberries using this method?
The watering frequency will depend on several factors, including the climate, the type of soil you’re using, the size of the container, and the stage of growth of the plants. As a general rule, check the soil moisture every few days. Stick your finger about an inch or two into the soil. If it feels dry to the touch, it’s time to water. If it feels moist, wait a day or two and check again. During hot, dry weather, you may need to water more frequently, perhaps every other day. During cooler, wetter weather, you may only need to water once a week or even less. The key is to observe your plants and adjust your watering schedule accordingly. Wilting leaves are a sign of underwatering, while yellowing leaves can indicate overwatering.
What are the signs of overwatering or underwatering strawberries?
Overwatering and underwatering can both manifest in similar symptoms, so it’s important to carefully observe your plants and the soil moisture to determine the cause. Signs of overwatering include yellowing leaves (especially lower leaves), wilting leaves (despite the soil being wet), soft, mushy roots, and the presence of fungal diseases like gray mold. Signs of underwatering include wilting leaves, dry, brittle leaves, stunted growth, and dry, cracked soil. If you suspect overwatering, stop watering immediately and allow the soil to dry out completely before watering again. You may also need to improve drainage by adding more perlite or sand to the soil. If you suspect underwatering, water thoroughly until the water drains out of the bottom of the container.
Can I use this method for growing strawberries in hanging baskets?
Yes, this method is particularly well-suited for growing strawberries in hanging baskets. Hanging baskets tend to dry out more quickly than containers on the ground, so the water-wise approach is even more beneficial. Be sure to use a well-draining potting mix and check the soil moisture frequently. You may need to water more often than you would for strawberries grown in containers on the ground, especially during hot, windy weather. Choose a hanging basket with good drainage holes to prevent waterlogging.
What kind of fertilizer should I use for water-free strawberry growing?
Strawberries are heavy feeders, so regular fertilization is important for optimal growth and fruit production. Use a balanced fertilizer specifically formulated for strawberries or fruits and vegetables. A fertilizer with an NPK ratio of 10-10-10 or 12-12-12 is a good choice. You can use either a granular fertilizer or a liquid fertilizer. Granular fertilizers are slow-release and provide a steady supply of nutrients over time. Liquid fertilizers are fast-acting and can be applied more frequently. Follow the instructions on the fertilizer package for application rates and frequency. Avoid over-fertilizing, as this can lead to nutrient burn and damage the plants.
How do I protect my strawberries from pests and diseases using this method?
The water-free growing method itself helps to reduce the risk of fungal diseases by minimizing moisture around the plants. However, you still need to be vigilant about pests and diseases. Regularly inspect your plants for signs of infestation or disease. Common strawberry pests include aphids, spider mites, and slugs. Common strawberry diseases include gray mold, powdery mildew, and leaf spot. Use organic pest control methods whenever possible, such as insecticidal soap, neem oil, or diatomaceous earth. Remove any diseased leaves or fruit promptly to prevent the spread of infection. Good air circulation is also important for preventing fungal diseases, so avoid overcrowding the plants.
Can I use this method for growing strawberries indoors?
Yes, you can grow strawberries indoors using this water-free method, but you’ll need to provide adequate light. Strawberries require at least 6-8 hours of direct sunlight per day to produce fruit. If you don’t have a sunny window, you’ll need to supplement with artificial grow lights. Use a full-spectrum LED grow light and position it close to the plants. You’ll also need to ensure good air circulation to prevent fungal diseases. A small fan can help with this. Be sure to pollinate the flowers manually, as there won’t be any bees or other pollinators indoors. You can use a small paintbrush to transfer pollen from one flower to another.
What if I live in a very hot climate? Will this method still work?
Yes, this method can still work in hot climates, but you’ll need to take extra precautions to prevent the plants from drying out. Provide shade during the hottest part of the day, especially in the afternoon. You can use shade cloth or move the plants to a shadier location. Water more frequently, but be careful not to overwater. Mulch around the plants to help retain moisture in the soil. Choose strawberry varieties that are heat-tolerant.
How long does it take to grow strawberries using this water-free method?
The time it takes to grow strawberries will depend on the variety you choose and the growing conditions.
Leave a Comment