
Winged Bean Growing Tips: Ever dreamt of cultivating a garden that’s not only beautiful but also incredibly useful? Imagine harvesting a single plant that offers protein-rich beans, edible leaves, nutritious tubers, and even fragrant flowers! That’s the magic of the winged bean, a fascinating legume with a rich history and a promising future in home gardens.
This remarkable plant, also known as the Goa bean or asparagus pea, has been a staple in Southeast Asian and Papua New Guinean cuisines for centuries. Its versatility has made it a vital food source, and now, you can bring this ancient wisdom to your own backyard. But let’s be honest, sometimes growing something a little “different” can feel daunting. That’s where these DIY tricks and hacks come in!
I’m here to share my tried-and-true methods for successful winged bean growing tips, ensuring you can enjoy a bountiful harvest. Whether you’re a seasoned gardener or just starting out, these simple yet effective strategies will help you overcome common challenges and unlock the full potential of this incredible plant. From choosing the right location to providing proper support, we’ll cover everything you need to know. So, grab your gardening gloves, and let’s embark on this exciting journey together! You’ll be amazed at how easy and rewarding it is to grow your own winged beans.
Growing Winged Beans: A Comprehensive DIY Guide
Hey there, fellow gardening enthusiasts! I’m so excited to share my experiences and tips on growing winged beans. These fascinating legumes, also known as Goa beans or asparagus peas, are not only delicious but also incredibly versatile. Every part of the plant – the pods, leaves, flowers, seeds, and even the tubers – is edible! Plus, they’re nitrogen-fixing, meaning they’re great for your soil. Let’s dive into how you can successfully cultivate these amazing plants in your own backyard.
Choosing the Right Variety and Location
Before we get our hands dirty, let’s talk about selecting the right winged bean variety and finding the perfect spot for them to thrive.
* Variety Selection: Winged bean varieties differ in pod length, color, and maturity time. Some popular choices include ‘Chimbu,’ ‘UPS 122,’ and ‘Beatrice.’ Do some research to find a variety that suits your local climate and your culinary preferences. I personally love ‘Chimbu’ for its early maturity and tender pods.
* Sunlight: Winged beans need at least 6-8 hours of direct sunlight each day. A sunny spot in your garden is crucial for optimal growth and pod production.
* Soil: Well-draining soil is essential. Winged beans don’t like soggy feet! Amend your soil with compost or other organic matter to improve drainage and fertility. A slightly acidic to neutral pH (6.0-7.0) is ideal.
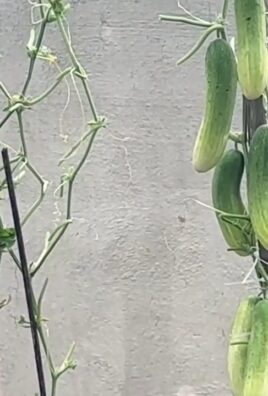
* Support System: These are climbing plants, so they need a sturdy trellis, fence, or other support structure to climb on. I’ve used everything from bamboo poles to repurposed metal fencing with great success.
Step-by-Step Planting Guide
Now for the fun part – planting! Here’s a detailed guide to get your winged beans off to a great start.
1. Seed Preparation (Optional but Recommended): Winged bean seeds have a hard seed coat, so scarifying them can improve germination rates. You can gently nick the seed coat with a knife or rub them lightly with sandpaper. Alternatively, soak the seeds in warm water for 24 hours before planting. This helps soften the seed coat and encourages sprouting. I usually opt for the soaking method; it’s less risky than accidentally damaging the seed.
2. Direct Sowing vs. Starting Indoors: You can either direct sow the seeds into the ground or start them indoors. Direct sowing is generally preferred in warmer climates, as winged beans don’t transplant particularly well. If you live in a cooler region with a shorter growing season, starting them indoors 4-6 weeks before the last expected frost is a good idea.
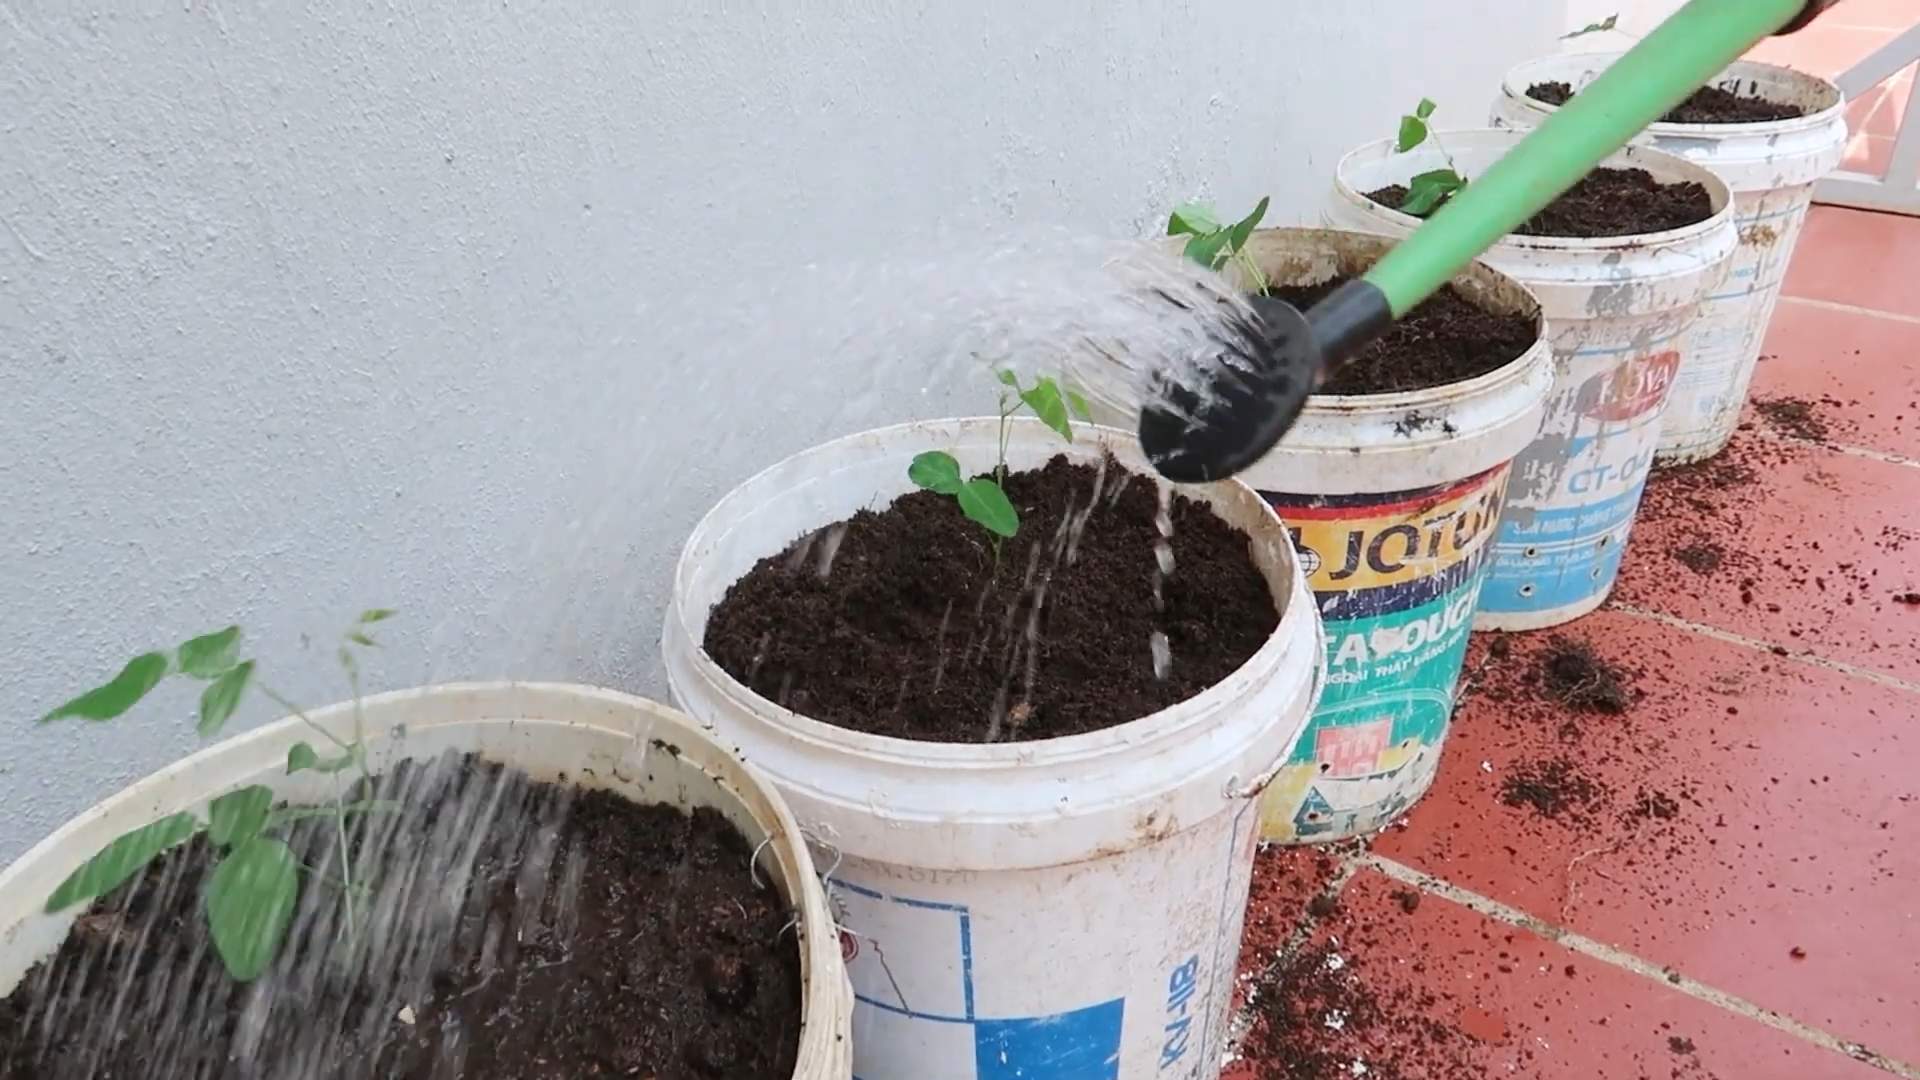
* Direct Sowing: Once the soil has warmed up to at least 65°F (18°C), sow the seeds about 1 inch deep and 2-3 inches apart. Space rows about 3-4 feet apart. Gently water the soil after planting.
* Starting Indoors: Sow the seeds in individual pots filled with seed-starting mix. Keep the soil moist but not waterlogged. Once the seedlings have developed a few true leaves, you can harden them off (gradually expose them to outdoor conditions) for a week before transplanting them into the garden.
3. Transplanting (If Starting Indoors): Carefully transplant the seedlings into the garden, spacing them about 12-18 inches apart. Be gentle with the roots, as they are delicate. Water thoroughly after transplanting.
4. Providing Support: As soon as the seedlings start to vine, provide them with a trellis or other support structure to climb on. Make sure the support is sturdy enough to handle the weight of the mature plants and pods. I’ve found that a trellis made of cattle panels works exceptionally well.
Watering and Fertilizing
Proper watering and fertilization are crucial for healthy growth and abundant pod production.
1. Watering: Winged beans need consistent moisture, especially during flowering and pod development. Water deeply and regularly, especially during dry spells. Avoid overhead watering, as this can increase the risk of fungal diseases. Soaker hoses or drip irrigation are excellent options. I usually water deeply every 2-3 days, depending on the weather.
2. Fertilizing: Winged beans are nitrogen-fixing, so they don’t need a lot of nitrogen fertilizer. However, they do benefit from phosphorus and potassium. Amend the soil with compost or use a balanced fertilizer (e.g., 5-10-10) at planting time. You can also side-dress the plants with compost or a liquid seaweed fertilizer every few weeks during the growing season. I personally prefer using compost tea; it’s a gentle and effective way to nourish the plants.
Pest and Disease Management
While winged beans are relatively pest-resistant, they can occasionally be affected by certain pests and diseases.
1. Common Pests: Aphids, bean beetles, and spider mites can sometimes attack winged beans. Inspect your plants regularly and take action if you notice any signs of infestation.
* Aphids: A strong spray of water can often dislodge aphids. You can also use insecticidal soap or neem oil.
* Bean Beetles: Handpick the beetles and their larvae. You can also use row covers to protect the plants.
* Spider Mites: Increase humidity around the plants by misting them with water. You can also use insecticidal soap or neem oil.
2. Common Diseases: Fungal diseases, such as powdery mildew and leaf spot, can sometimes affect winged beans, especially in humid conditions.
* Powdery Mildew: Improve air circulation around the plants by pruning them. You can also use a fungicide.
* Leaf Spot: Remove and destroy infected leaves. Avoid overhead watering. You can also use a fungicide.
3. Prevention is Key: The best way to manage pests and diseases is to prevent them in the first place. Choose disease-resistant varieties, provide good air circulation, and avoid overwatering. Regularly inspect your plants and take action at the first sign of trouble. I always try to use organic methods whenever possible to protect beneficial insects and the environment.
Harvesting and Using Winged Beans
Now for the most rewarding part – harvesting and enjoying your homegrown winged beans!
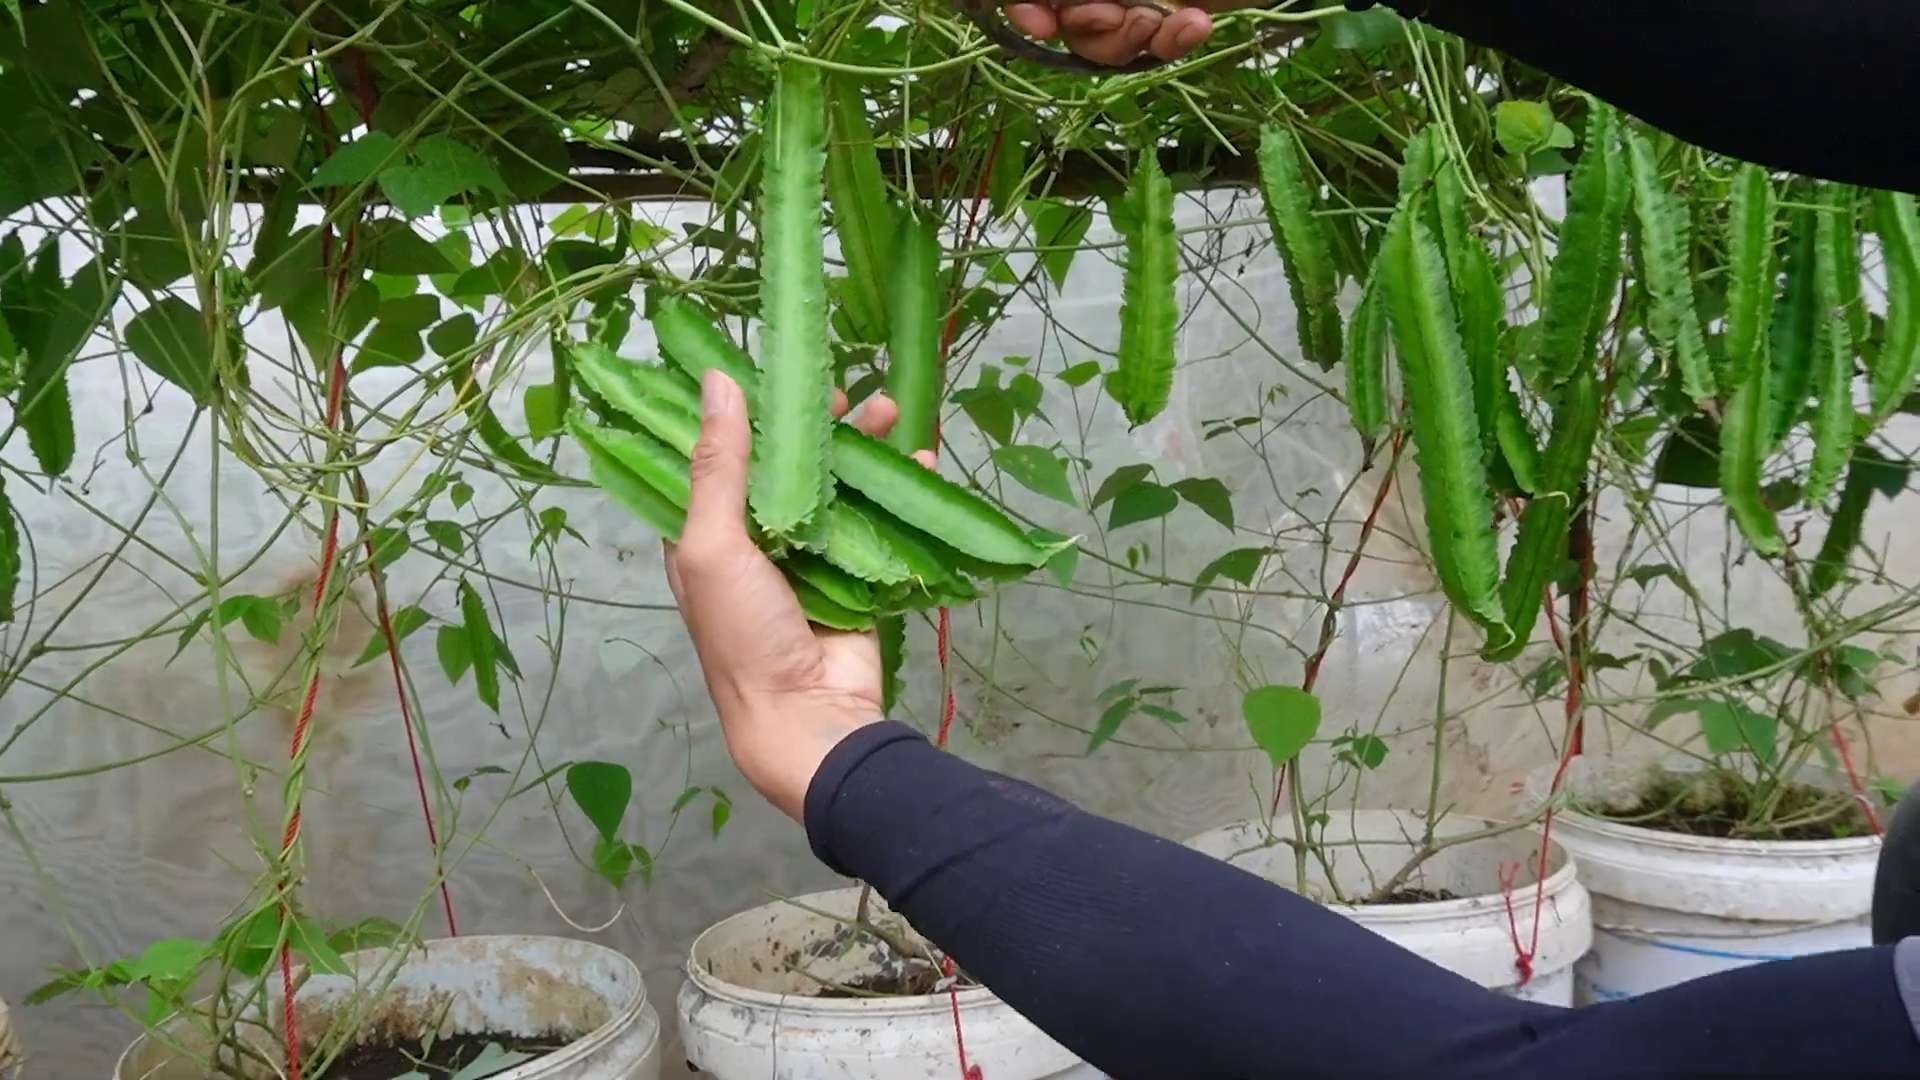
1. Harvesting Pods: The pods are typically harvested when they are young and tender, about 6-8 inches long. They should be bright green and snap easily. Harvest regularly to encourage continued pod production. I usually harvest every few days during peak season.
2. Harvesting Leaves: Young leaves can be harvested and used like spinach. They have a mild, slightly nutty flavor.
3. Harvesting Flowers: The flowers are also edible and can be used in salads or as a garnish.
4. Harvesting Seeds: Mature seeds can be harvested and used like dried beans. Allow the pods to dry on the vine before harvesting the seeds.
5. Harvesting Tubers: The tubers can be harvested after the plants have died back in the fall. They have a nutty flavor and can be cooked like potatoes.
6. Culinary Uses: Winged beans are incredibly versatile in the kitchen. The pods can be steamed, stir-fried, or added to soups and stews. The leaves can be used in salads or cooked like spinach. The flowers can be used as a garnish or added to salads. The seeds can be used like dried beans. The tubers can be cooked like potatoes. I love stir-frying the pods with garlic and ginger – it’s a simple and delicious dish!
Saving Seeds for Next Year
If you want to grow winged beans again next year, you can save the seeds from your best plants.
1. Select Healthy Plants: Choose plants that are healthy, vigorous, and produce abundant pods.
2. Allow Pods to Dry: Allow the pods to dry completely on the vine. They should turn brown and brittle.
3. Harvest the Seeds: Remove the seeds from the dried pods.
4. Dry the Seeds: Spread the seeds out on a tray and allow them to dry completely for a few days.
5. Store the Seeds: Store the dried seeds in an airtight container in a cool, dark, and dry place. They should remain viable for several years. I usually store my seeds in a glass jar in the refrigerator.
Troubleshooting
Even with the best care, you might encounter some challenges when growing winged beans. Here are some common problems and how to address them:
* Poor Germination: If your seeds aren’t germinating, make sure the soil is warm enough and that you’ve scarified or soaked the seeds.
* Slow Growth: If your plants are growing slowly, make sure they’re getting enough sunlight, water, and nutrients.
* Lack of Pod Production: If your plants aren’t producing pods, make sure they’re getting enough sunlight and water. You may also need to fertilize them with a phosphorus-rich fertilizer.
* Yellowing Leaves: Yellow
Conclusion
So, there you have it! Mastering the art of growing winged beans doesn’t require a green thumb blessed by the gardening gods. It’s about understanding their needs, providing the right support, and being patient. This DIY approach, focusing on creating a thriving environment from the get-go, is a game-changer. Why? Because it bypasses common pitfalls that often lead to stunted growth or disappointing yields.
Think about it: store-bought supports can be expensive and often aren’t tailored to the specific needs of your winged bean plants. By crafting your own trellis system, you can customize the height, width, and overall design to perfectly accommodate their vigorous climbing habit. This not only saves you money but also ensures that your plants receive optimal sunlight and airflow, crucial for healthy development and abundant pod production.
Beyond the basic trellis, consider experimenting with different materials. Bamboo poles offer a natural and aesthetically pleasing option, while repurposed metal fencing can provide a sturdy and long-lasting structure. You could even get creative and build a living trellis using fast-growing shrubs or trees, creating a beautiful and functional garden feature.
Another variation to explore is companion planting. Winged beans thrive alongside certain plants that can deter pests or improve soil quality. Marigolds, for example, are known for their pest-repelling properties, while legumes like clover can fix nitrogen in the soil, benefiting your winged beans.
This DIY winged bean growing approach is a must-try because it empowers you to take control of your garden and cultivate a bountiful harvest. It’s about more than just growing beans; it’s about connecting with nature, learning new skills, and enjoying the satisfaction of creating something beautiful and productive with your own hands.
Don’t be afraid to experiment and adapt these tips to your specific growing conditions. Every garden is unique, and what works for one person may not work for another. The key is to observe your plants closely, listen to their needs, and adjust your approach accordingly.
We wholeheartedly encourage you to give these DIY winged bean growing tips a try. We’re confident that you’ll be amazed by the results. And most importantly, we want to hear about your experience! Share your photos, tips, and challenges in the comments below. Let’s create a community of winged bean enthusiasts and learn from each other. Happy gardening!
Frequently Asked Questions (FAQs)
What exactly are winged beans, and why should I grow them?
Winged beans (Psophocarpus tetragonolobus) are a fascinating and highly nutritious legume native to Southeast Asia. They are often called “four-angled beans” due to their distinctive, ridged pods. The entire plant is edible – the pods, leaves, flowers, seeds, and even the roots! They are packed with protein, vitamins, and minerals, making them a valuable addition to any diet. Growing your own winged beans allows you to enjoy fresh, organic produce and experience the unique flavors and textures of this versatile crop. Plus, they are beautiful climbing plants that can add visual interest to your garden.
How much sunlight do winged beans need?
Winged beans thrive in full sun, requiring at least 6-8 hours of direct sunlight per day. Insufficient sunlight can lead to stunted growth, reduced flowering, and lower pod production. Choose a location in your garden that receives ample sunlight throughout the day. If you live in a particularly hot climate, some afternoon shade may be beneficial to prevent scorching of the leaves.
What type of soil is best for growing winged beans?
Winged beans prefer well-drained, fertile soil with a slightly acidic to neutral pH (around 6.0 to 7.0). Amend your soil with compost or other organic matter to improve drainage and fertility. Avoid heavy clay soils, as they can become waterlogged and inhibit root growth. If your soil is particularly poor, consider growing your winged beans in raised beds or containers filled with a high-quality potting mix.
How often should I water my winged bean plants?
Winged beans need consistent moisture, especially during hot and dry periods. Water deeply and regularly, ensuring that the soil remains consistently moist but not waterlogged. Avoid overhead watering, as this can promote fungal diseases. A good rule of thumb is to water when the top inch of soil feels dry to the touch. Mulching around the base of the plants can help retain moisture and suppress weeds.
What kind of trellis or support system is best for winged beans?
As mentioned in the article, a DIY trellis system is highly recommended. Winged beans are vigorous climbers and require a sturdy support structure to grow properly. The ideal trellis should be at least 6-8 feet tall and provide ample space for the plants to climb. You can use a variety of materials to build your trellis, including bamboo poles, wooden stakes, metal fencing, or even repurposed materials. The key is to ensure that the trellis is strong enough to support the weight of the mature plants and their pods. Consider the overall aesthetic of your garden when choosing your trellis design.
When is the best time to plant winged beans?
Winged beans are a warm-season crop and should be planted after the last frost when the soil has warmed up to at least 65°F (18°C). In cooler climates, you can start seeds indoors 4-6 weeks before the last frost and transplant them outdoors once the weather is warm enough. In warmer climates, you can direct sow the seeds directly into the garden.
How long does it take for winged beans to mature and produce pods?
Winged beans typically take 120-150 days to mature and produce pods. The exact time will depend on the variety, growing conditions, and climate. Be patient, as they can take a while to get going. Once they start producing, you can harvest the pods when they are young and tender, typically 6-8 inches long.
Are there any common pests or diseases that affect winged beans?
Winged beans are generally resistant to pests and diseases, but they can be susceptible to certain problems, such as aphids, spider mites, and fungal diseases. Regularly inspect your plants for signs of infestation or disease and take appropriate action if necessary. Organic pest control methods, such as insecticidal soap or neem oil, can be effective for controlling aphids and spider mites. Ensure good air circulation around the plants to prevent fungal diseases.
Can I grow winged beans in containers?
Yes, you can grow winged beans in containers, but you will need to choose a large container (at least 15-20 gallons) and provide a sturdy trellis for the plants to climb. Use a high-quality potting mix and ensure that the container has good drainage. Water regularly and fertilize every few weeks with a balanced fertilizer.
How do I harvest and store winged beans?
Harvest winged bean pods when they are young and tender, typically 6-8 inches long. The pods should be firm and snap easily when bent. You can also harvest the leaves, flowers, and seeds for consumption. Store fresh winged bean pods in the refrigerator for up to a week. You can also freeze or dry the pods for longer storage. The dried seeds can be stored in an airtight container in a cool, dry place.
Leave a Comment